Welcome to “Advert / Stock 26/02/2023” by weekly update on the stock available, and the links to get you filtered on the types of models you are interested in.
Model Kits Ltd is a UK based small independent retailer.
I started the company with a single aim. To try and help get models / kits into the hands of UK builders so that they can enjoy their hobby.
I also have a stock of the GUNPRIMER Balancers and some of the other GUNPRIMER products, as well as a supply of reasonably priced basic bases.
If you are thinking about picking up something new, or just want to have a browse for some inspiration please consider us as an option.
I am continuing to increase the breadth of stock available in the shop as items become available; including, but not limited to, adding an MGEX Strike Freedom when the box arrives. I had 3 but 2 have already been accounted for.
Thank you everyone for your support so far, and I hope you have a great week building!
The links to individual sections / filtered list items are below.
Ok well, this should have been the next part of the Aile Strike build. However, procrastination, and the delivery of a second hand 3d printer both got in the way, making this a mixed bag! Then there was a few episodes of Knight’s and Magic on Crunchyroll.
So what have I been doing?
Thing I was doing Saturday
Well I did start to prep parts for the build. In fact here is the proof!
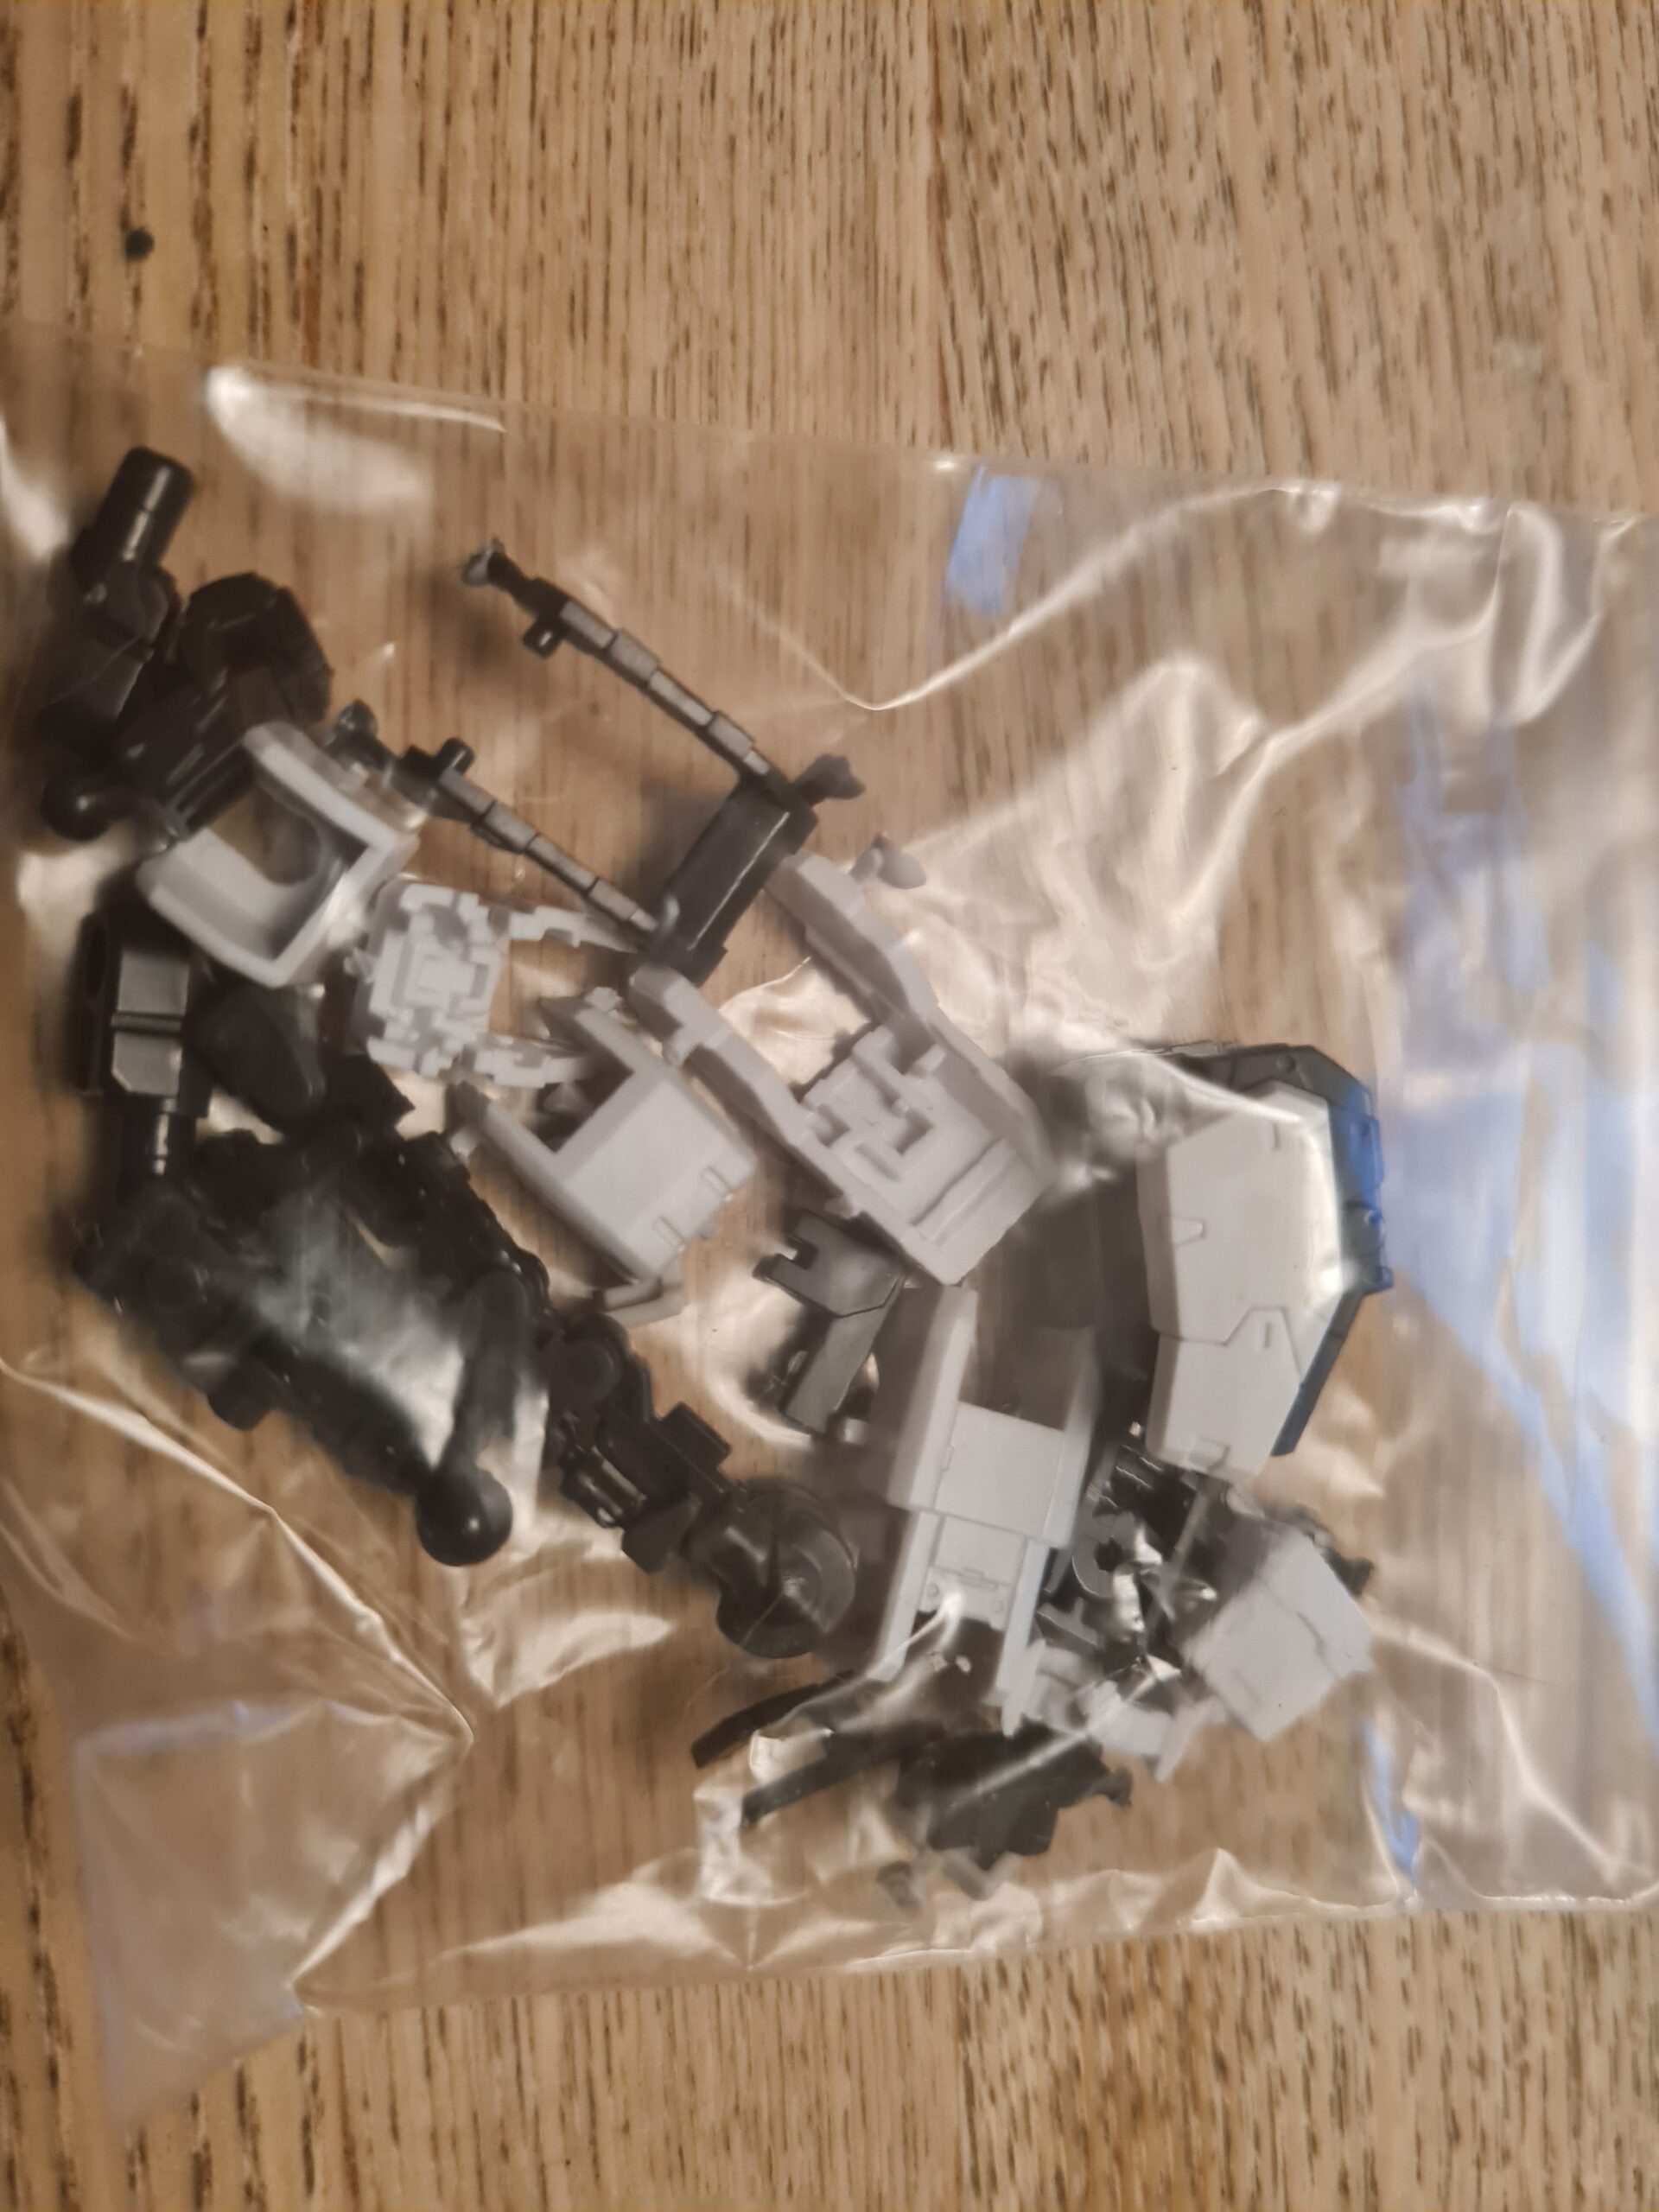
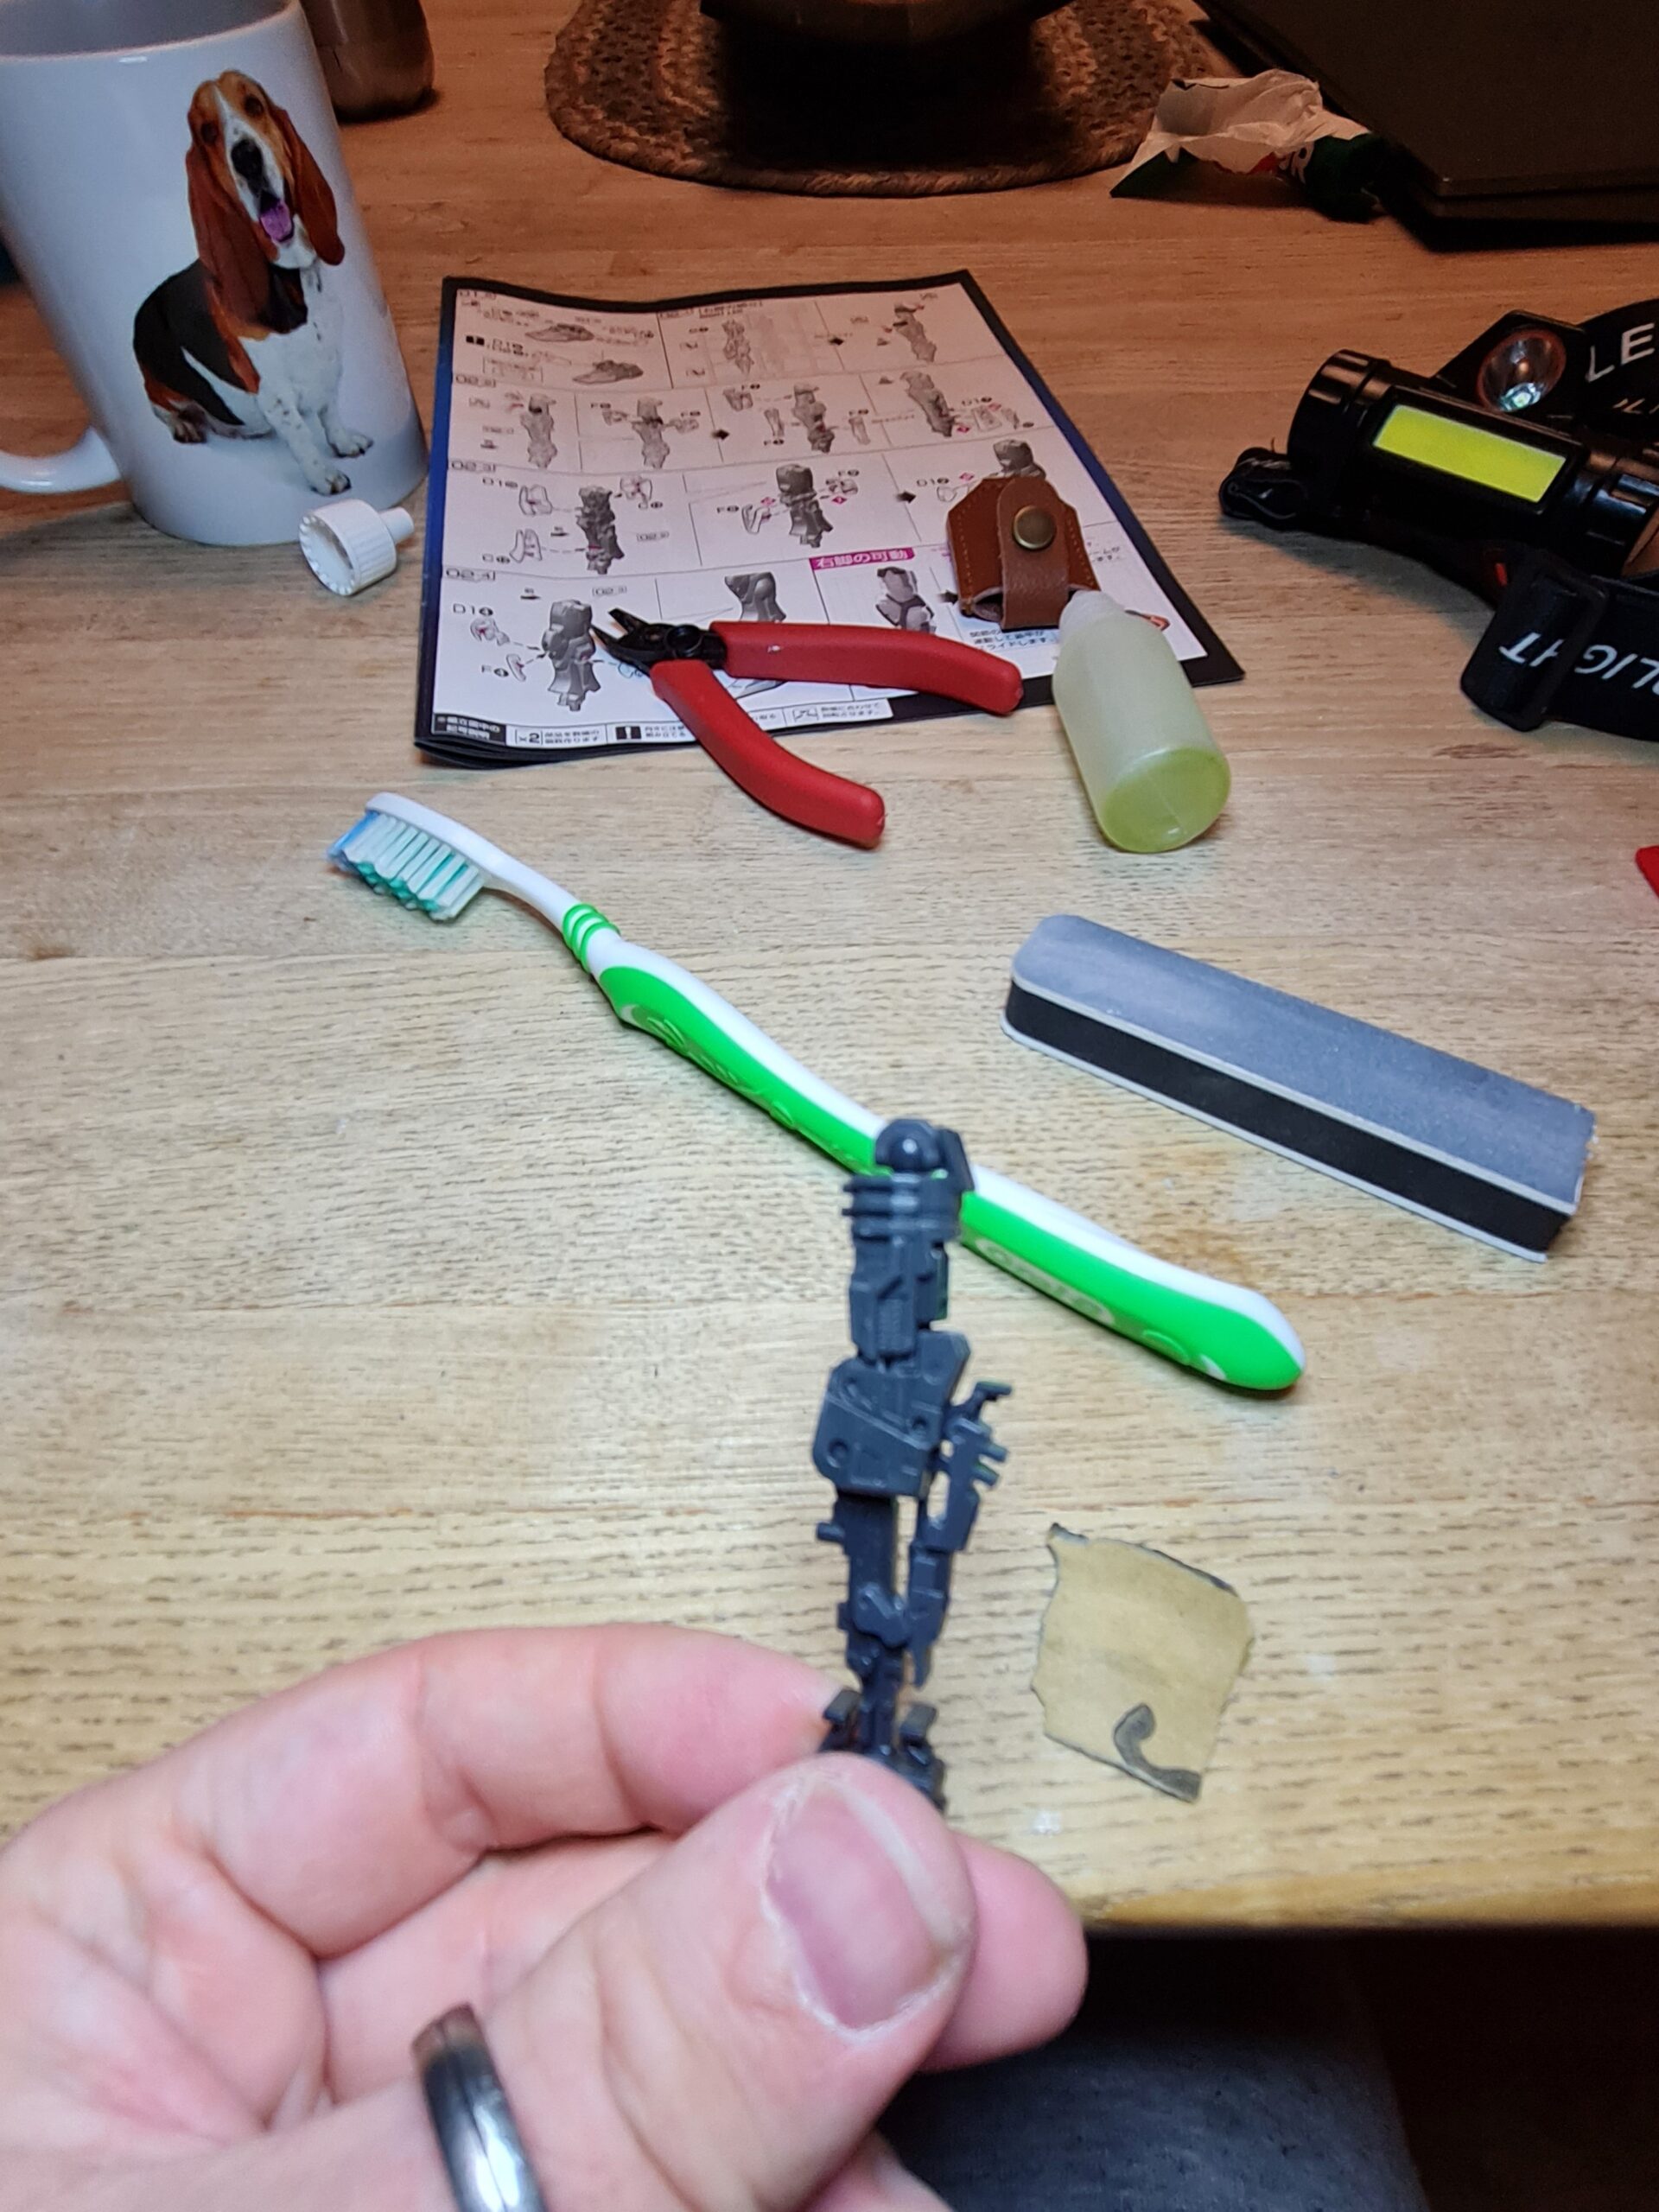
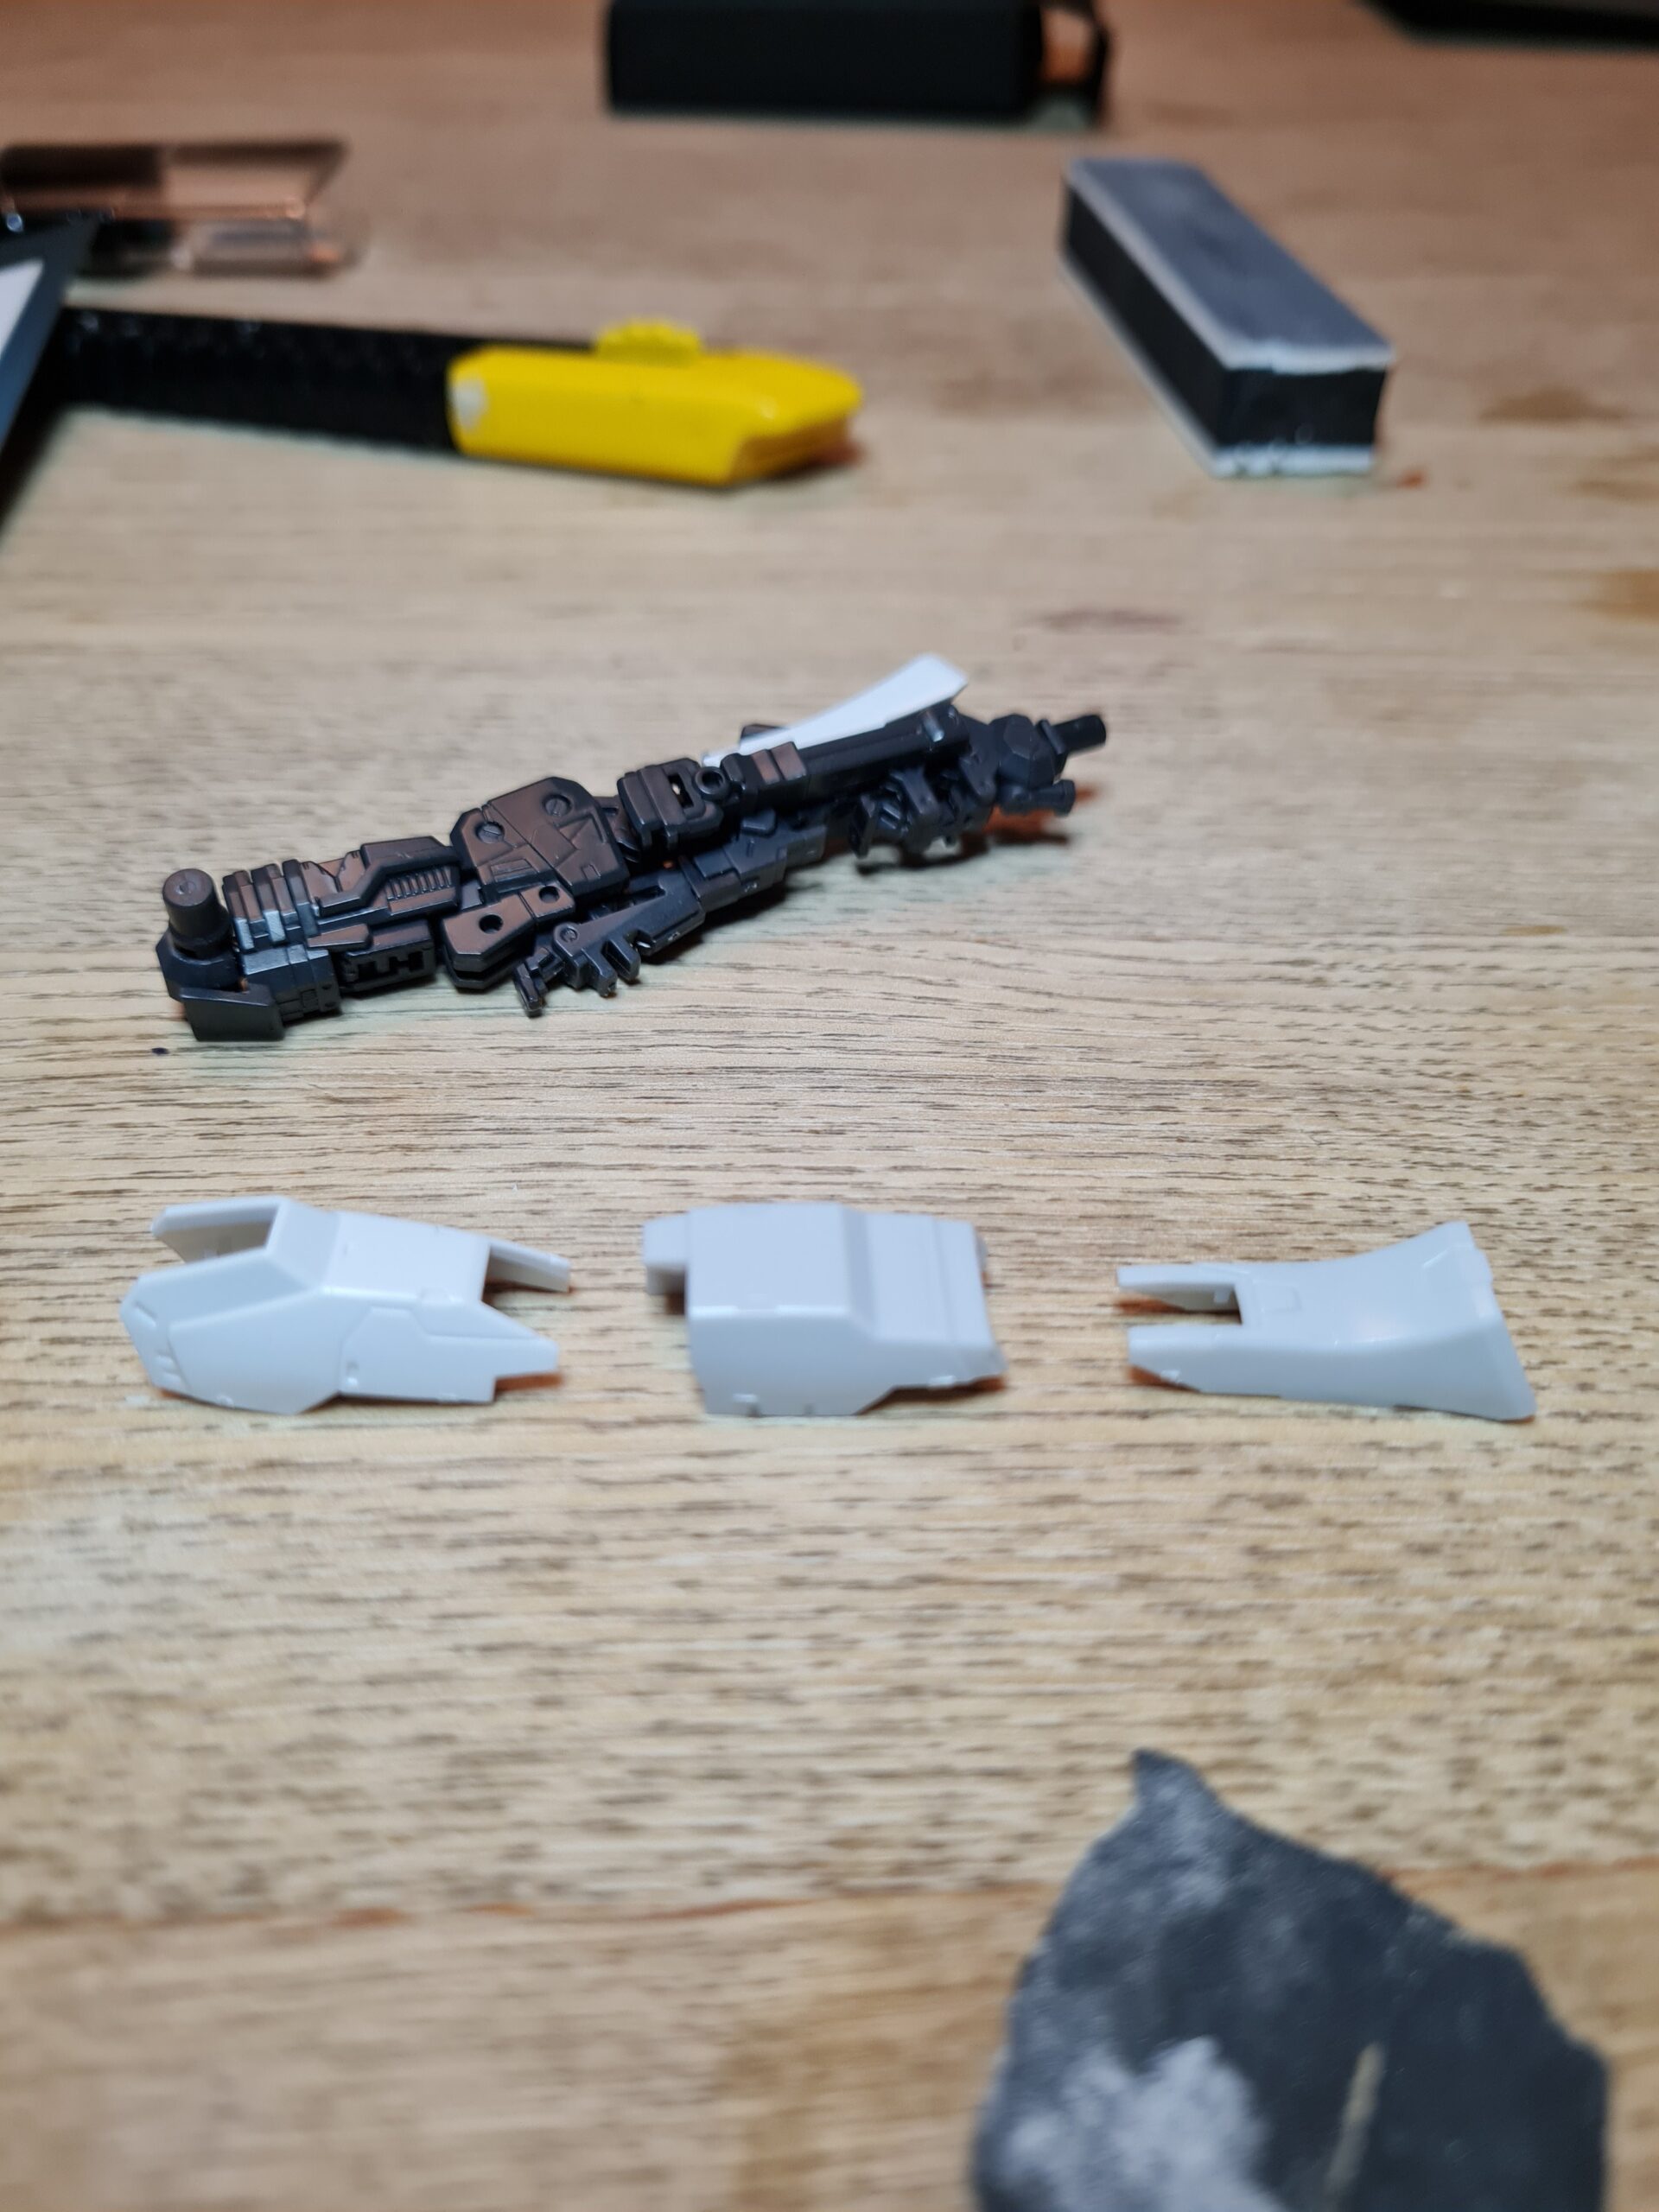
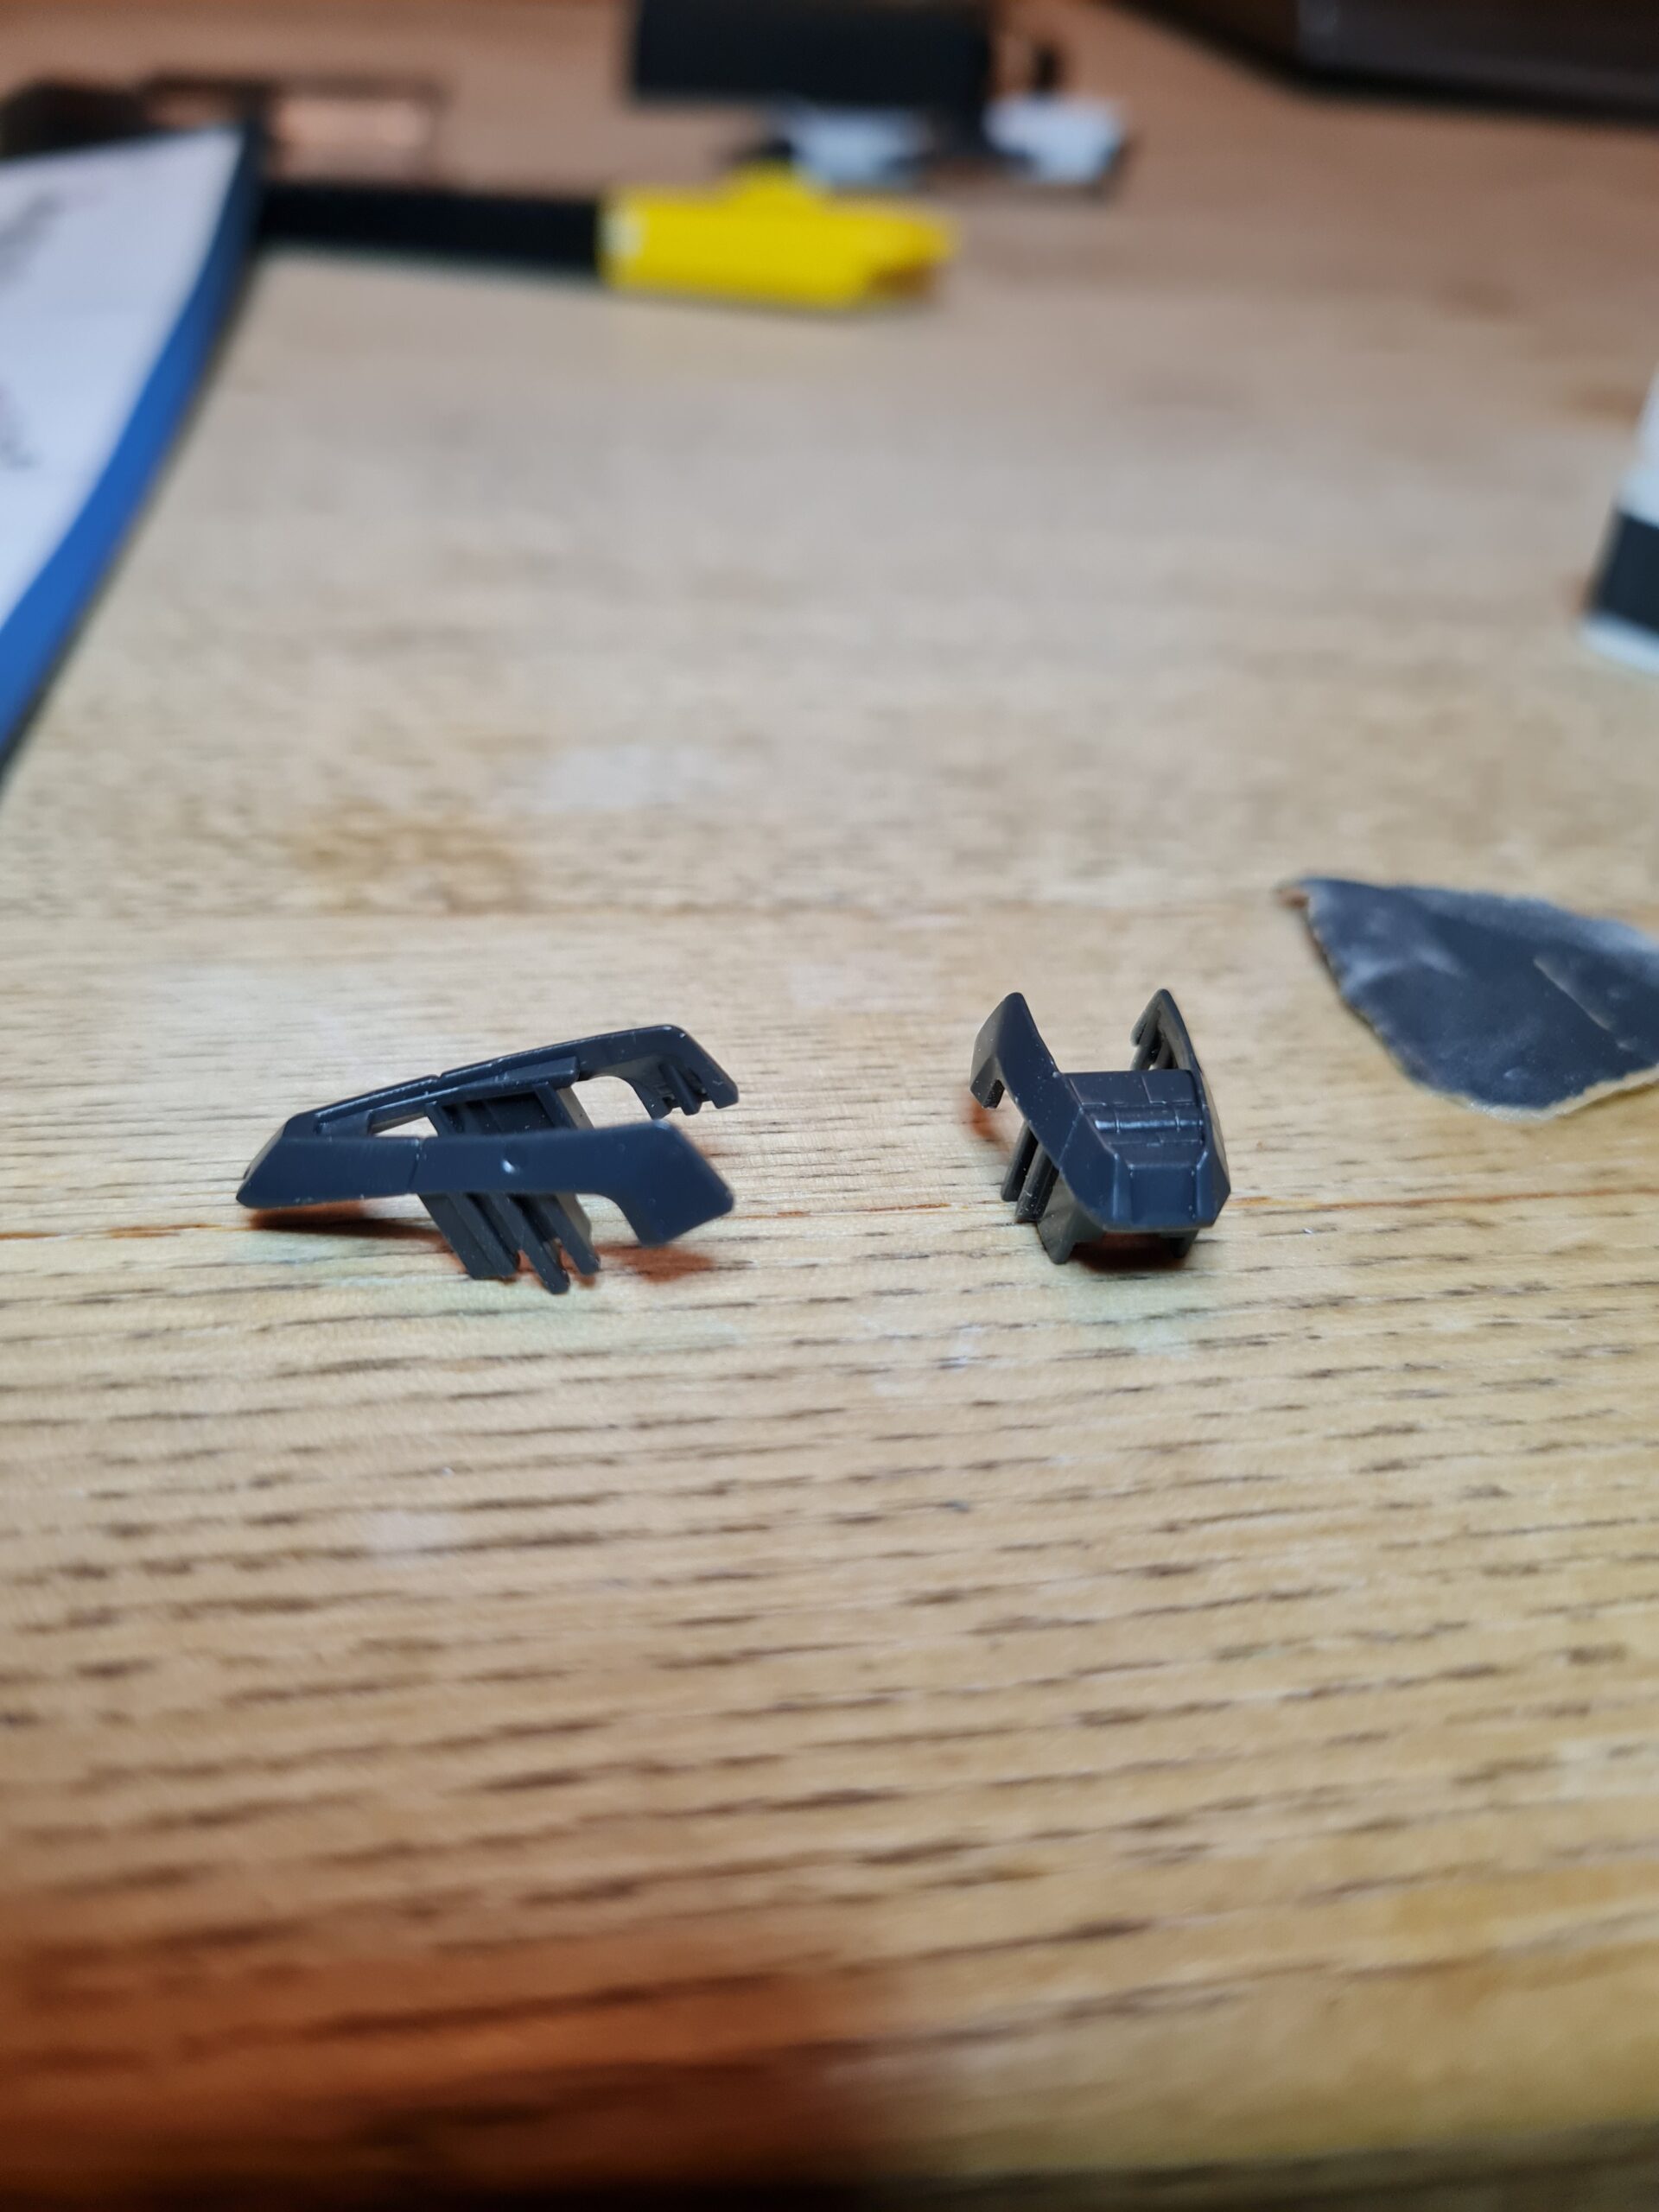
Bits Ready To Clean
This little bag contains all the bits I need to build the next arm. I need to do the second cut wit the nippers, the clean-up, the final polish and assembly. They got cut out with the intention of me working on them this evening. However I just sort of had a nap and then struggled to get started again. However, tomorrow is another day!
What else have I been doing?
As you may, or may not, be aware, I listed some reasonably priced basic 1/144 bases recently. You can find them here. They are only £2 each a real bargain! However, I have been working on creating some 3d models to print for adapters to add to them as additions so that you can benefit from different adapter types if you want them.
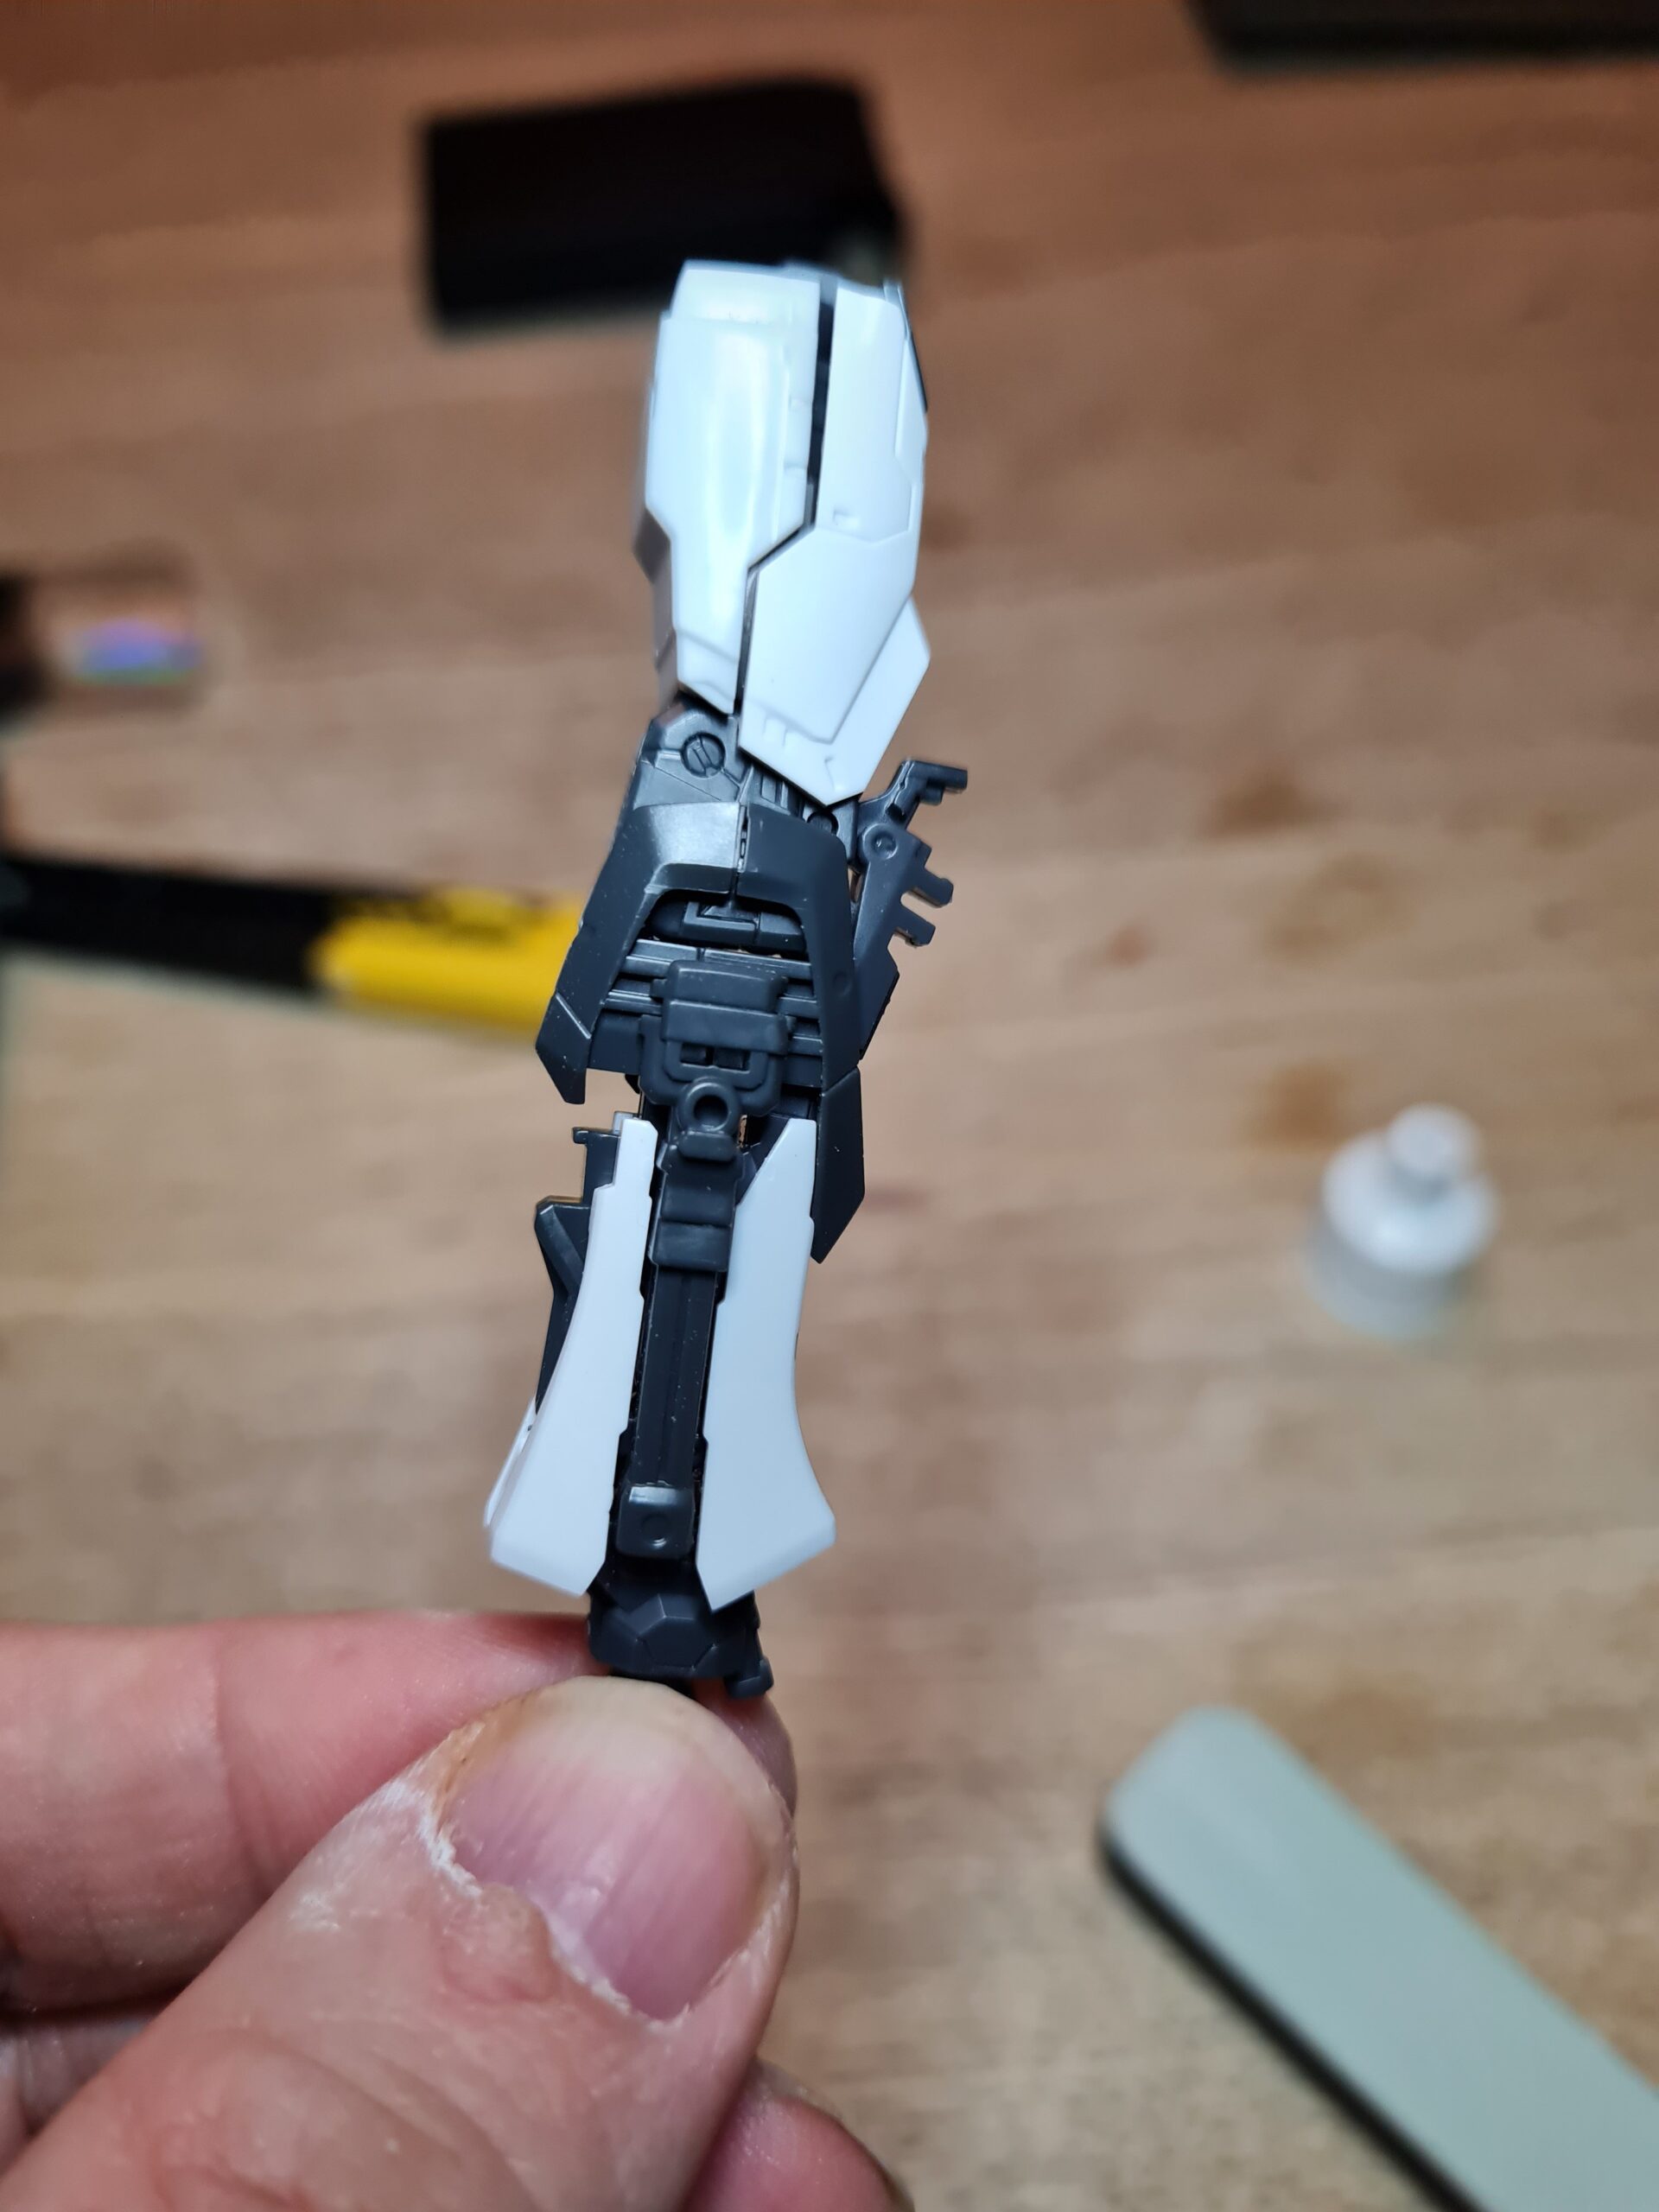
Here is my first experiment.
Without the distracting torsoModel on adapterModel on adapterAdapter
As you can see it is in the planning and test phase at the moment. This version fits the double strike really nicely. I am, however, having issues with print consistency. Tomorrow I should have a new delivery of filament which I am hoping may resolve that problem. Being new to the whole 3d printing world, this is a whole new thing.
Once I manage to get the printer printing consistently, next will be testing various different sizes, shapes etc. to find what work best. As soon as I am happy with them they will go up as an optional add on to the stands. Current thinking is that the adapter would be something like 50p.
Conclusion
Apart from watching my 3d printer not do what I want it do, I did get some parts rough cut out. Hopefully tomorrow will be a more productive modelling day!
Thank you for taking the time to read this. If you haven’t already done so please like and follow us on our social media platforms and checkout our website!
Welcome to “RG Aile Strike Build Day 8” where I am building up an RG Aile strike model. If you haven’t read any of the other parts I would recommend going back to the start. You can find that here. In the first post I covered the box, runners and provide the manual.
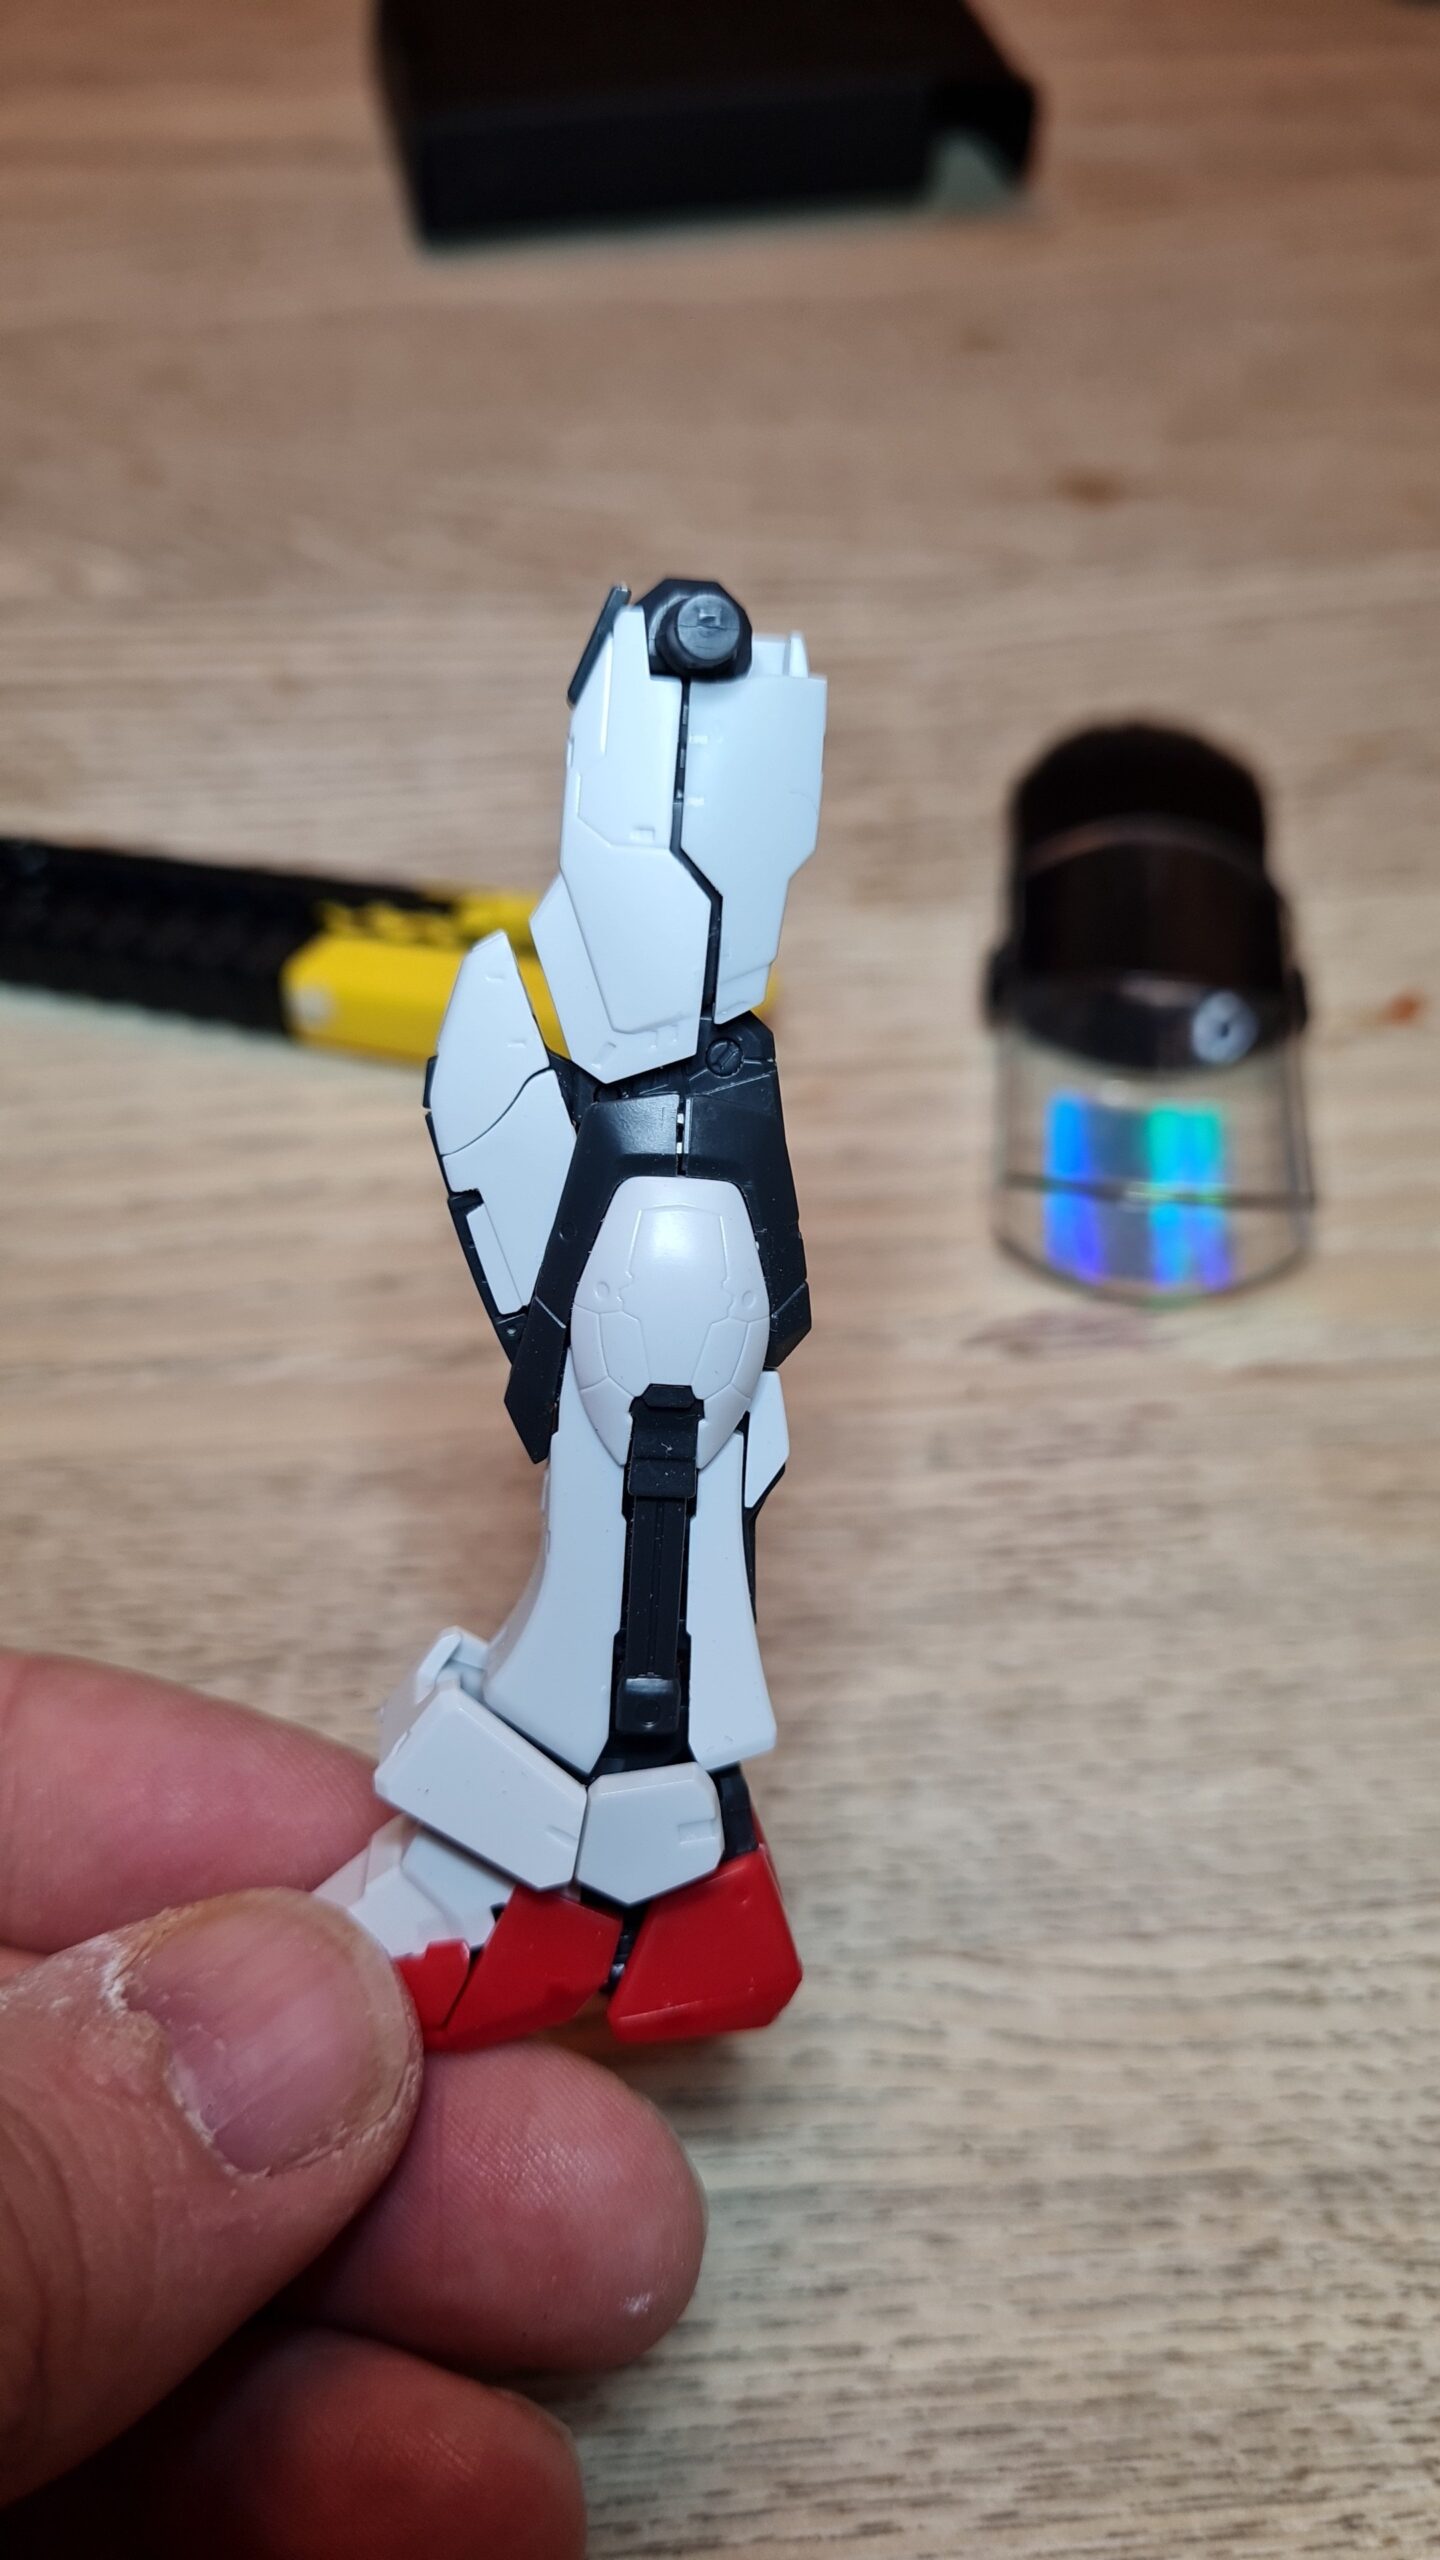
I am taking my time to ensure I clean up all the marks that can be cleaned up. As with any build like this, if you end up with discolouration or a small white “stress” mark you are likely to need painting to get rid of those. I may have a look at simple quick methods of dealing with those items, especially as I find that it has a habit of happening on the grey pieces. I also accept I may need to work on my cutting style as I’m sure that will contribute to it!
The Process
Unless otherwise noted I followed this process for each piece:
Cut off roughly leaving plenty of nub
Trim back the nub with my better nippers
Apply water to my wet and dry sandpaper and sand the nub marks down
Dry the piece
Brush it off with the tooth brush to remove any bits
Re-apply the matt finish using the Gray Balancer
Prep the part with the green side of the White Balancer
Shine the part up with the white side of the White Balancer
If after this I wasn’t happy I would repeat the sanding steps down, and keep iterating until I was happy with the finish.
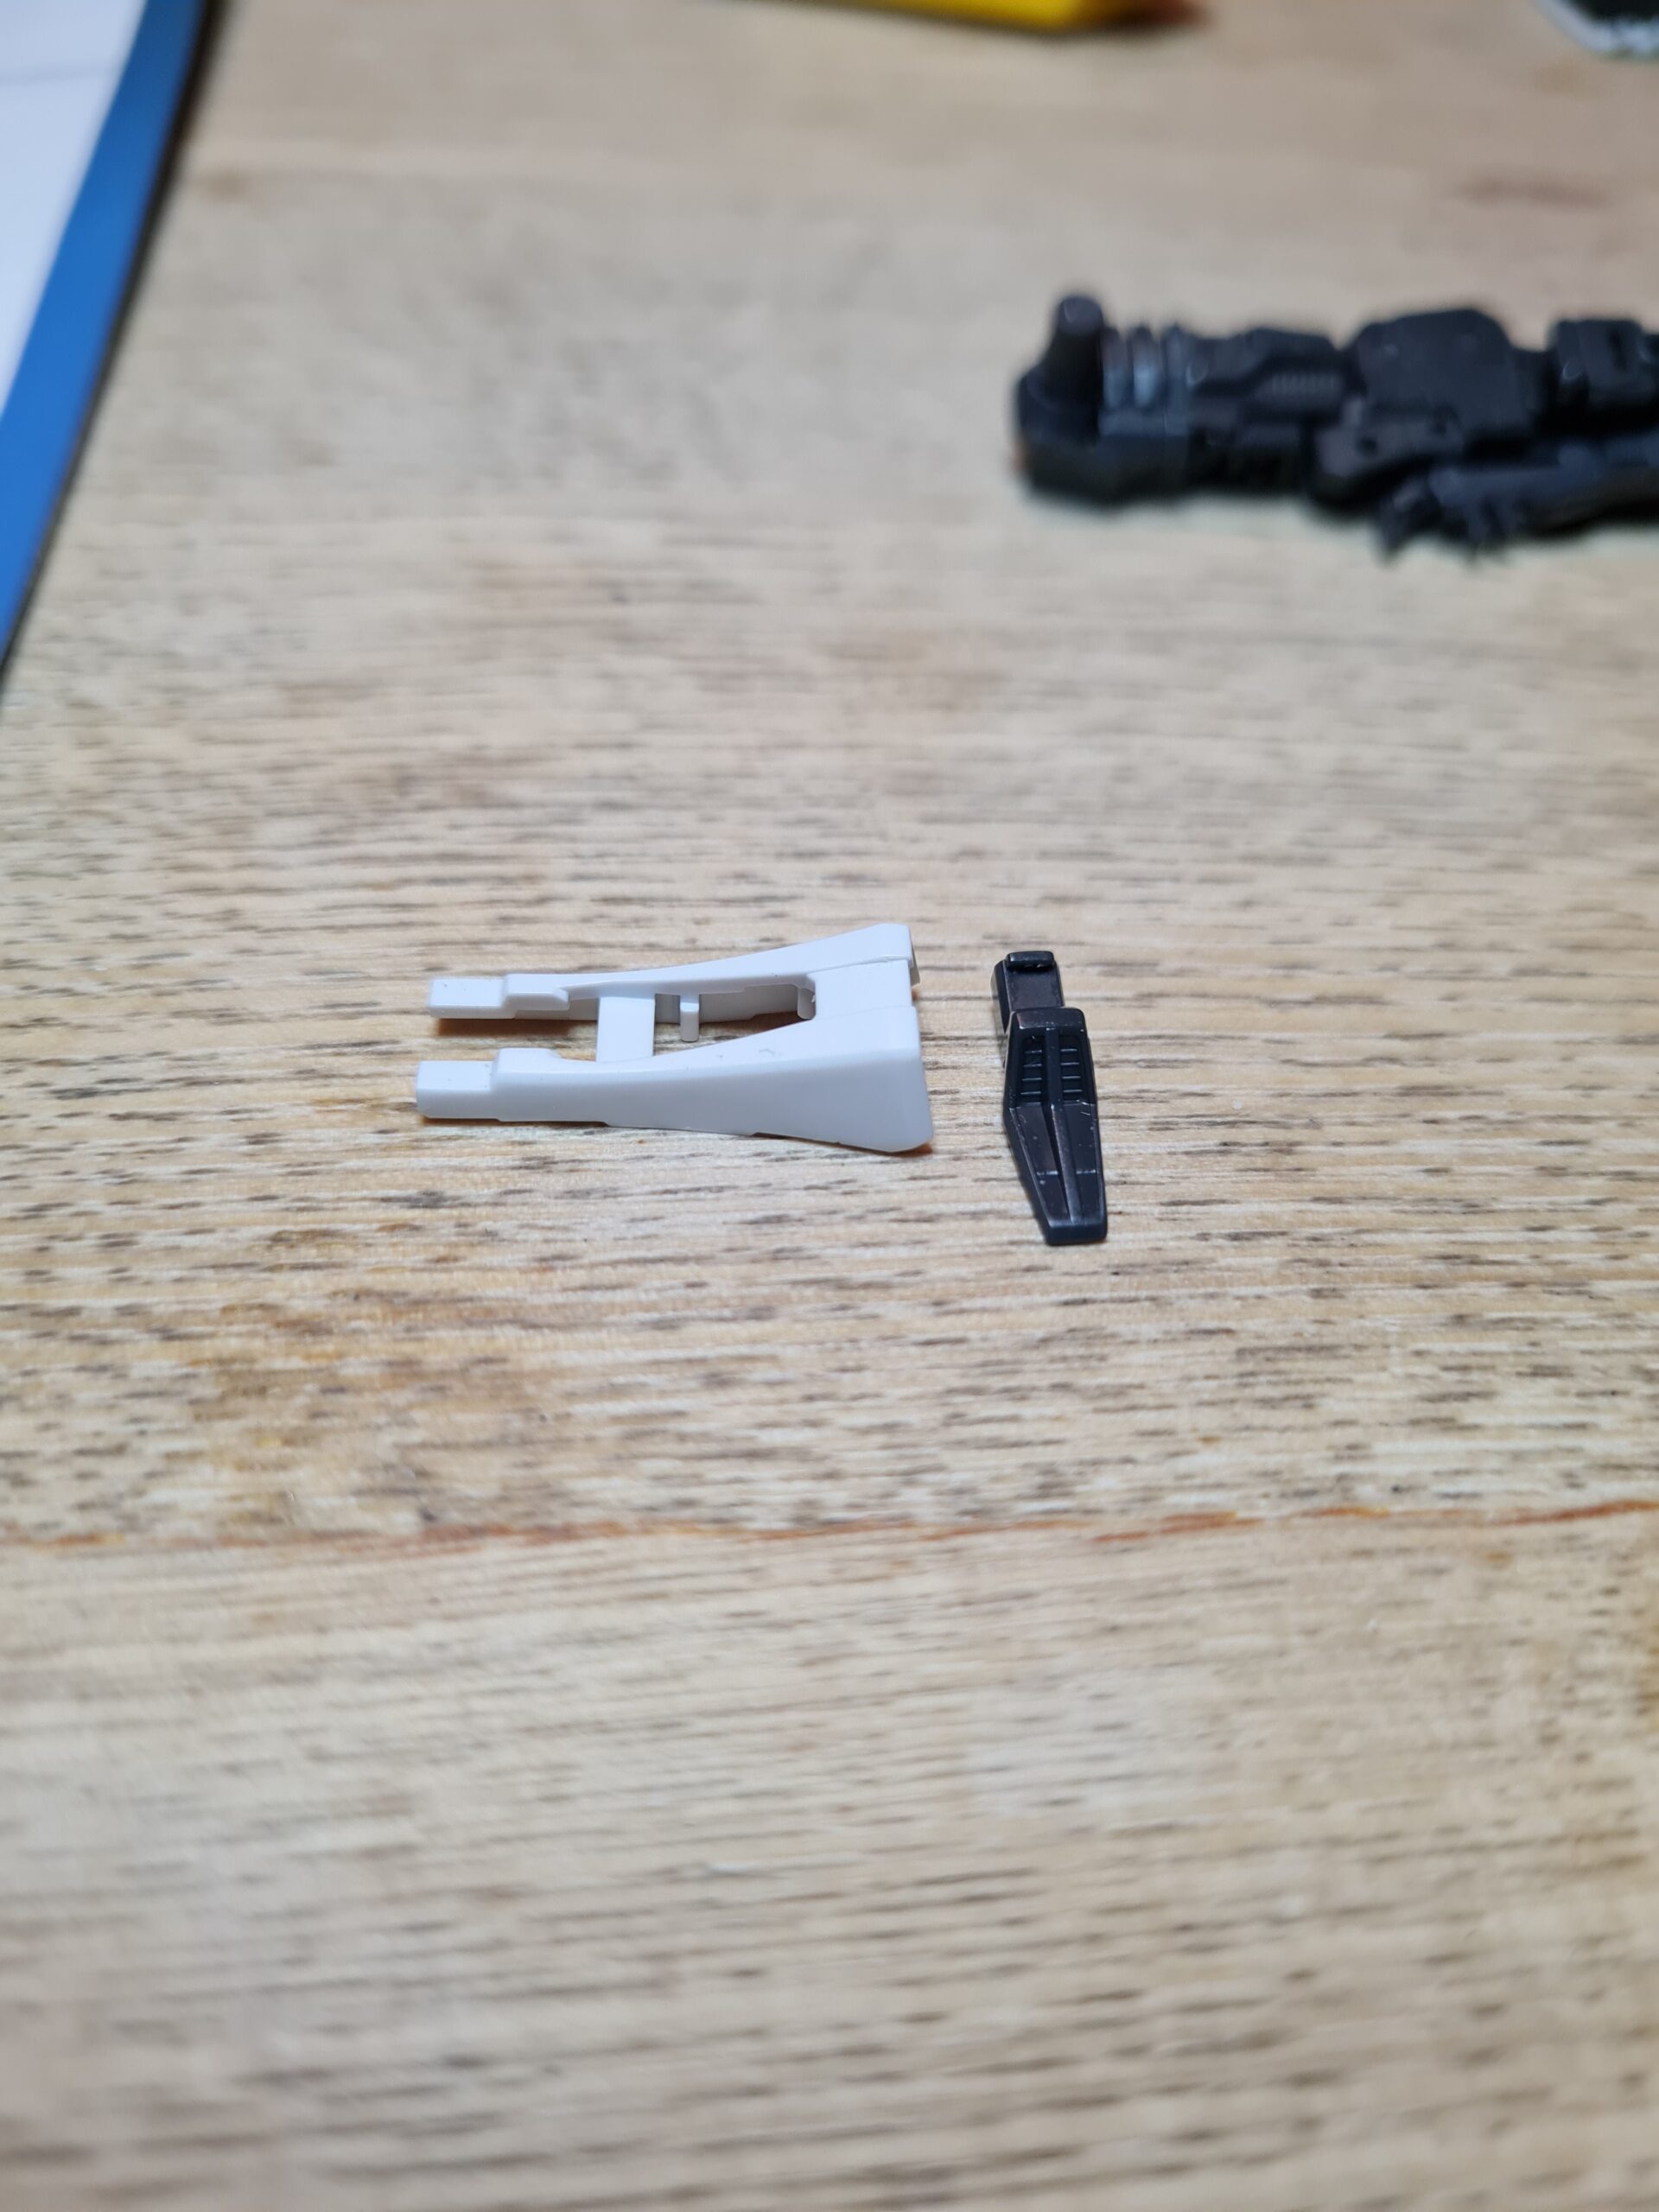
Todays Parts
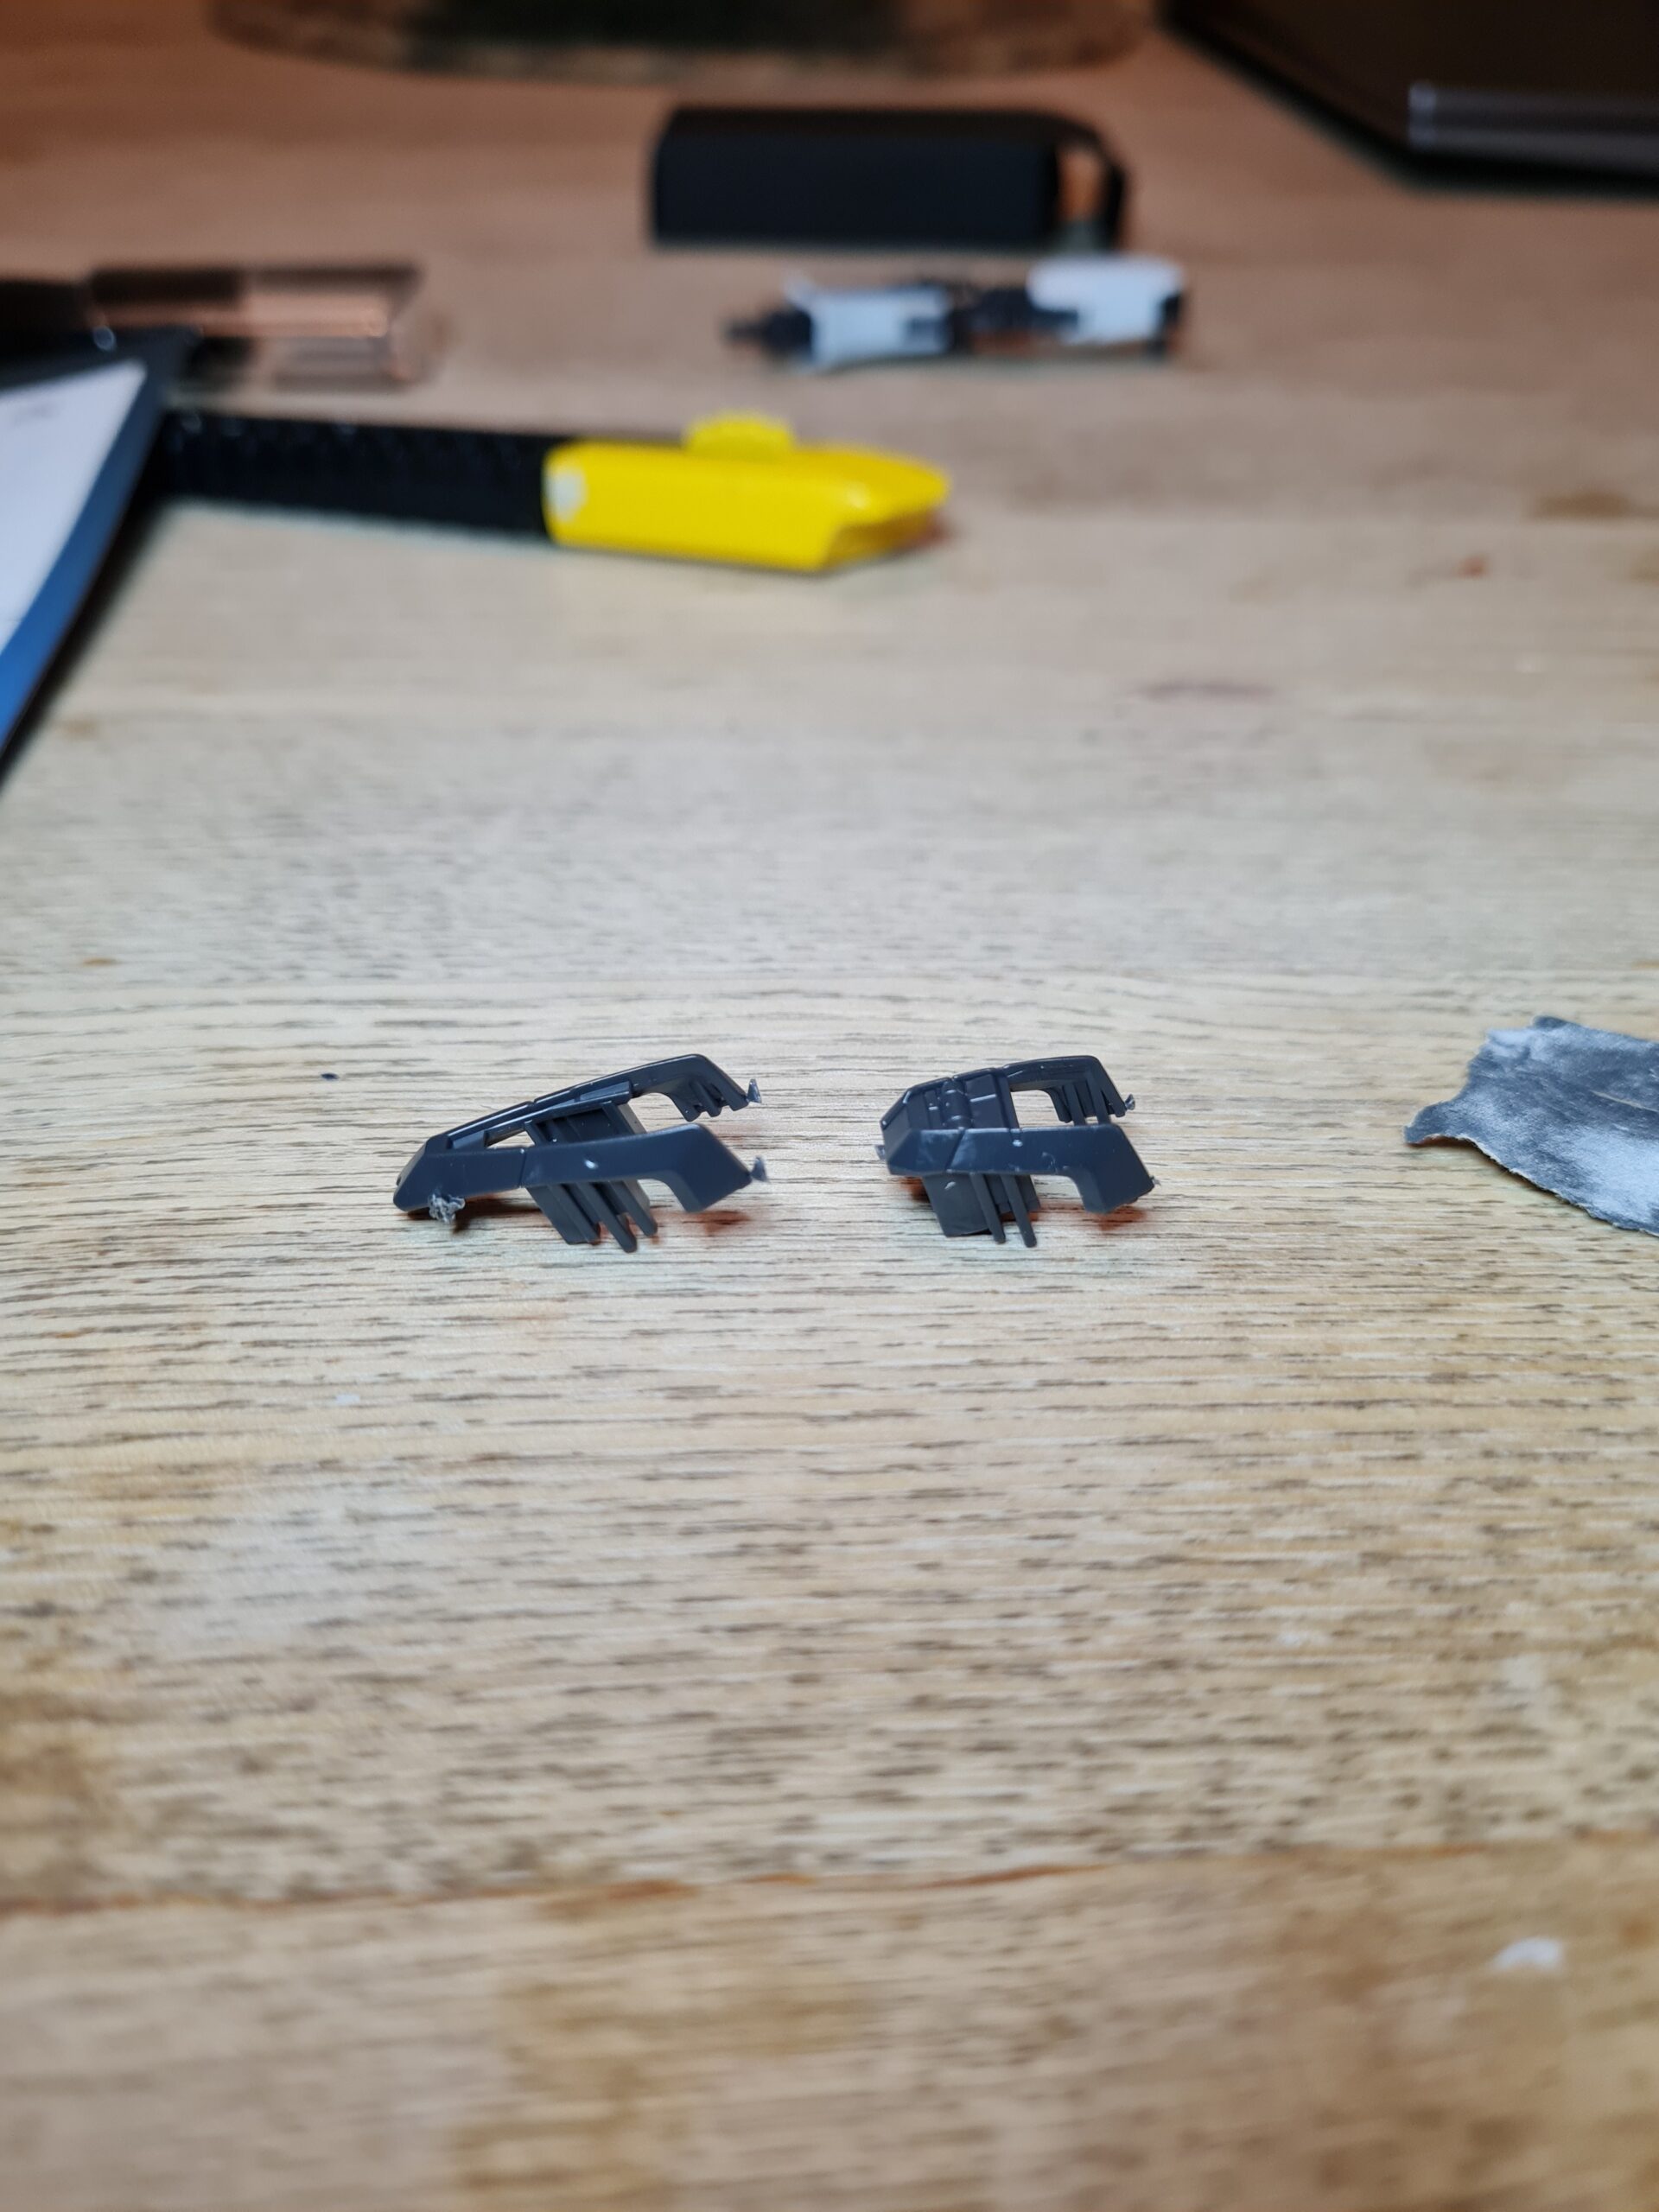
Nubbed Parts
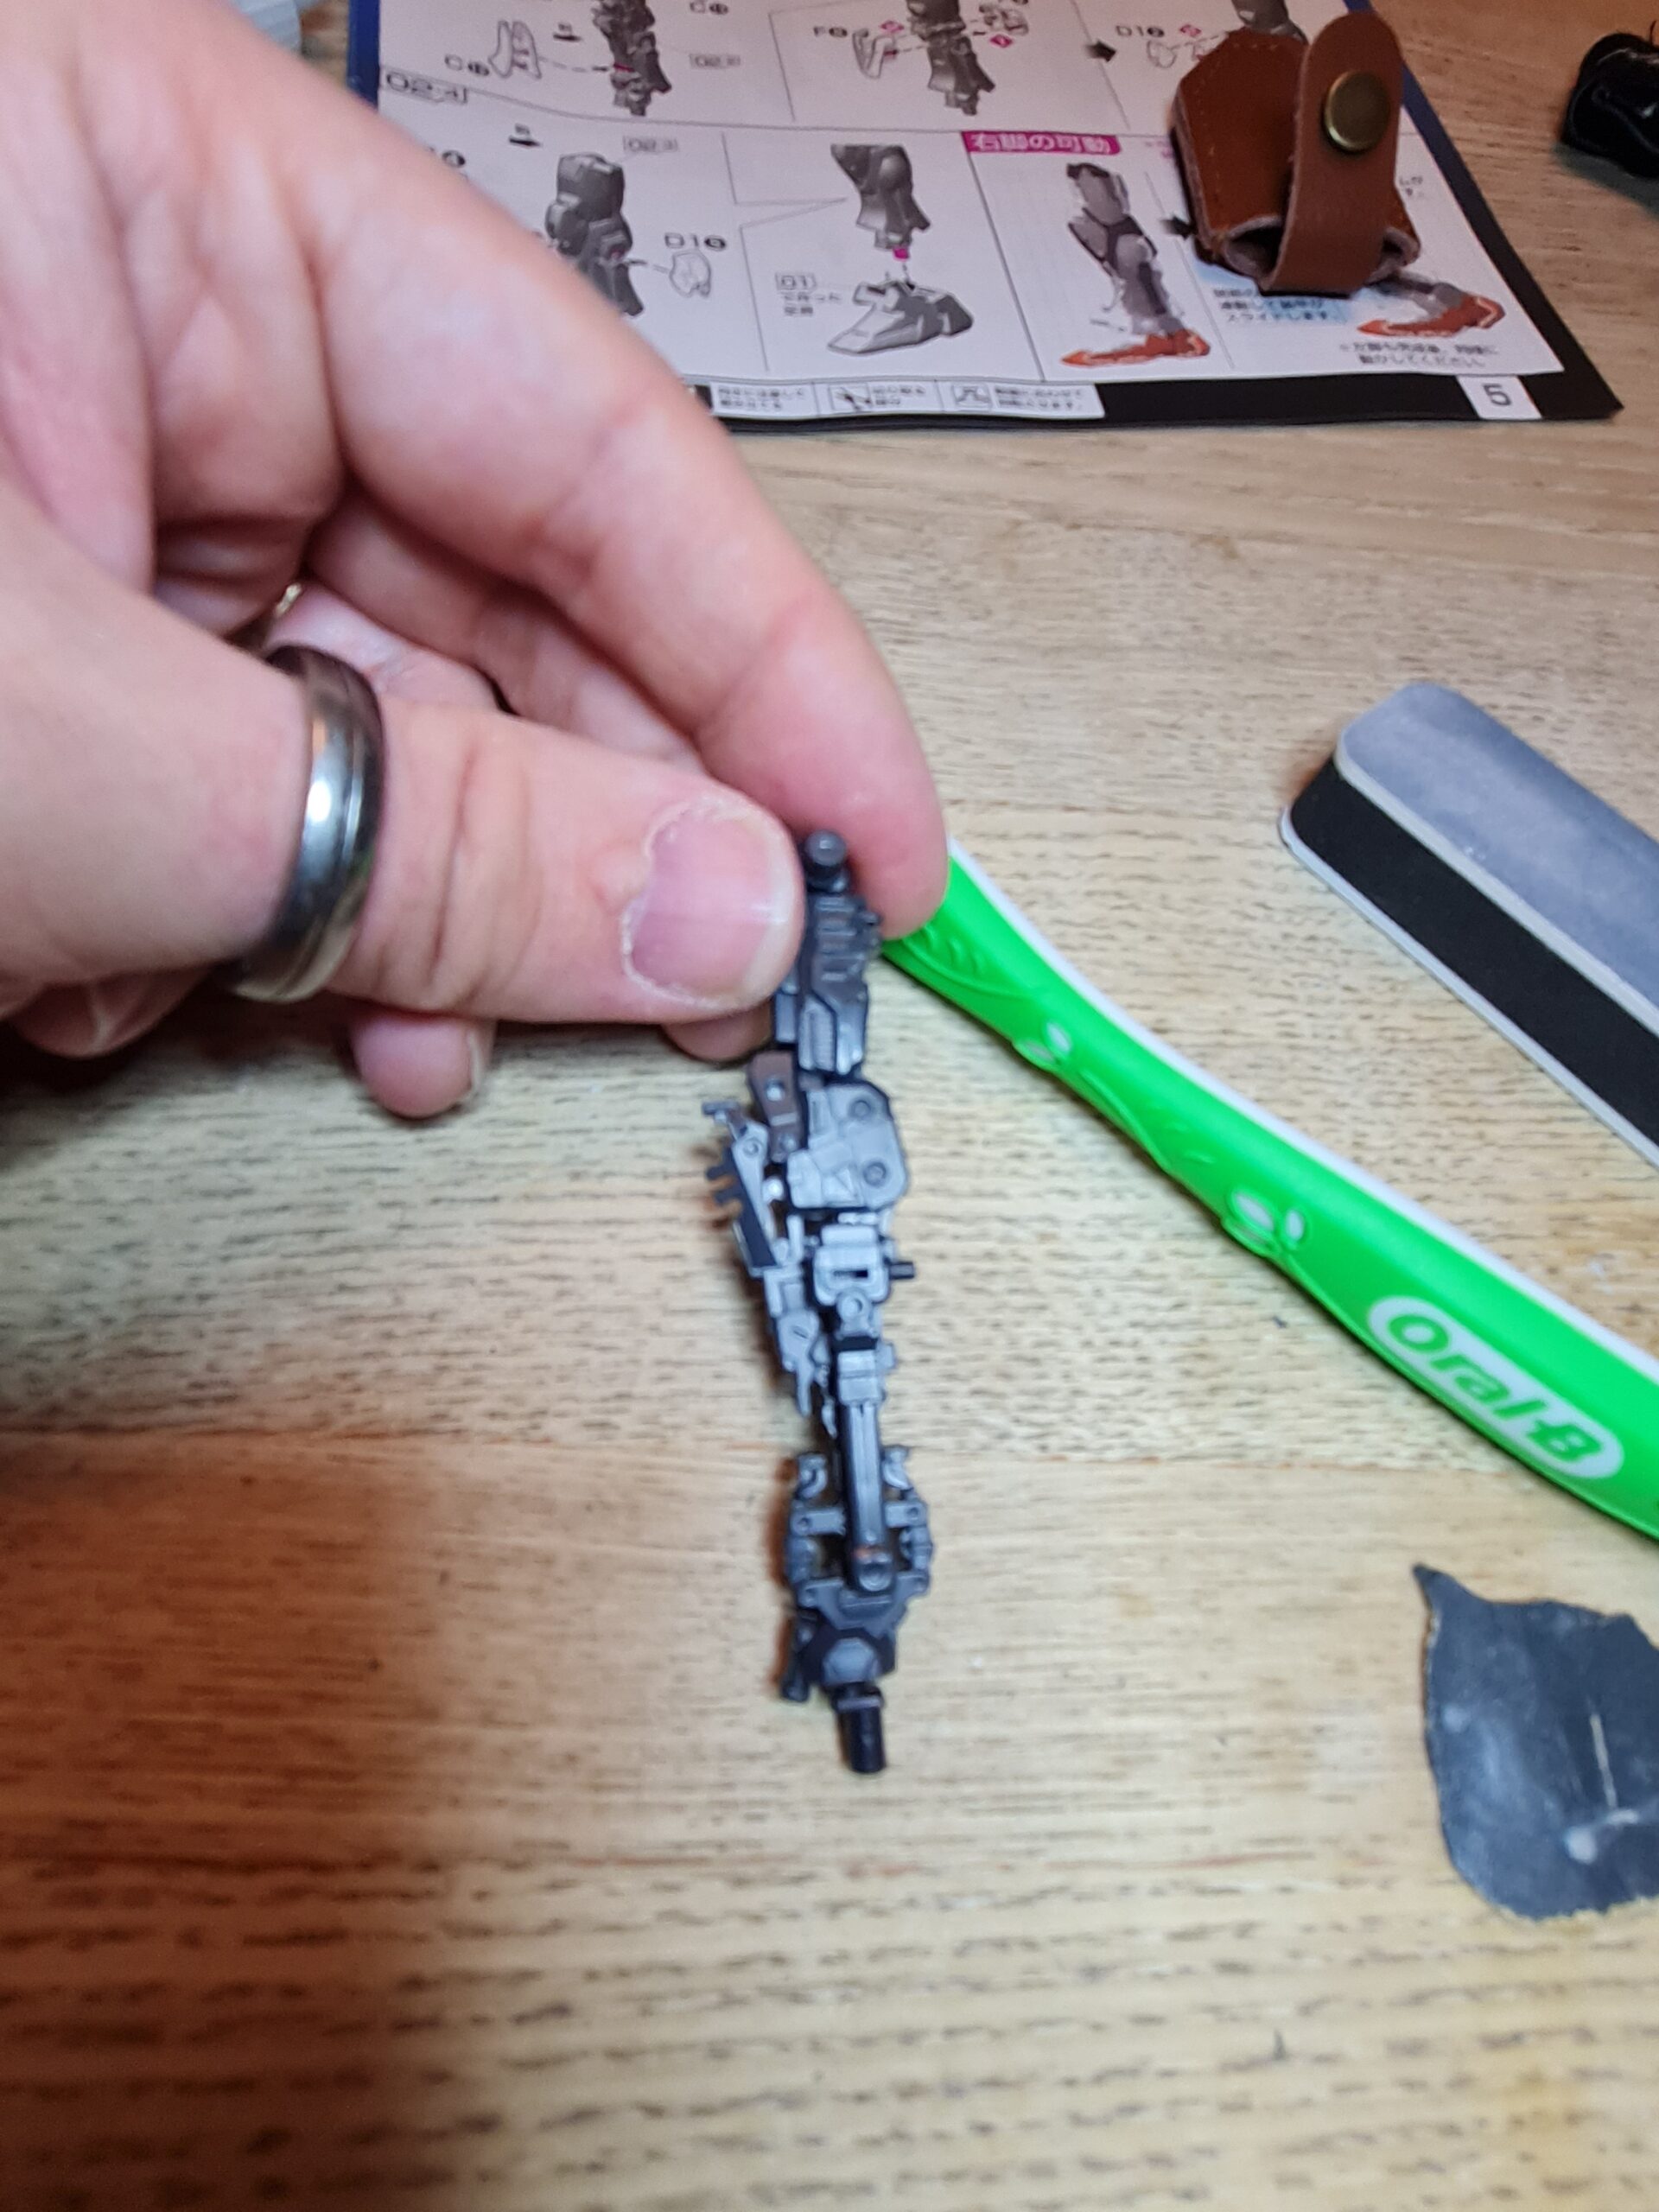
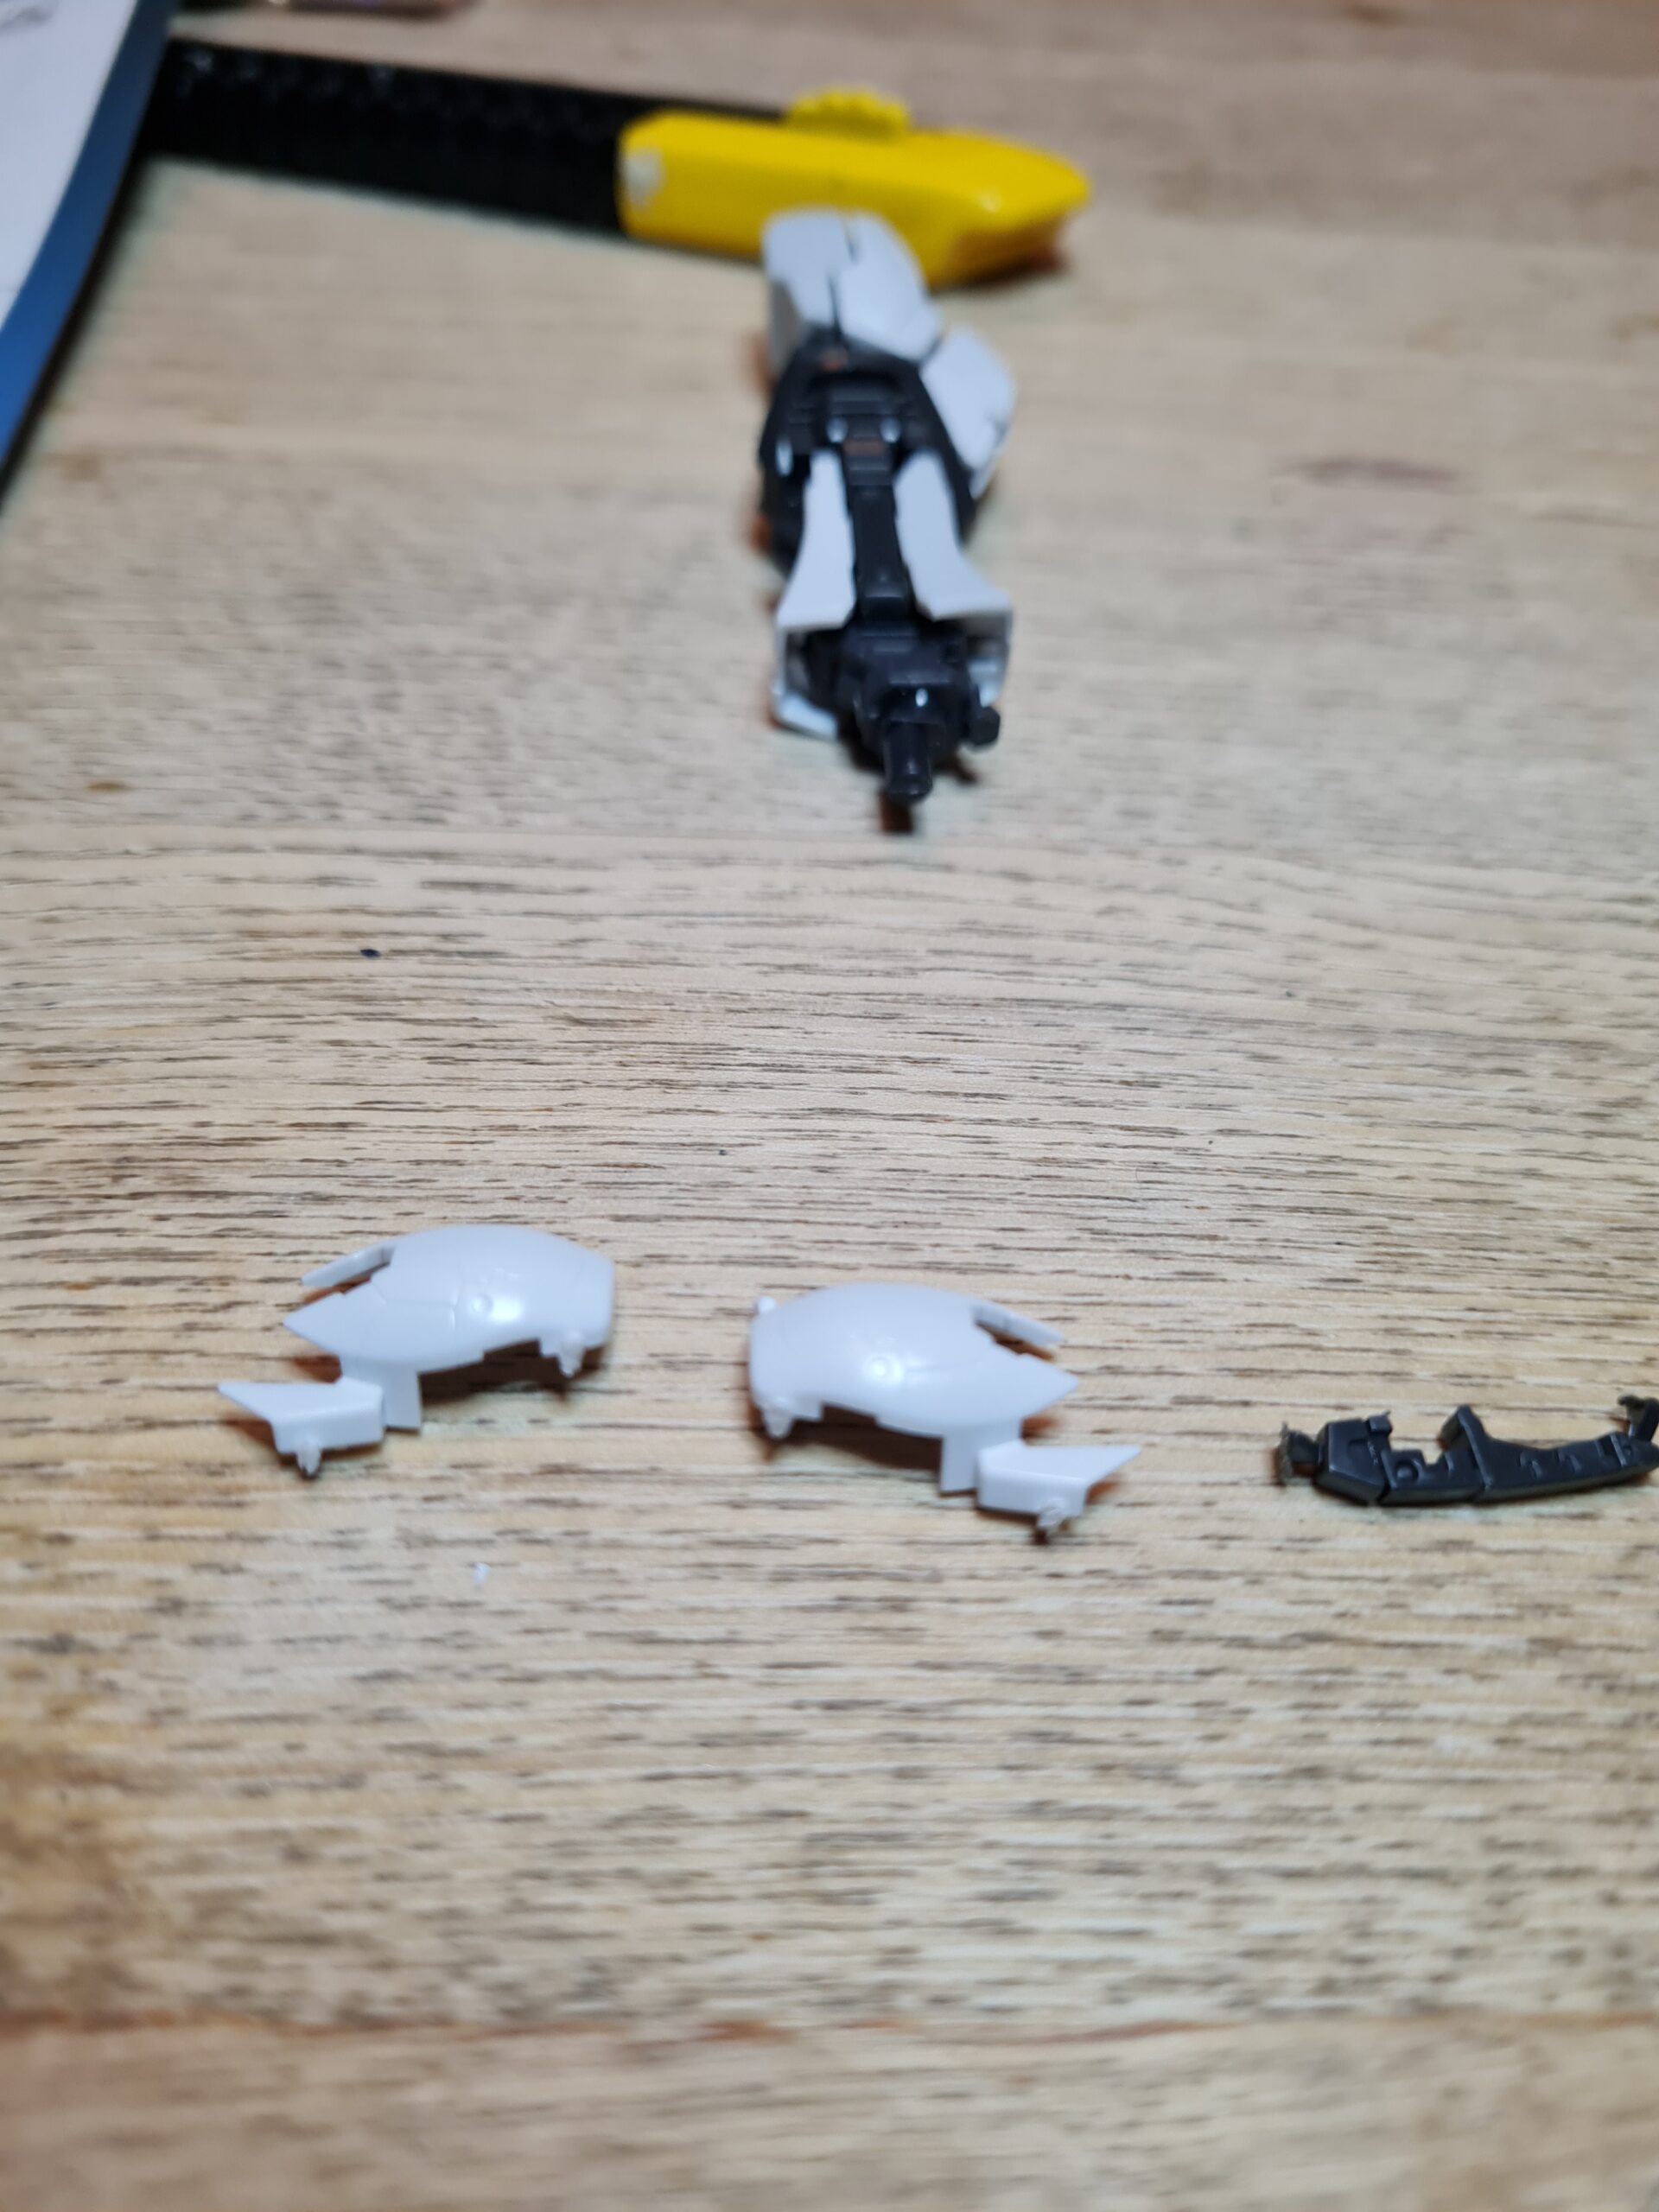
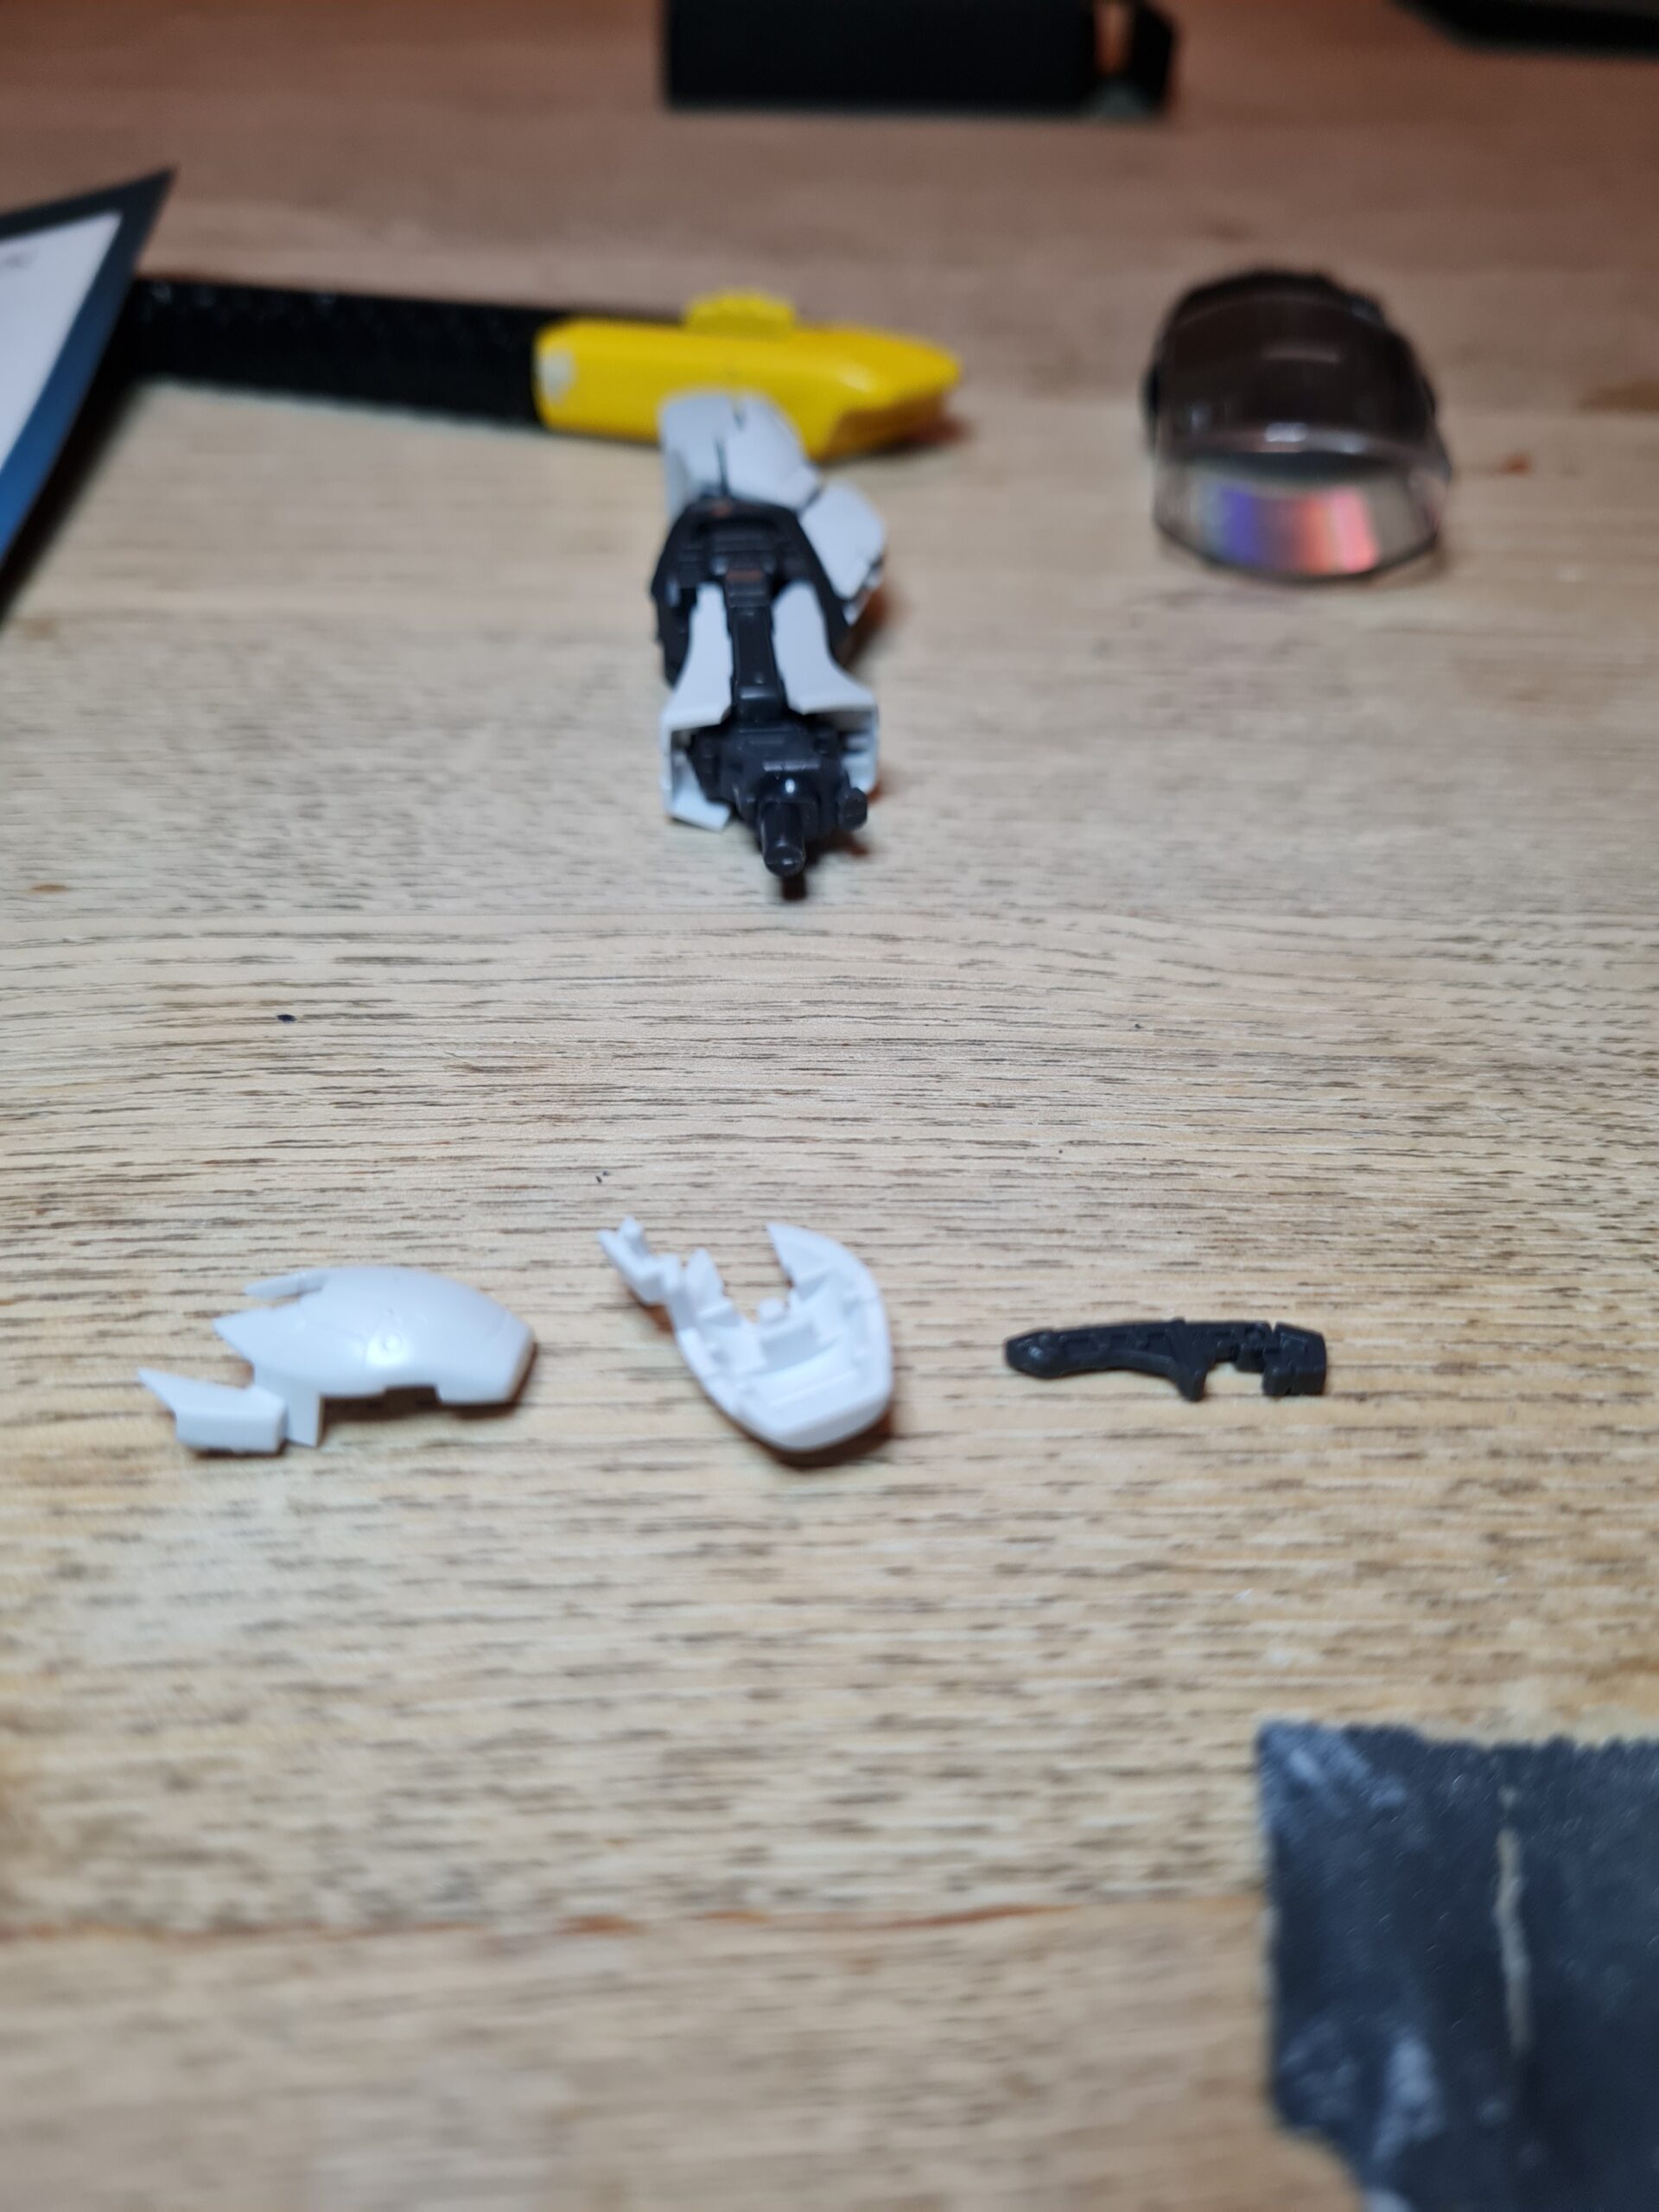
I decided to take a slightly different approach tonight as I knew I could finish this arm off. Taking this approach also allowed me to take less photos which sped the process. Again I may look into getting some sort of setup to help with that. However, at the moment I only have my phone, table, and patience 🙂
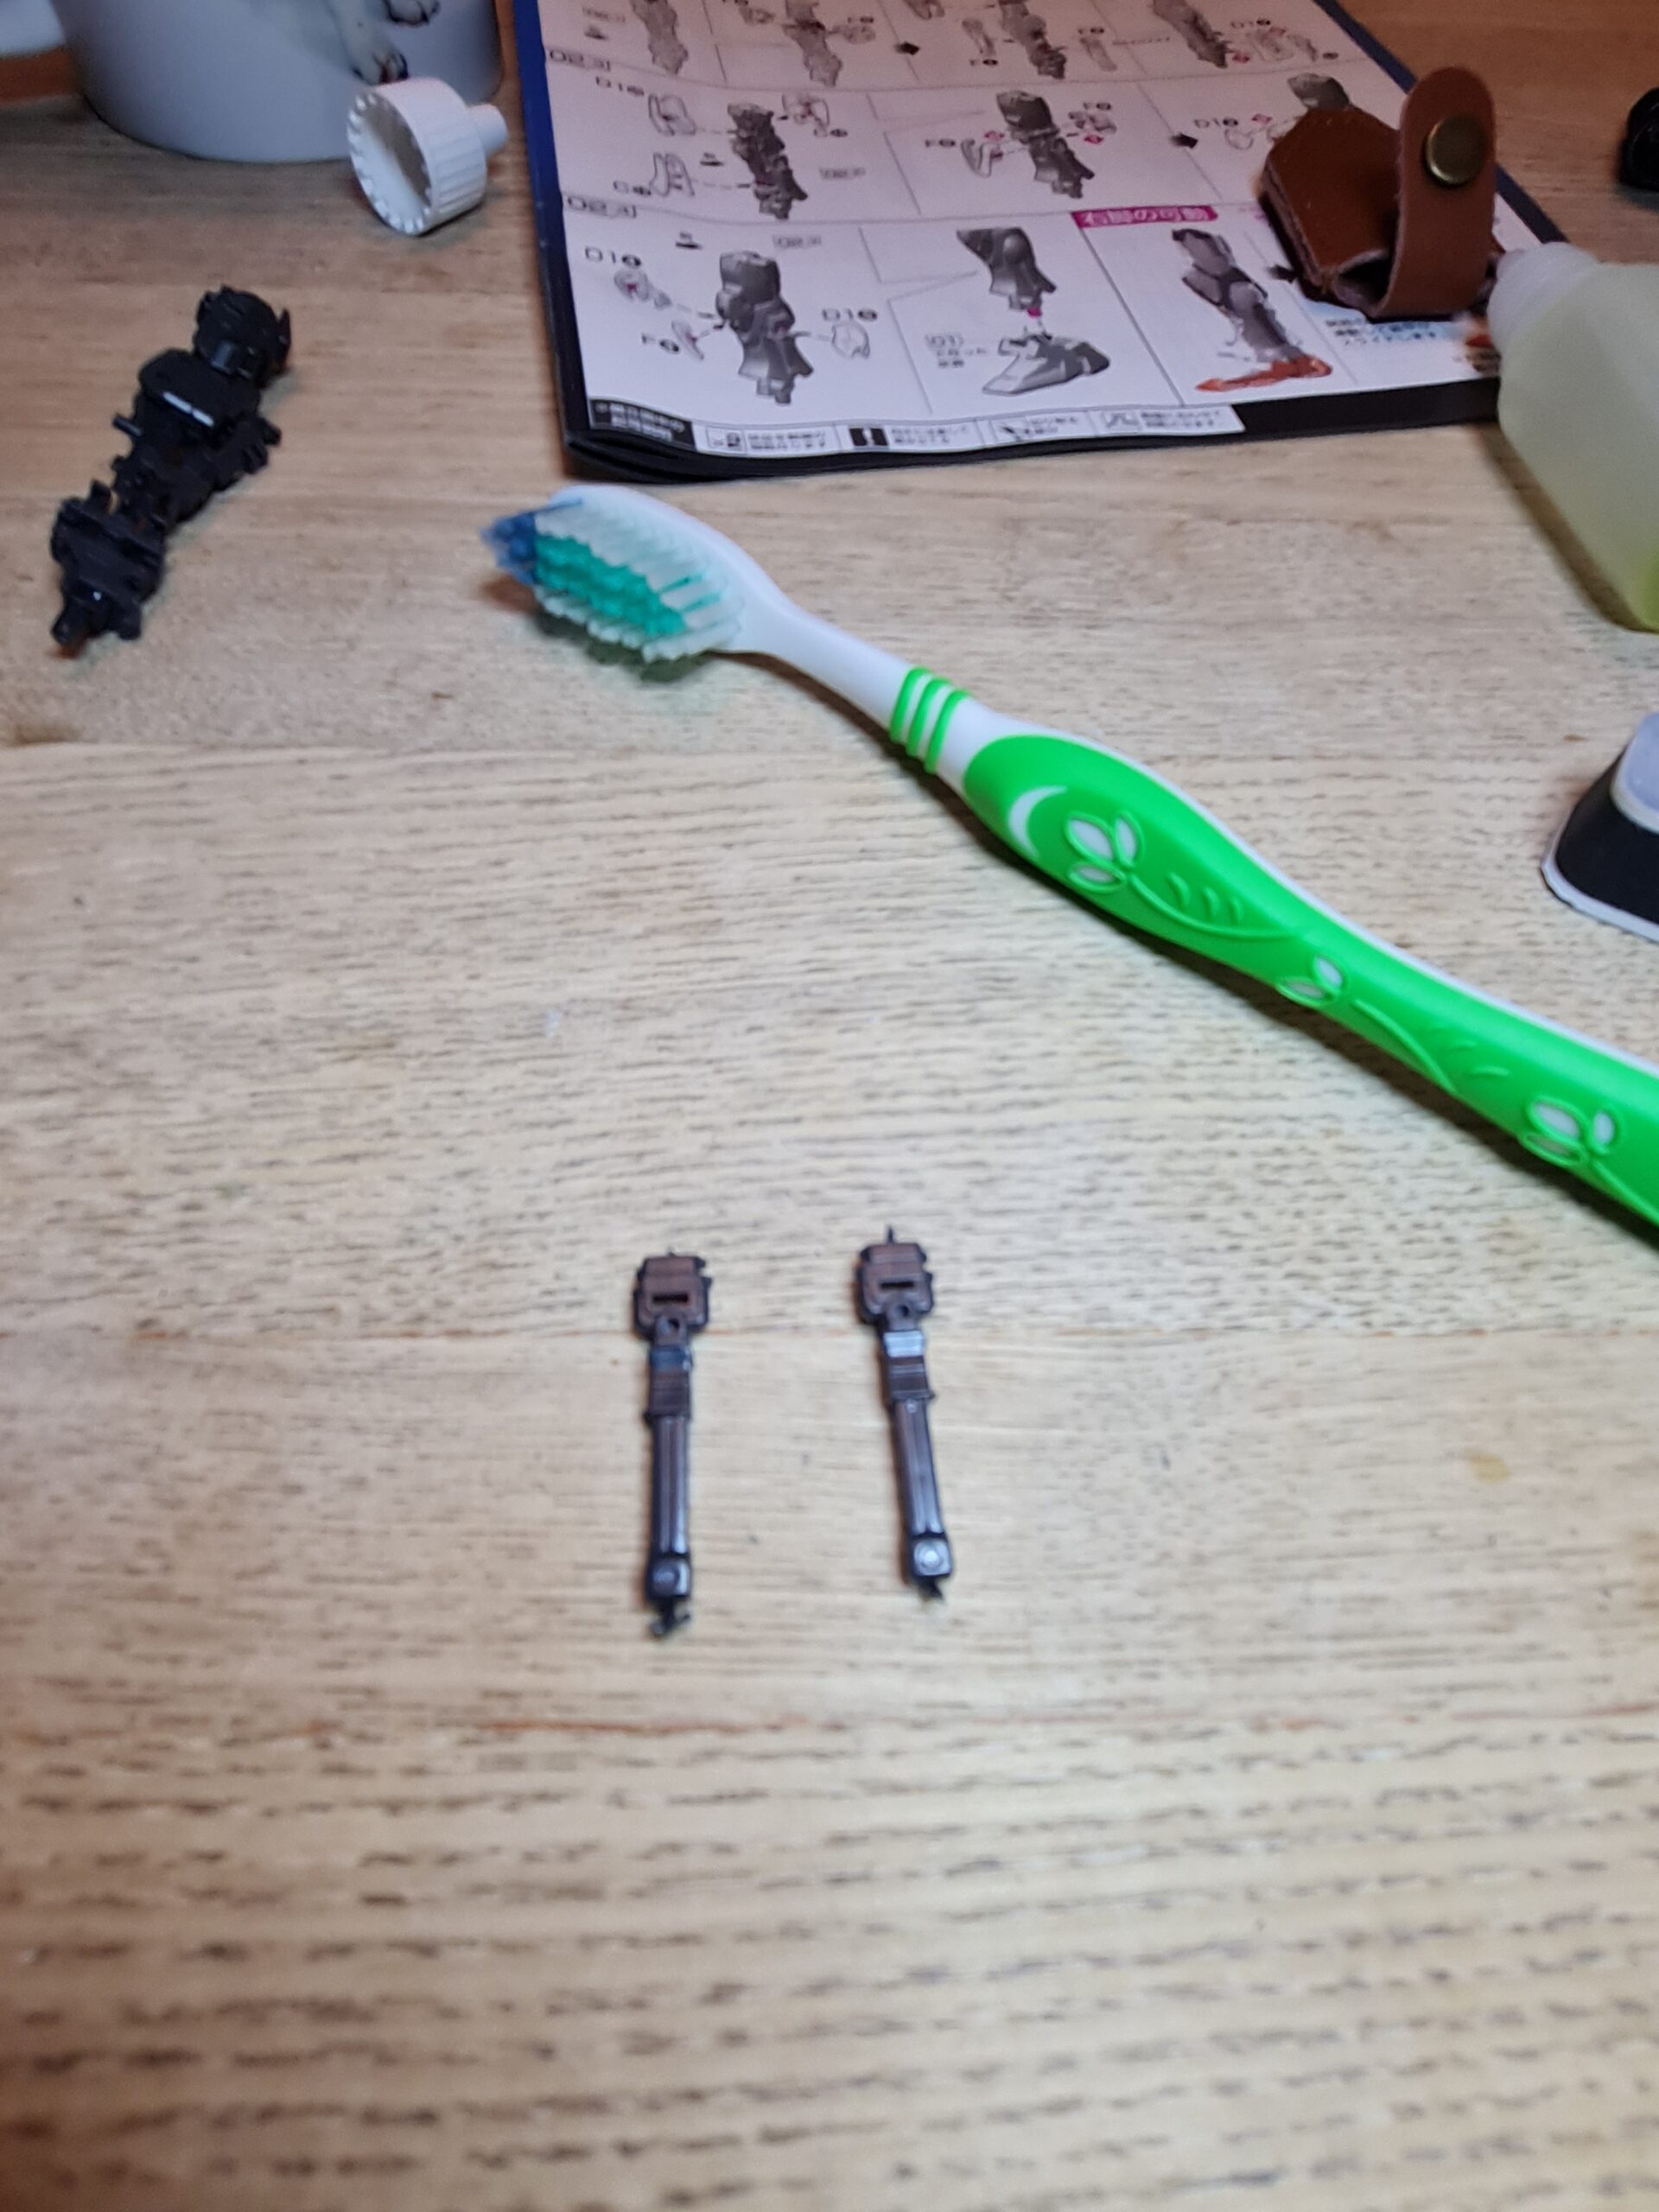
Clean Parts
So, as I knew I was approaching this differently, I also cleaned up all the parts I had to work with tonight. I actually found this a nice change to the pace. Rather than cut 2 – 3 pieces, clean them, put them together, photograph them, rinse and repeat, I found doing multiple sets of pieces together meant when it came to the assembly I could just enjoy the build of the arm.
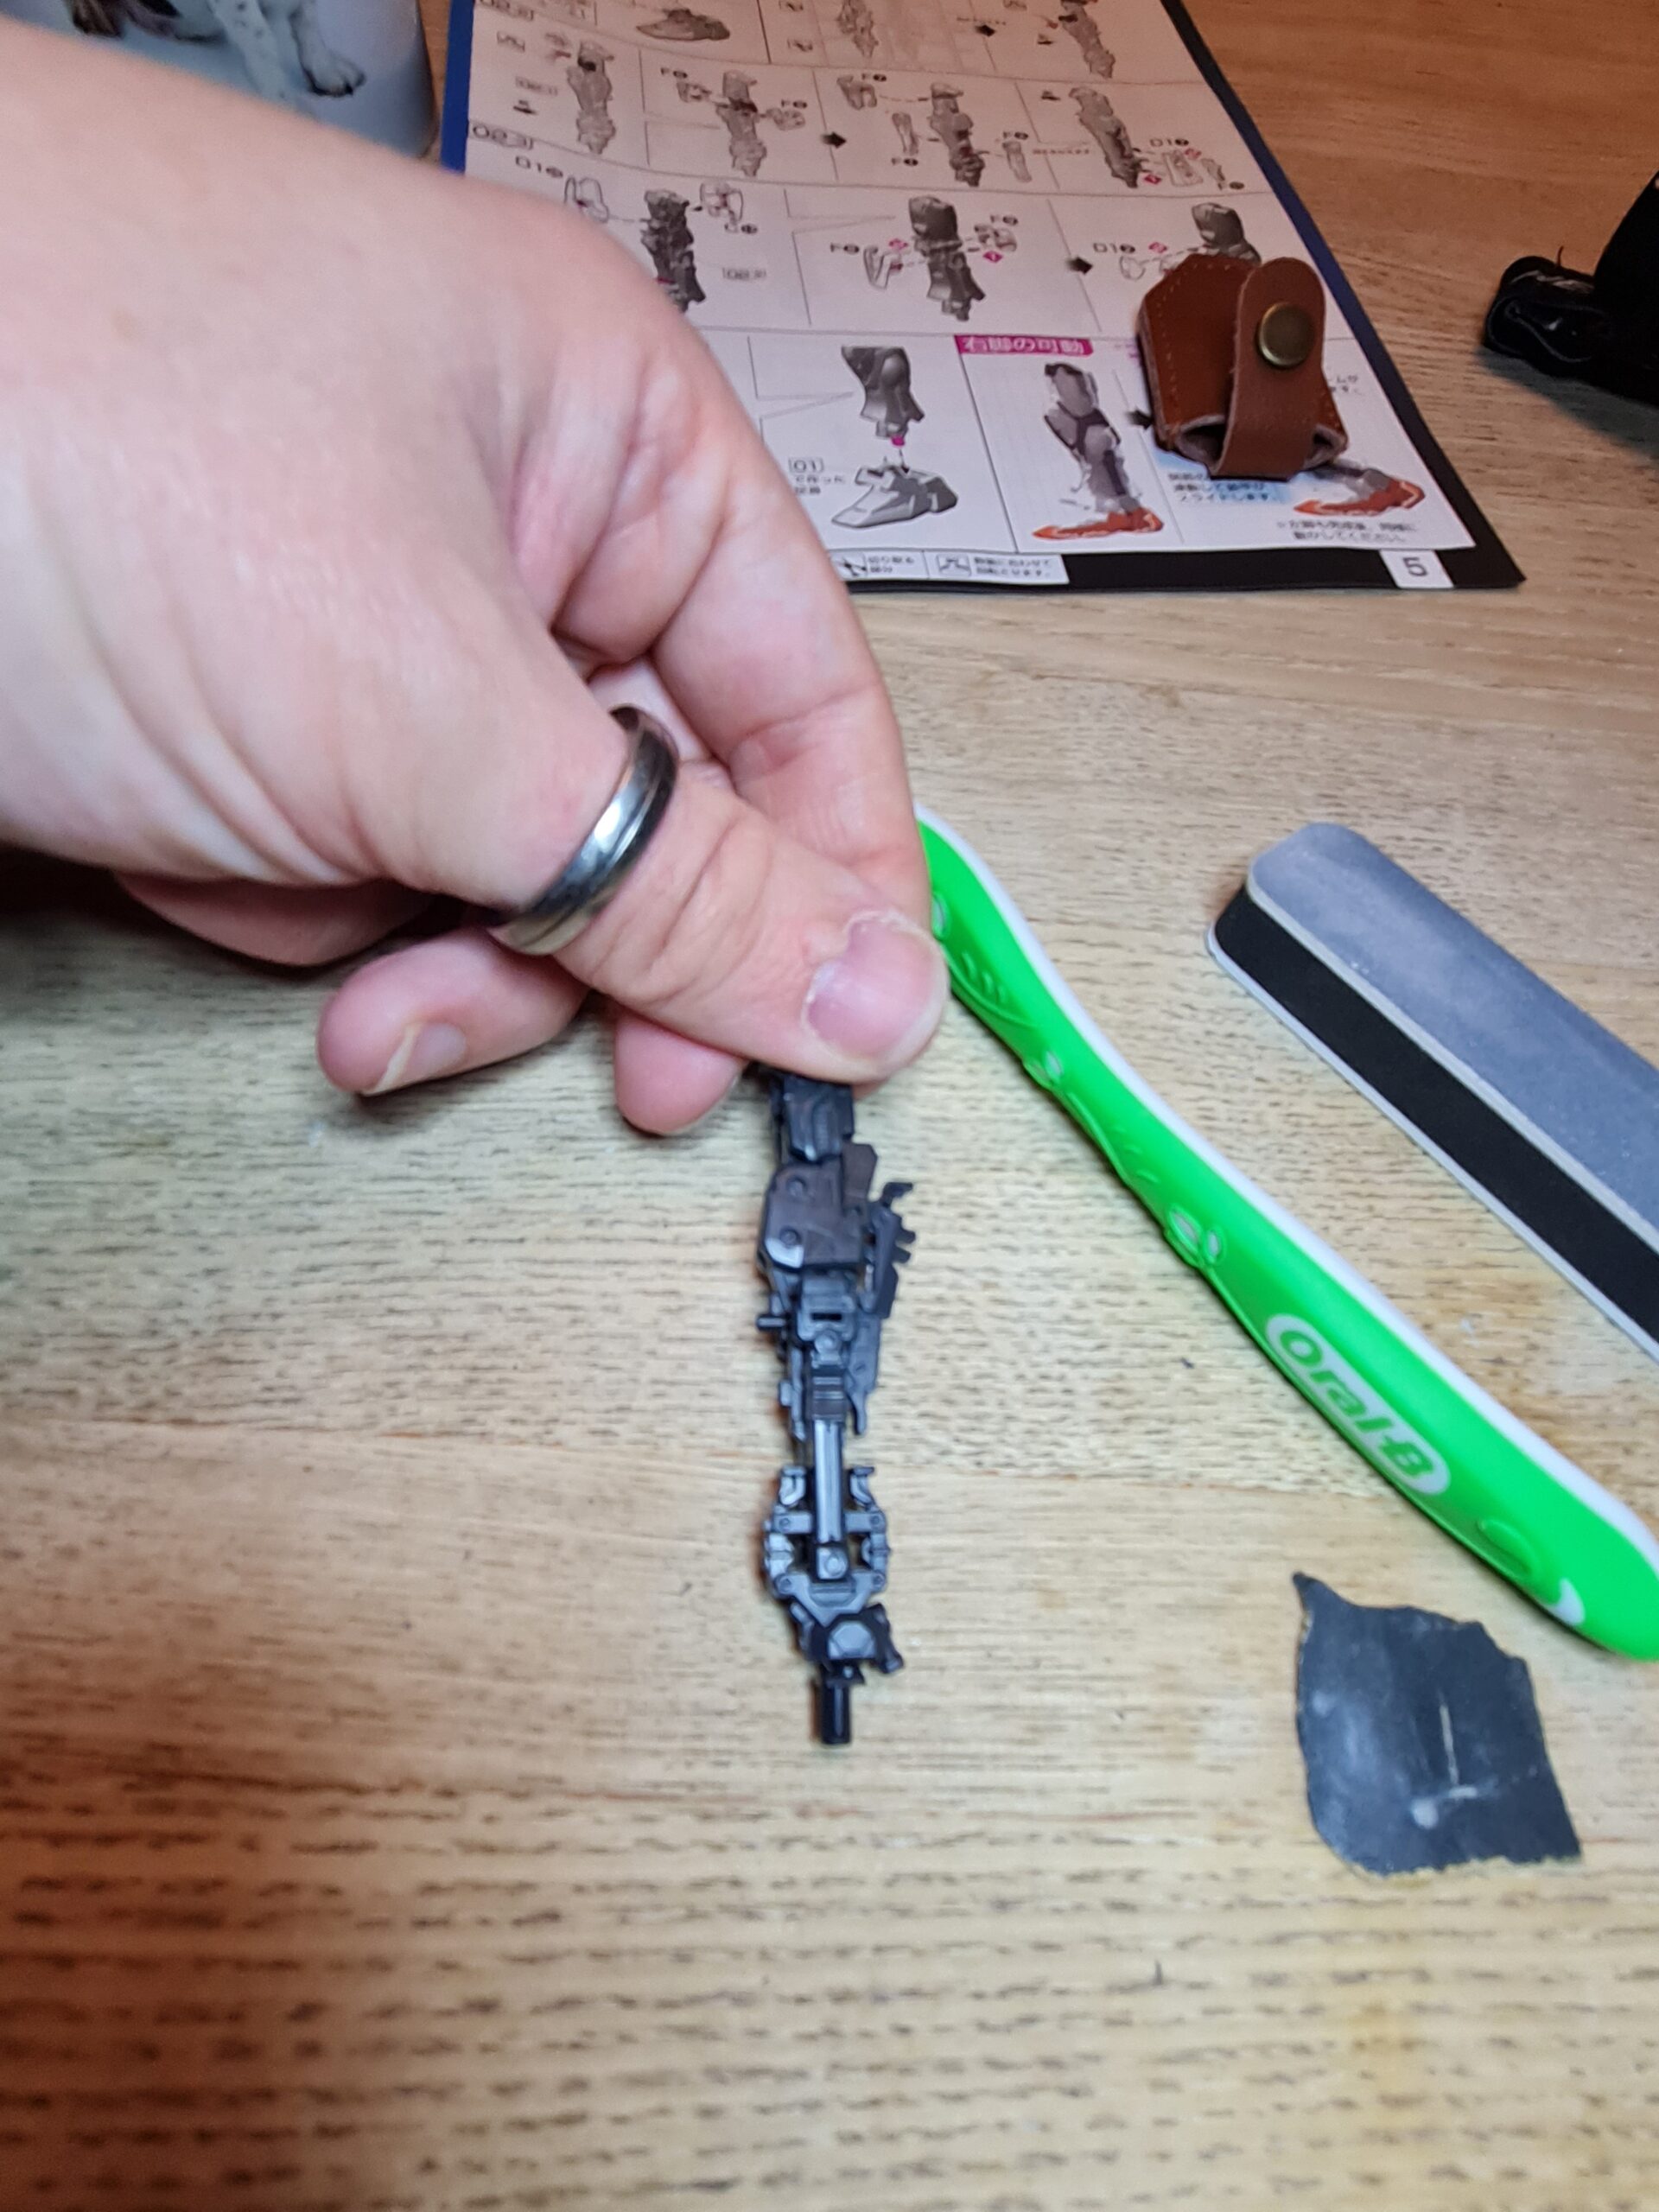
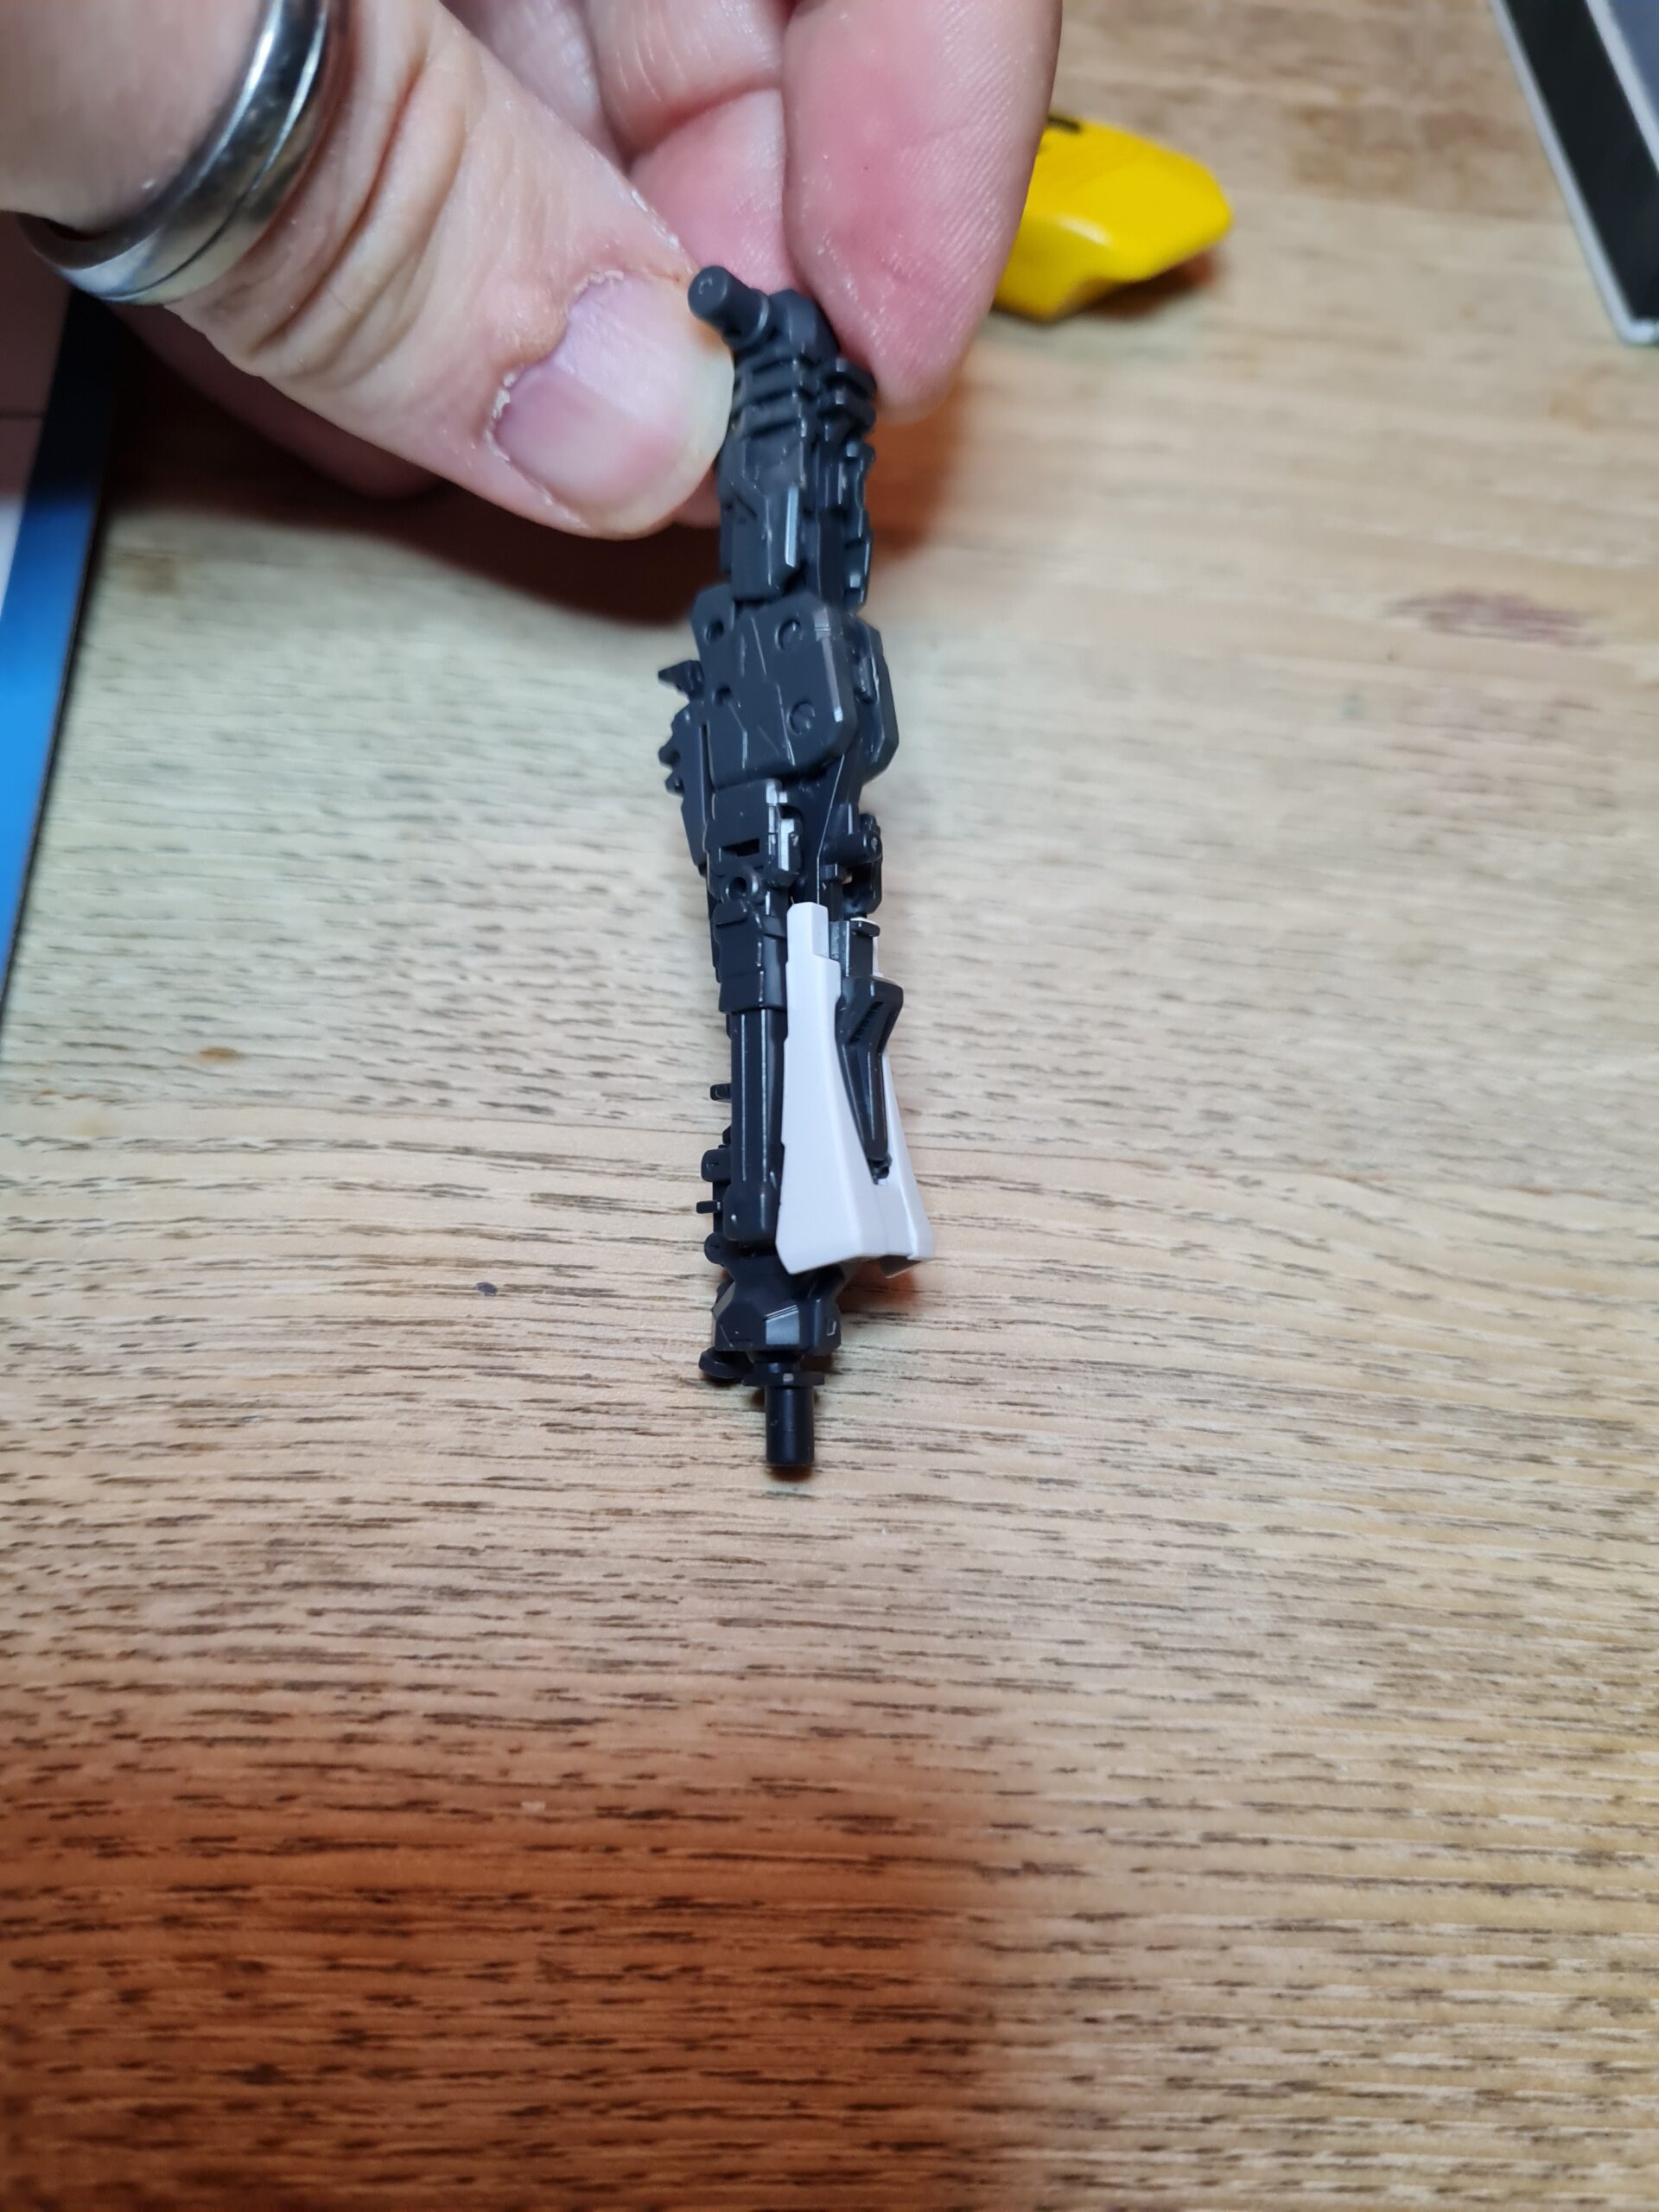
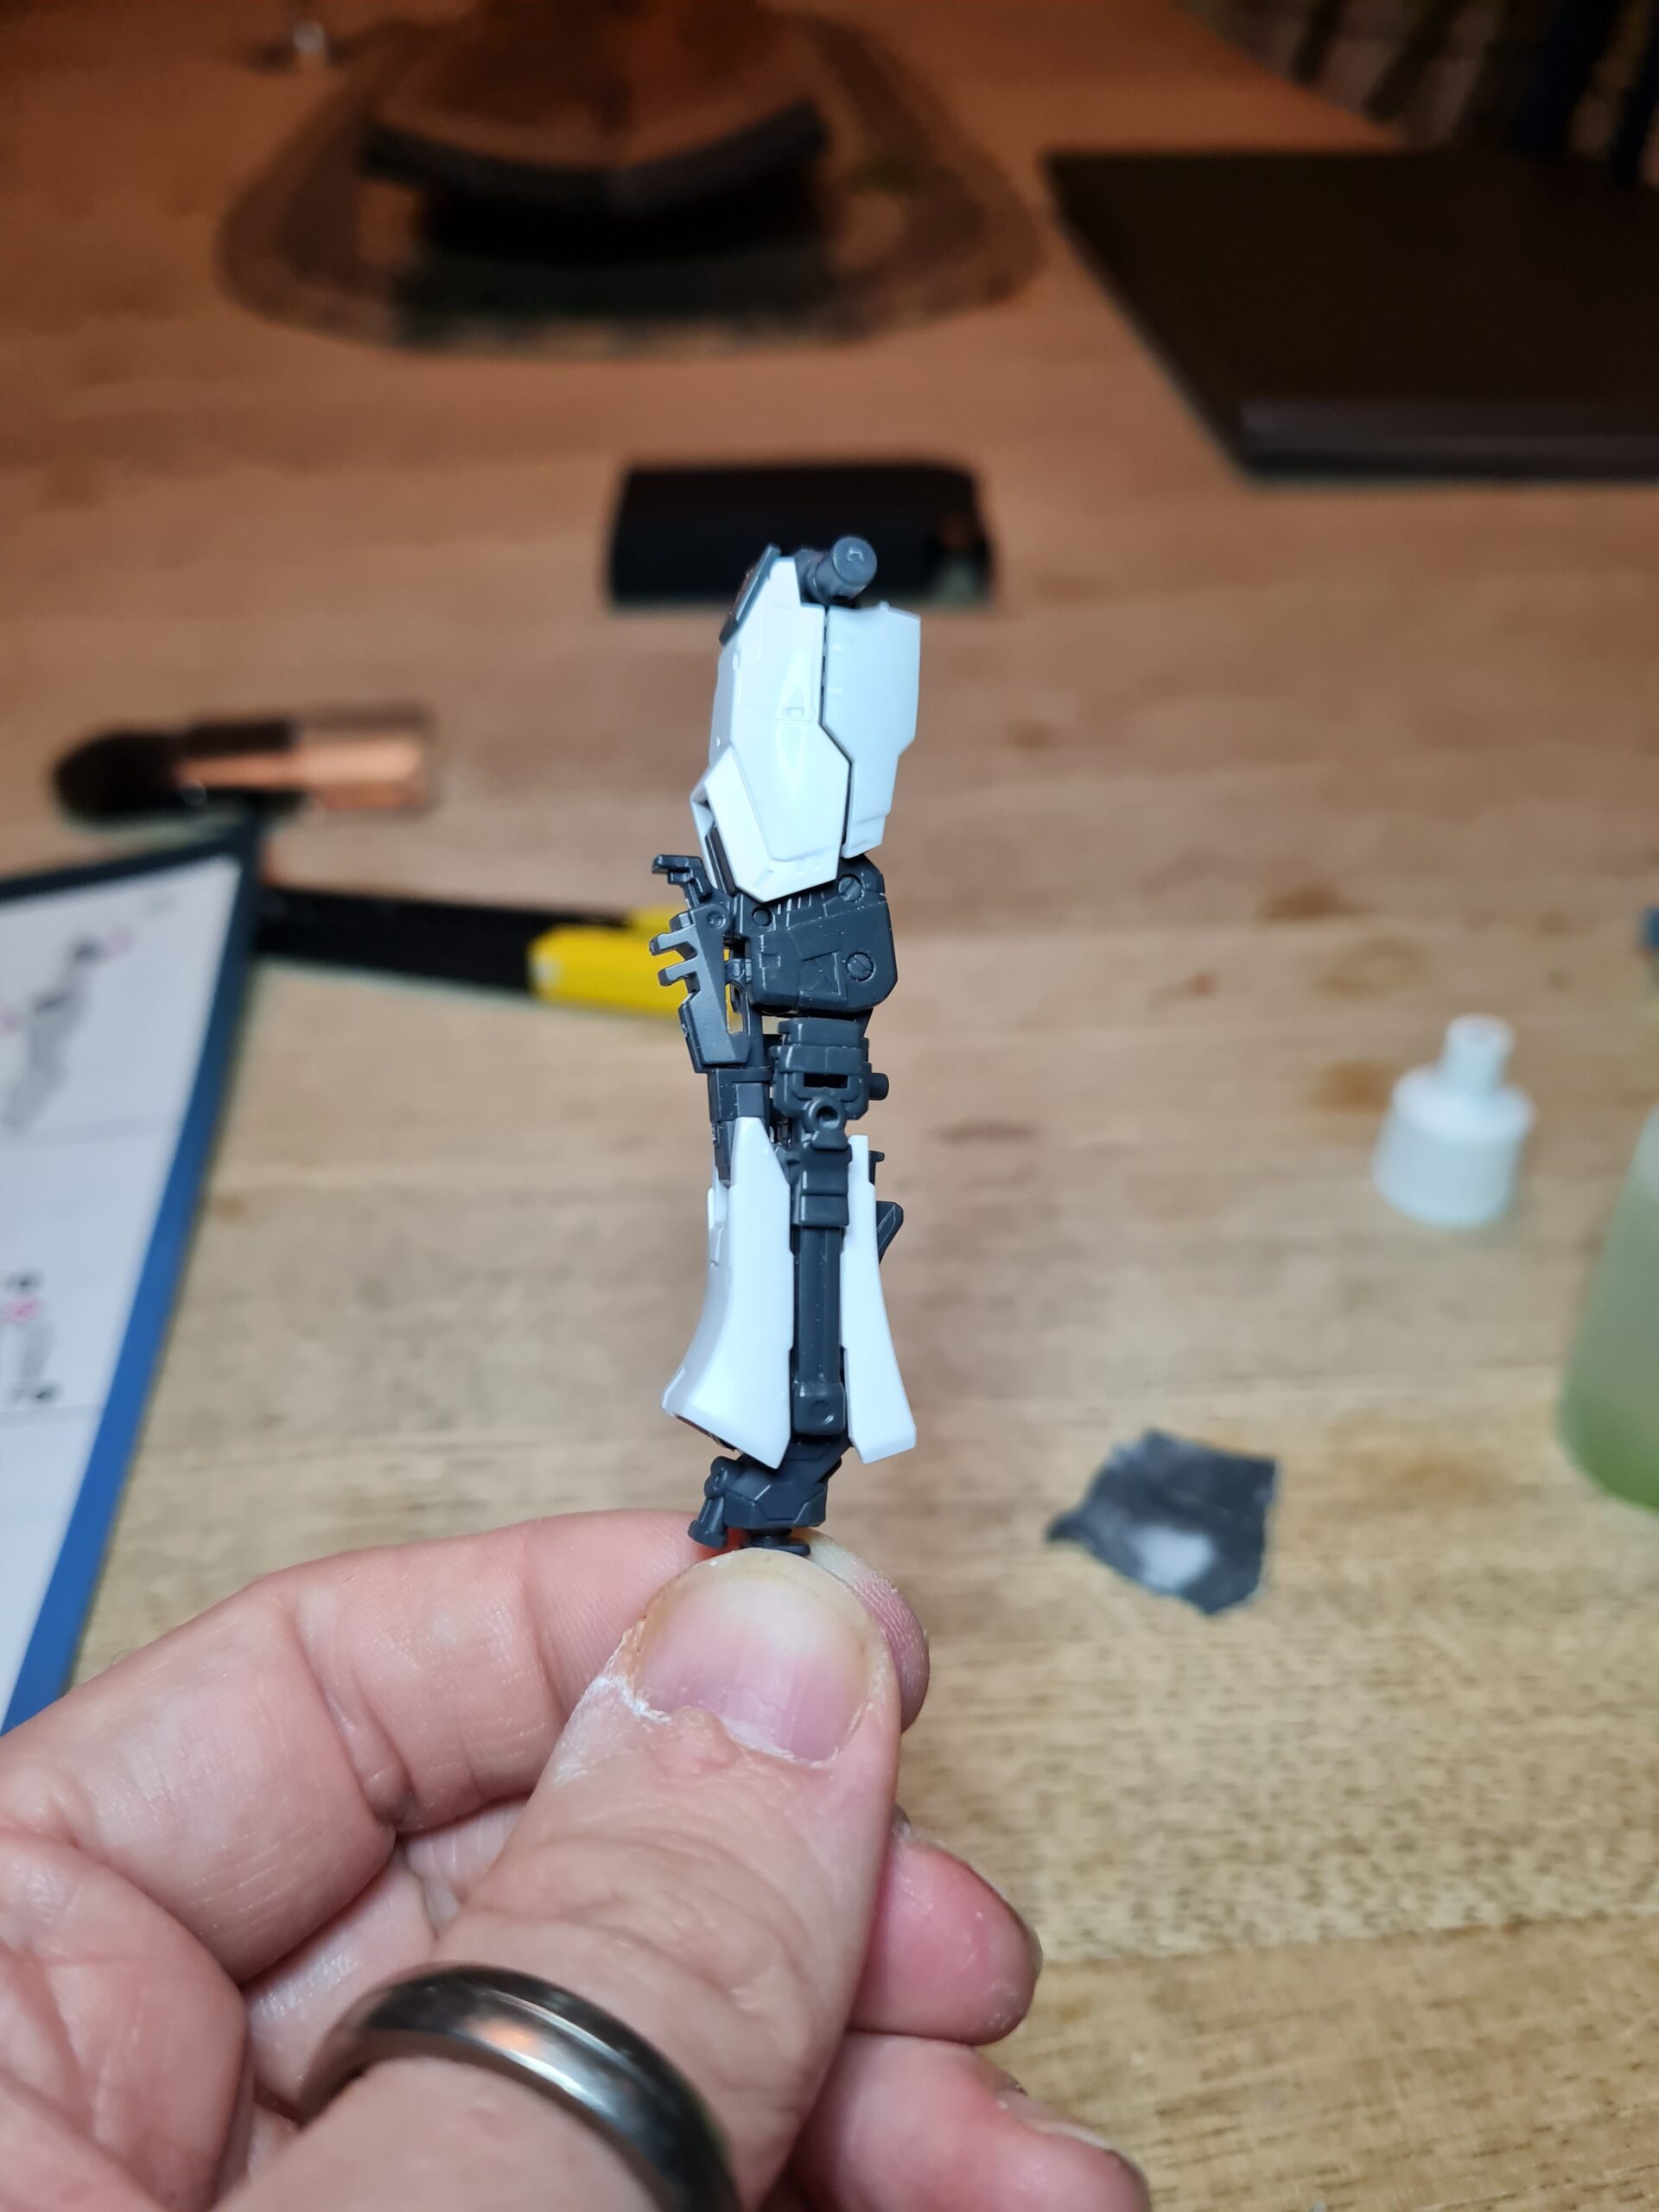
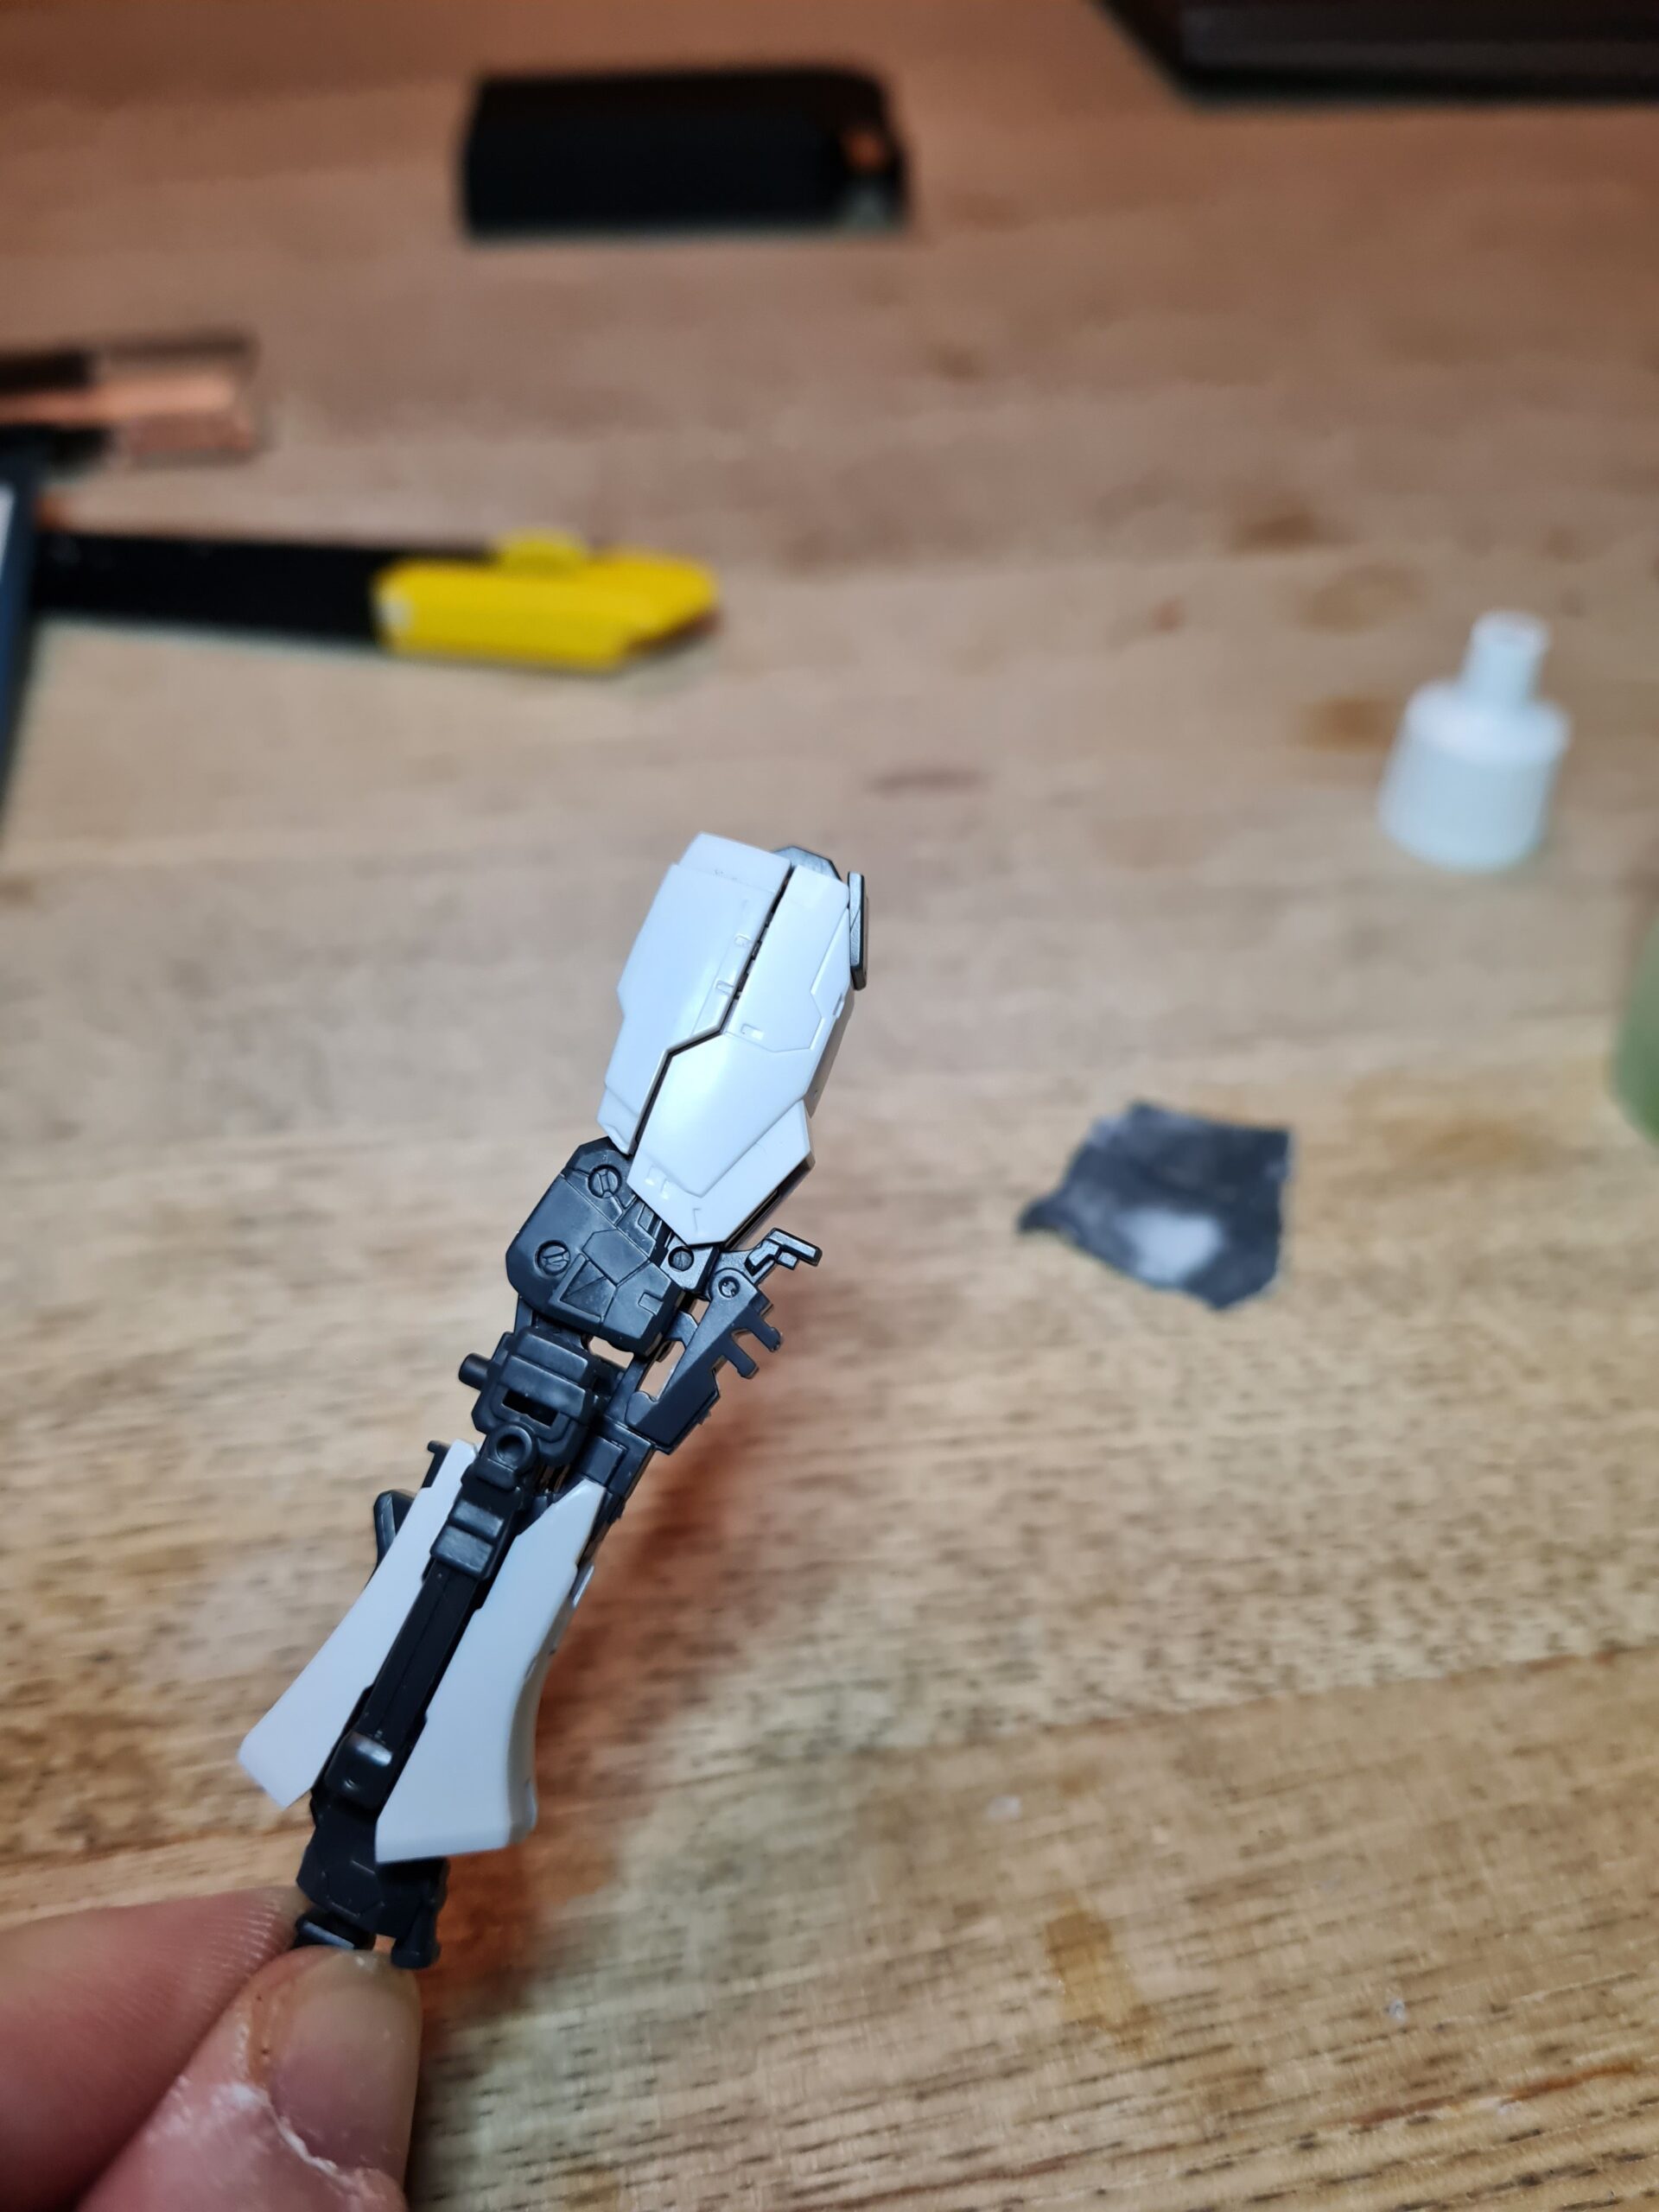
The Build
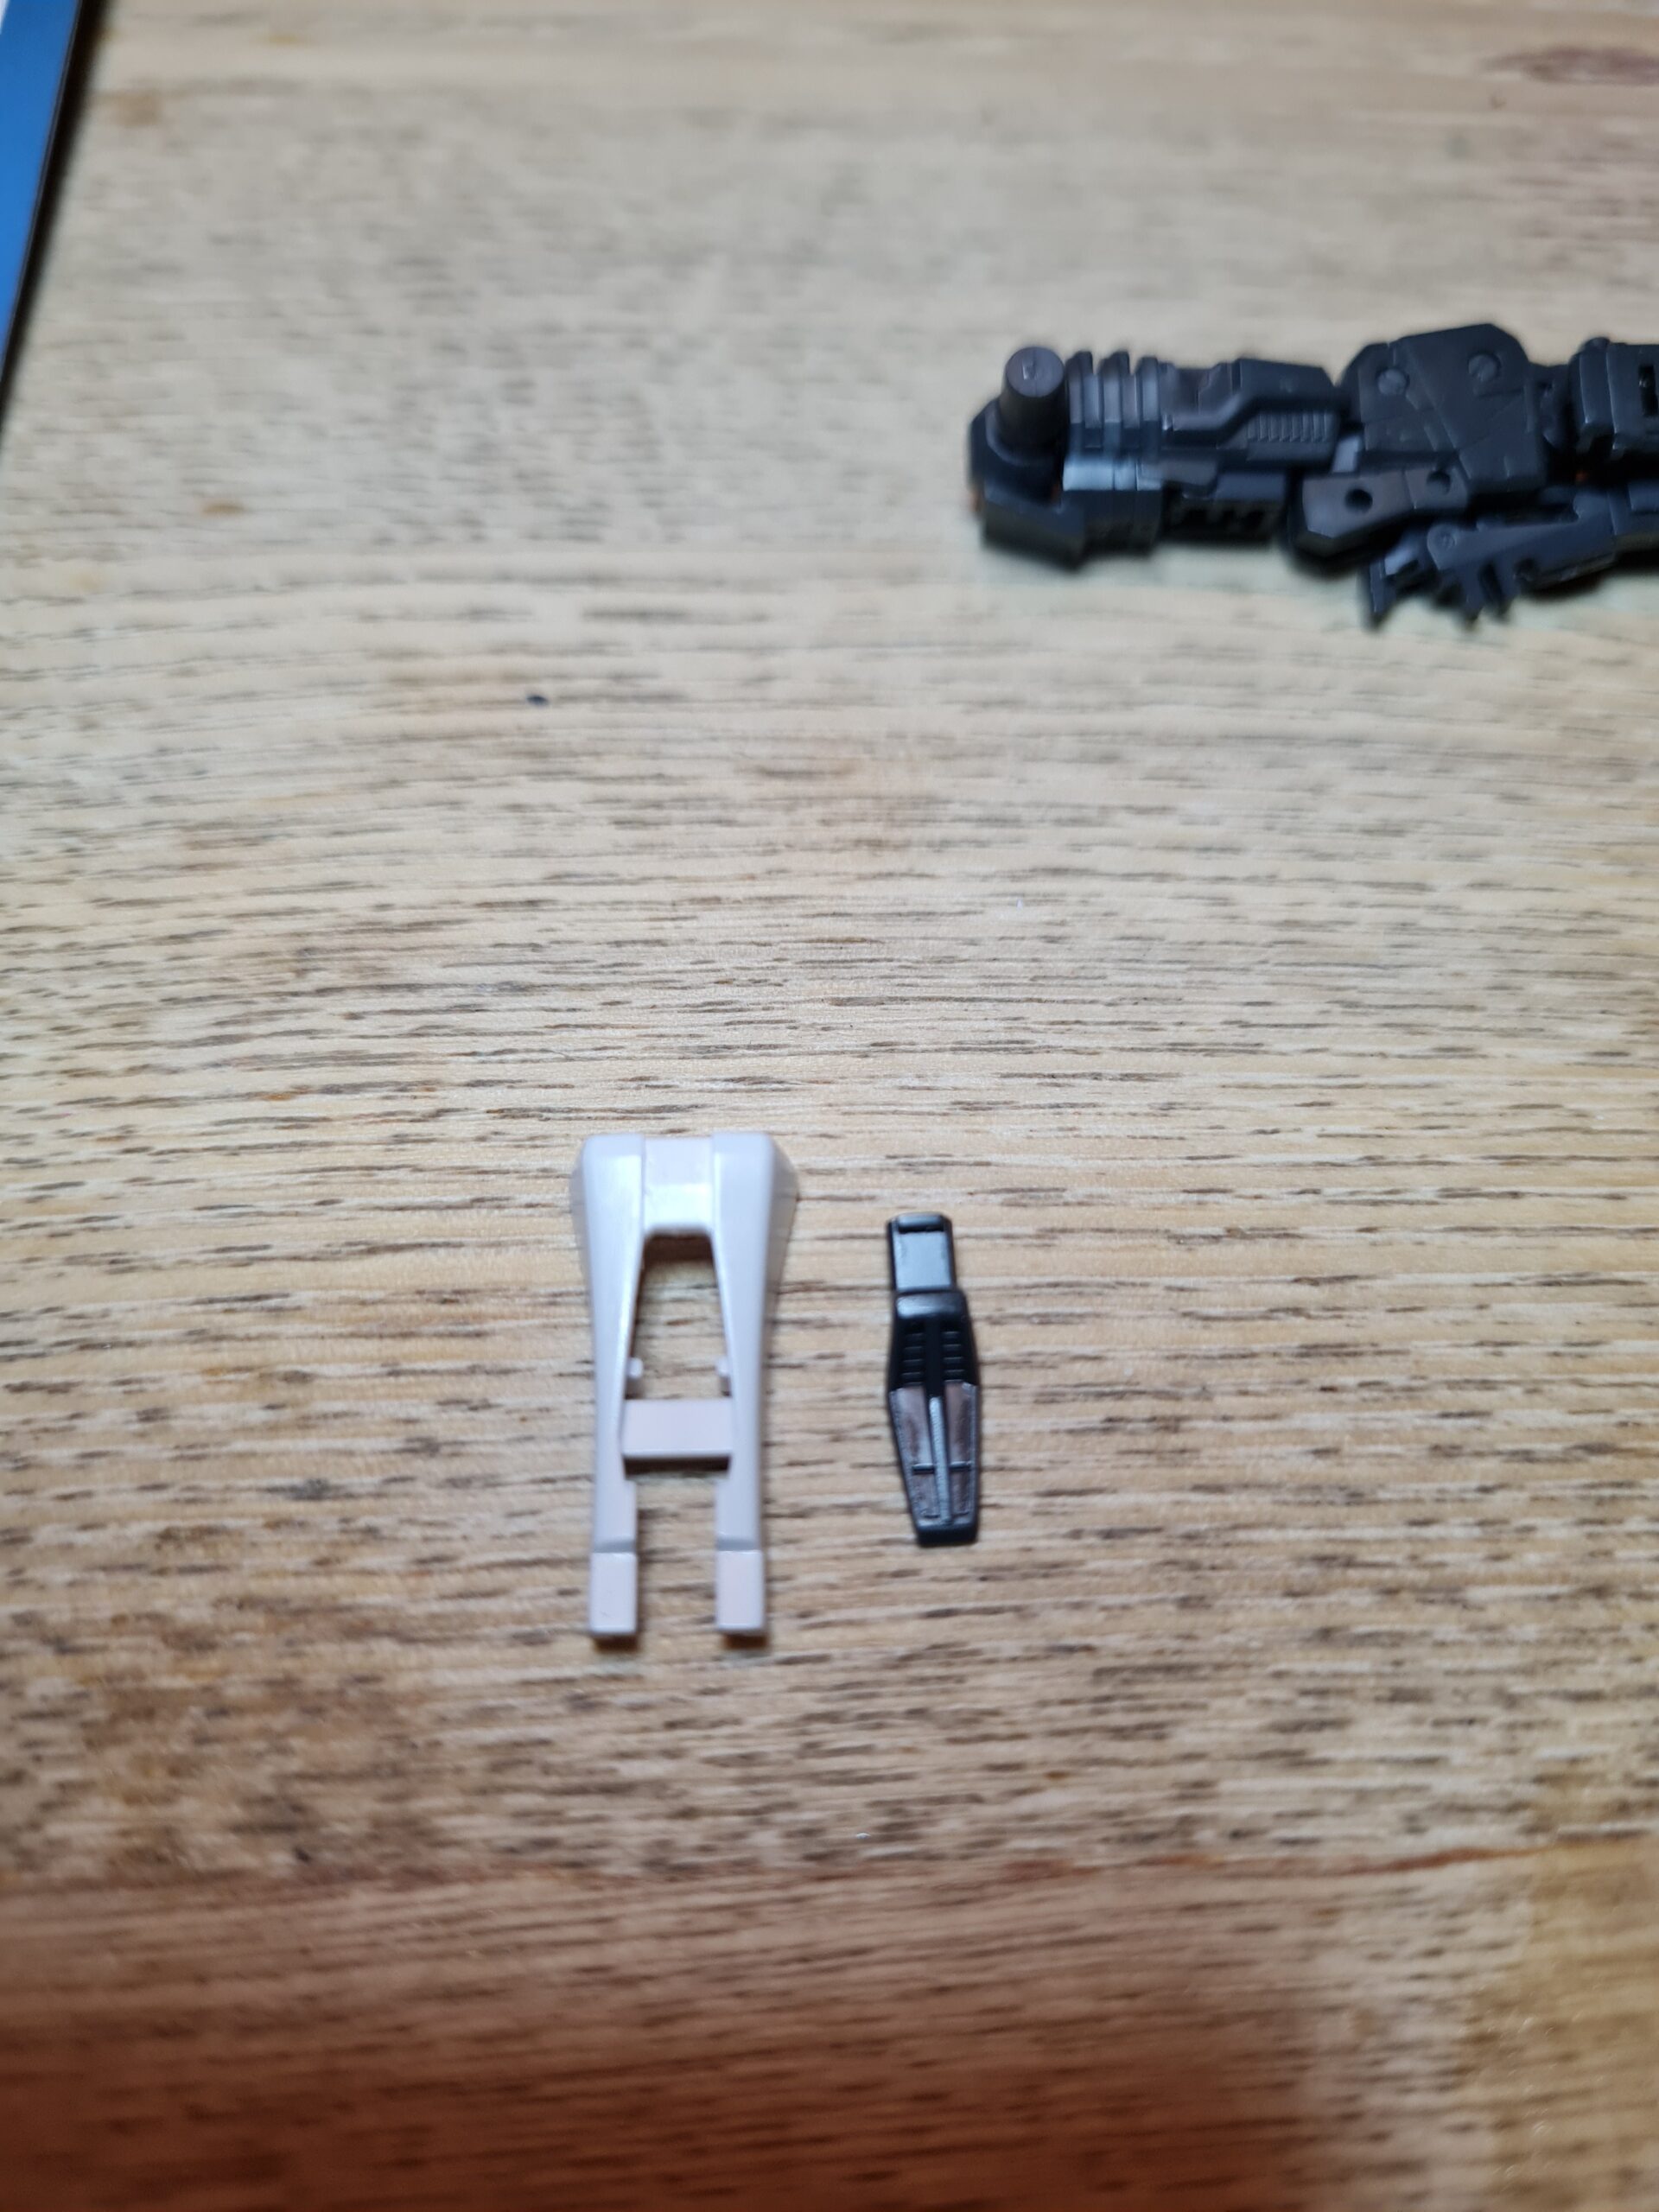
As I had approached it differently I had multiple bits to put together. Building this arm up was a really excellent experience. Seeing the parts layer on top of one another, and finally forming into the arm was a really enjoyable experience. I did have to consult the manual a couple of times, and work out which bits went where, but when in the right place the went together beautifully.
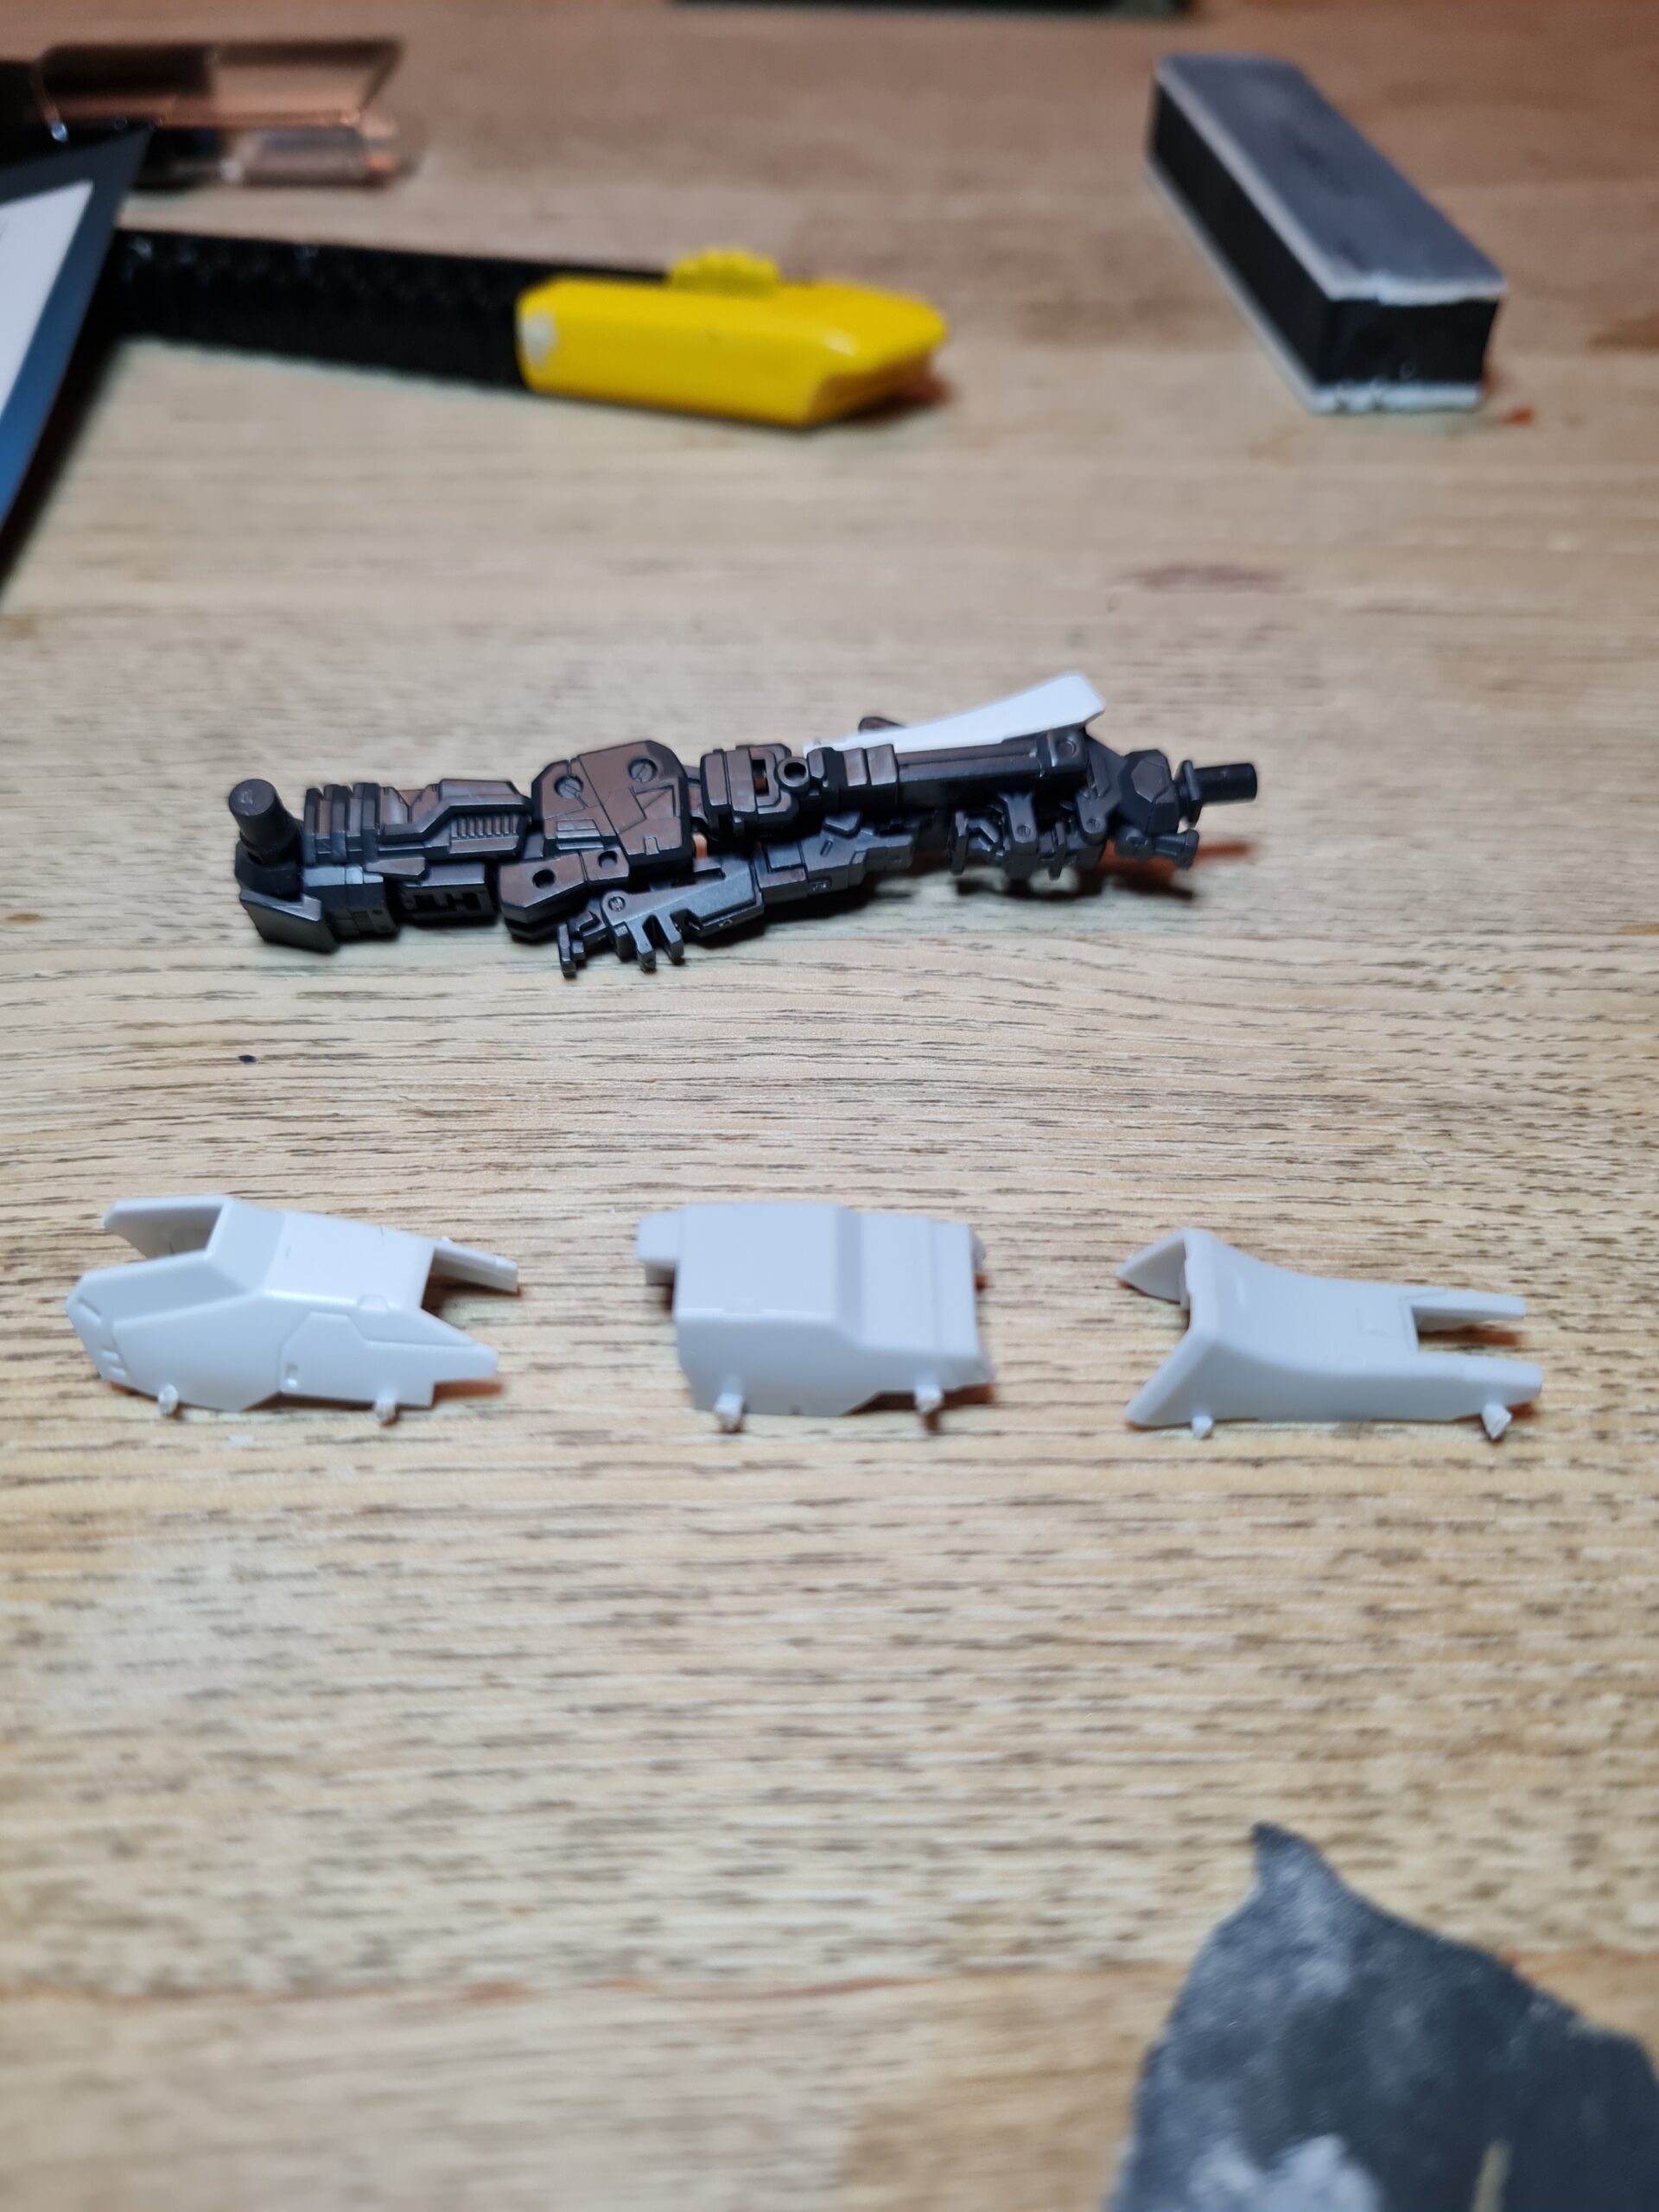
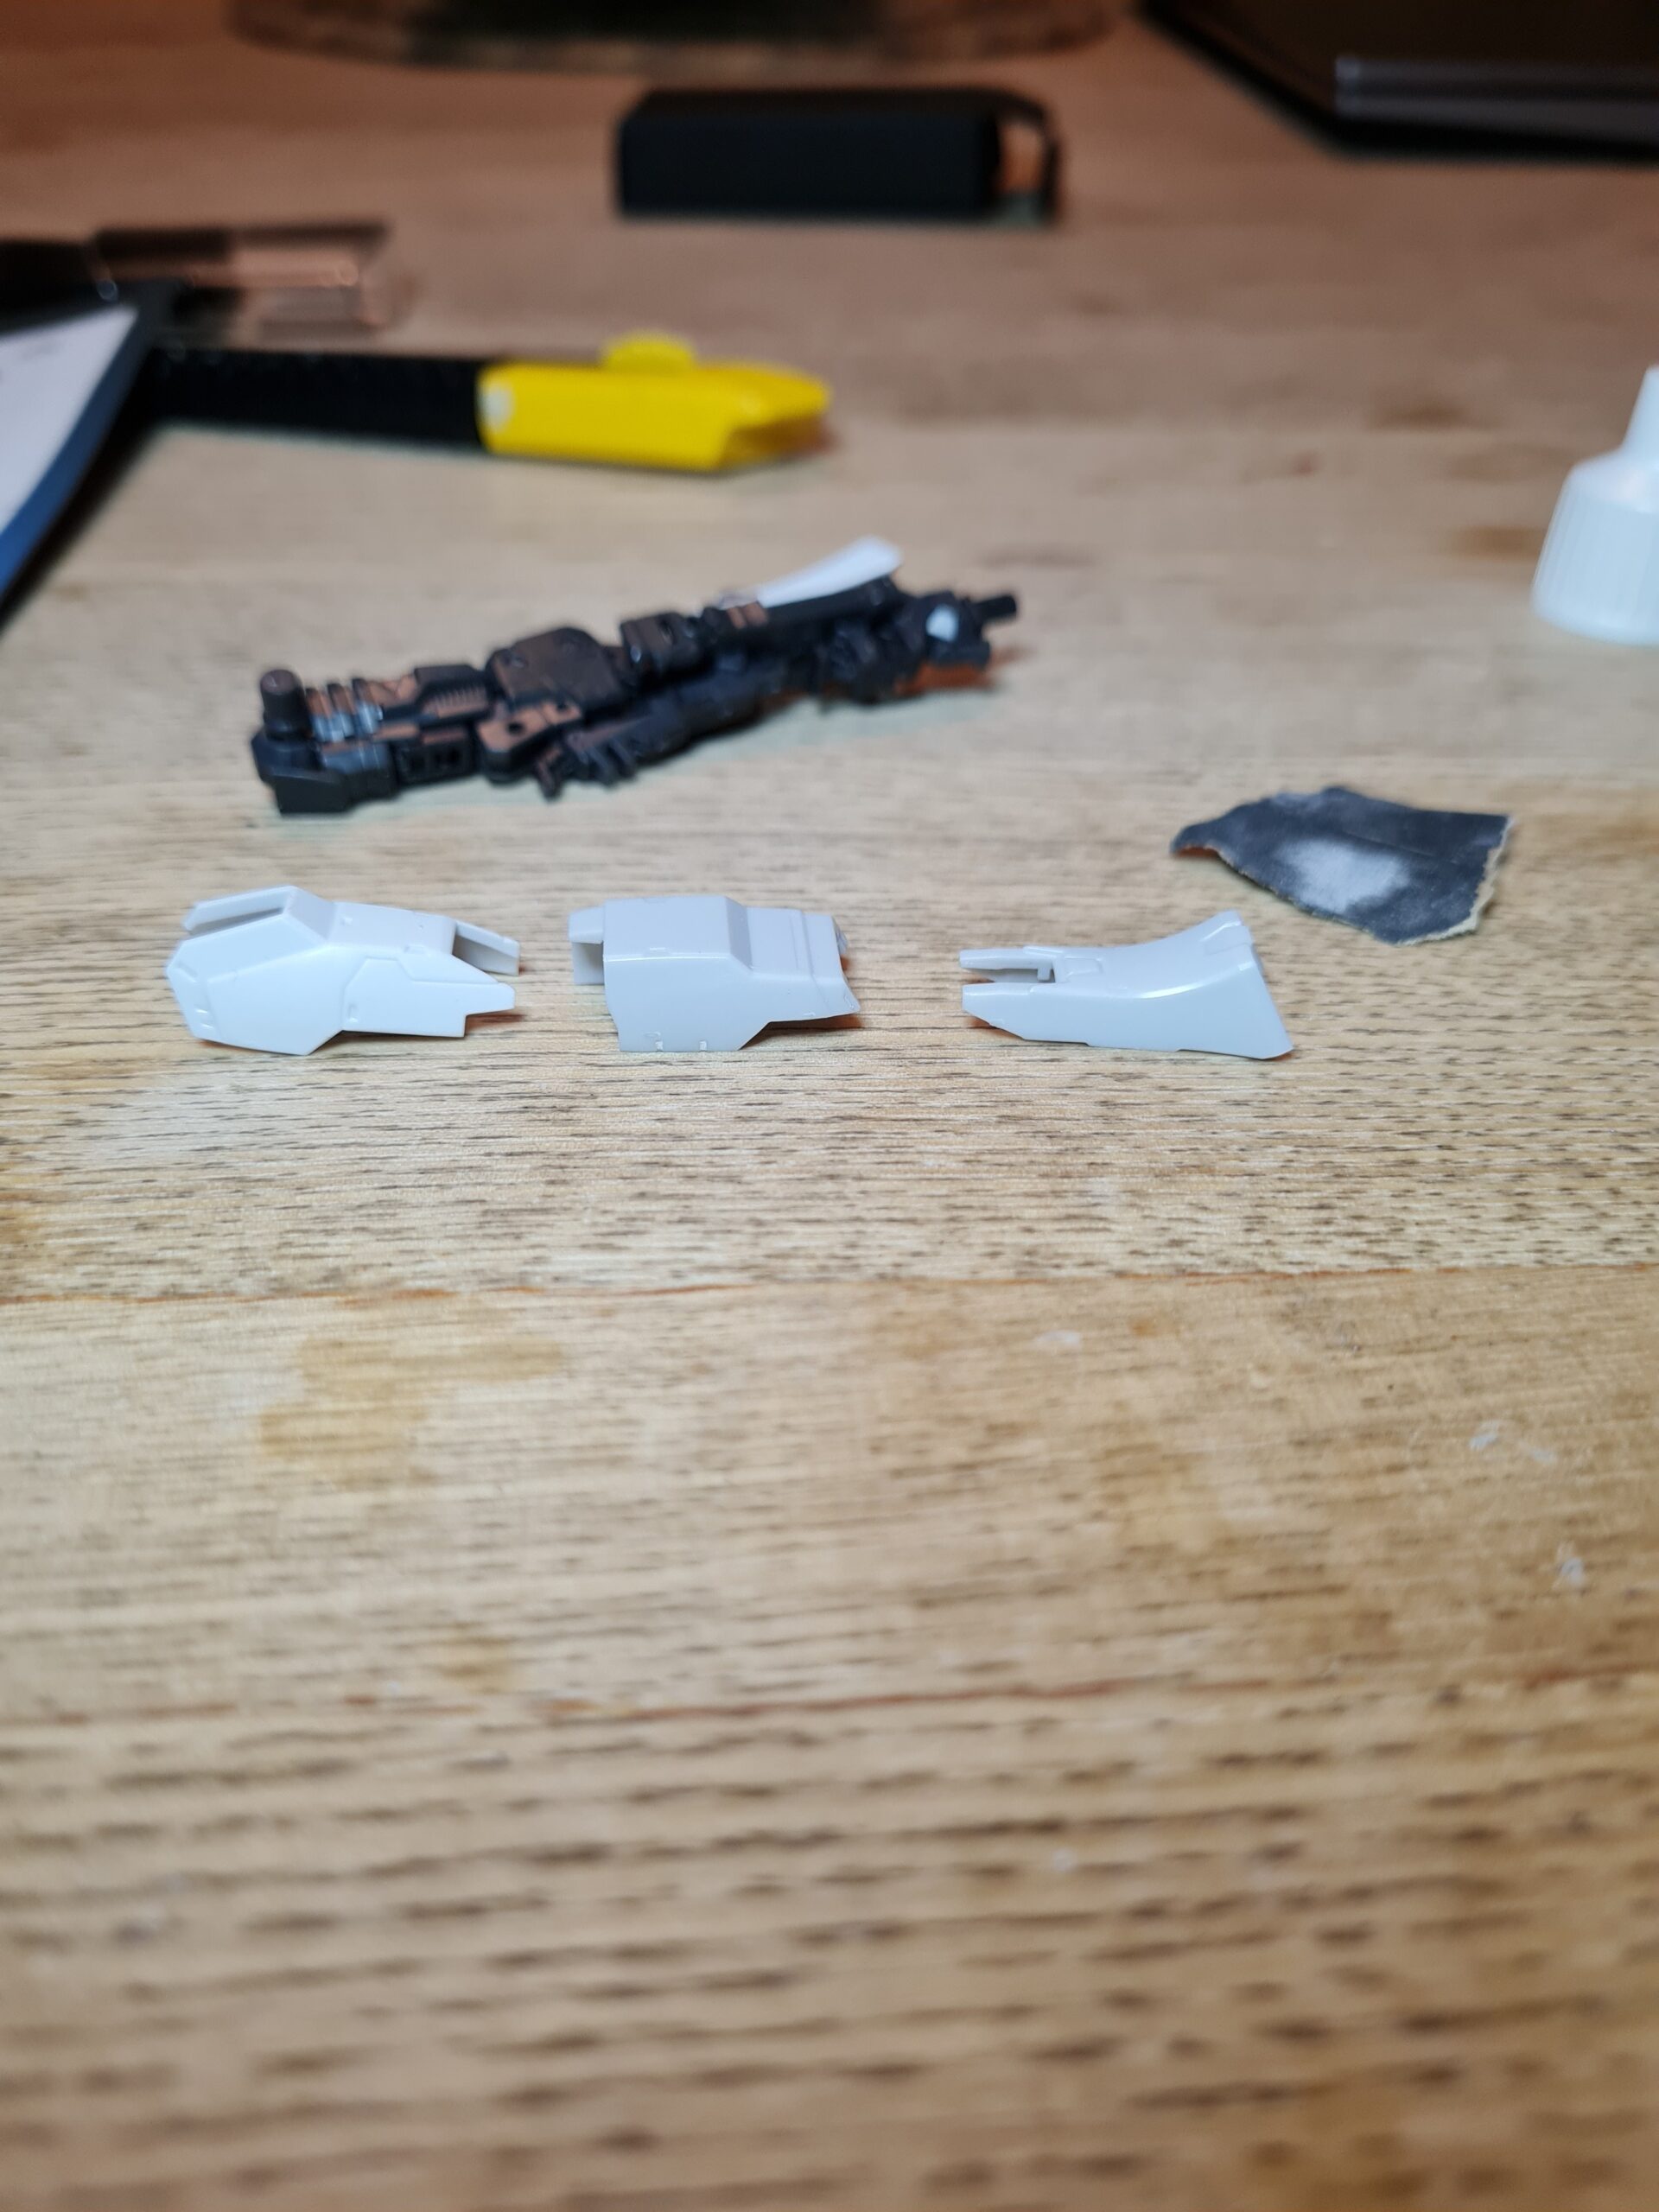
I have said it before in this build, and I’m sure I will say it again, but the armour on this build is an absolute pleasure to work with. The way the white parts clean up when you have that little bit extra time on them, they look really stunning.
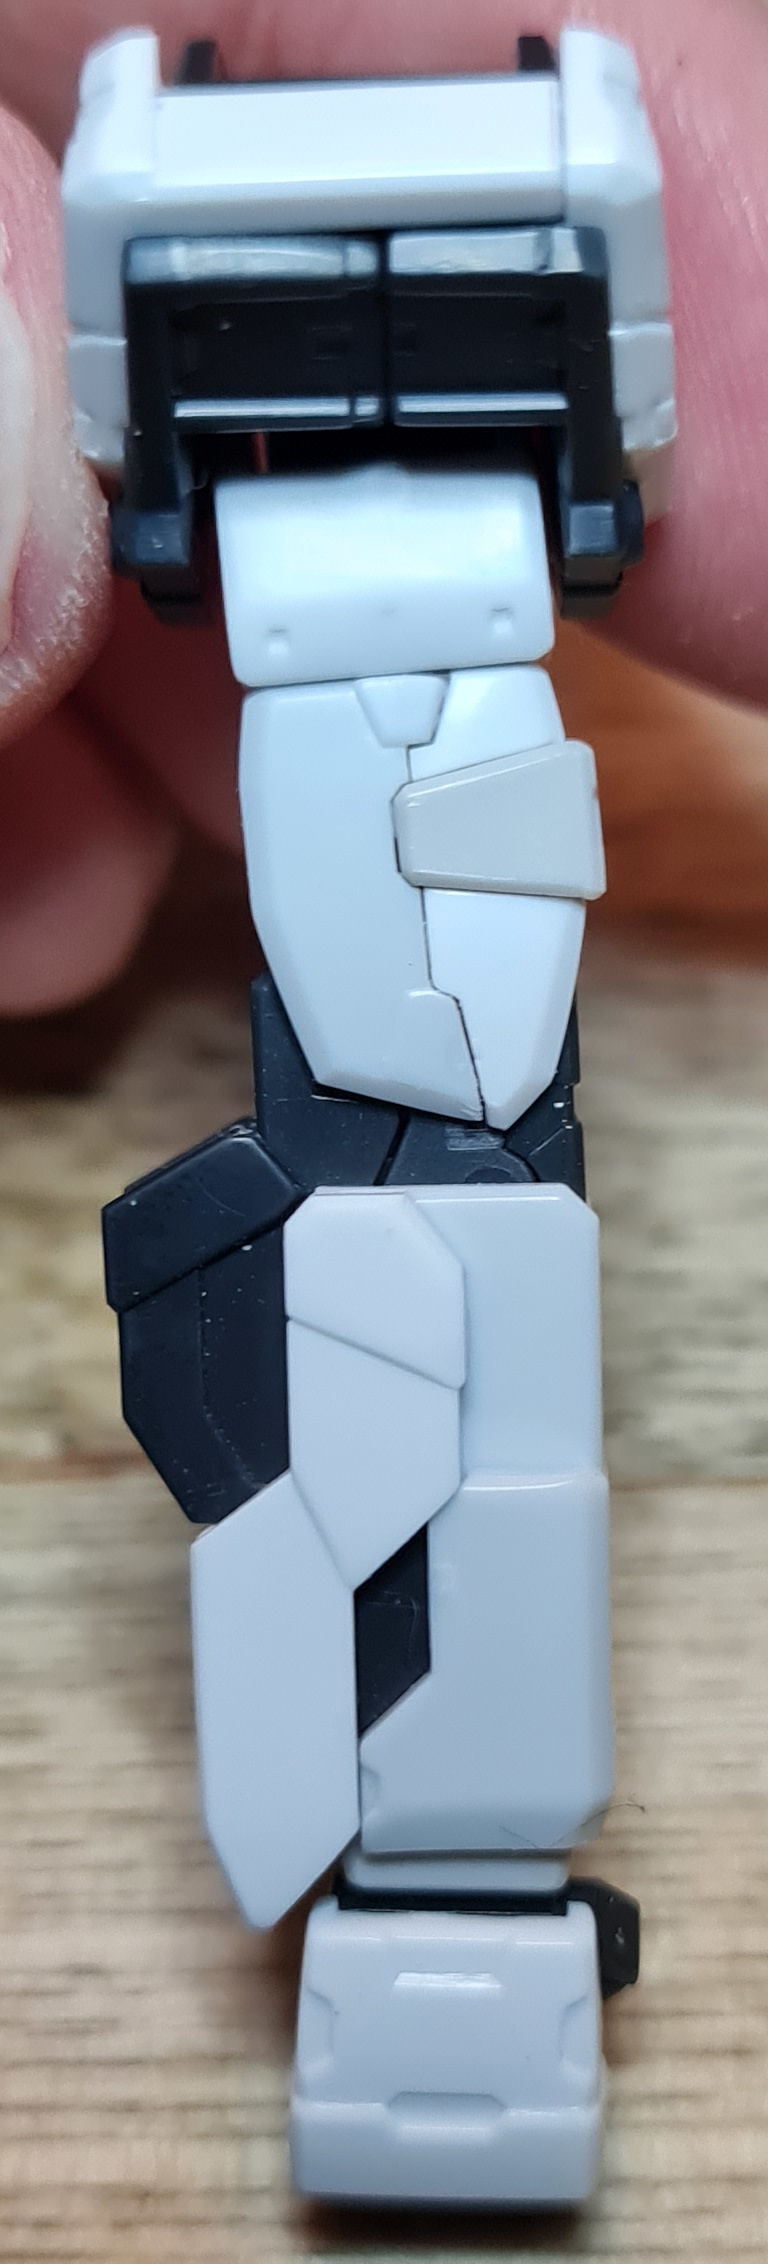
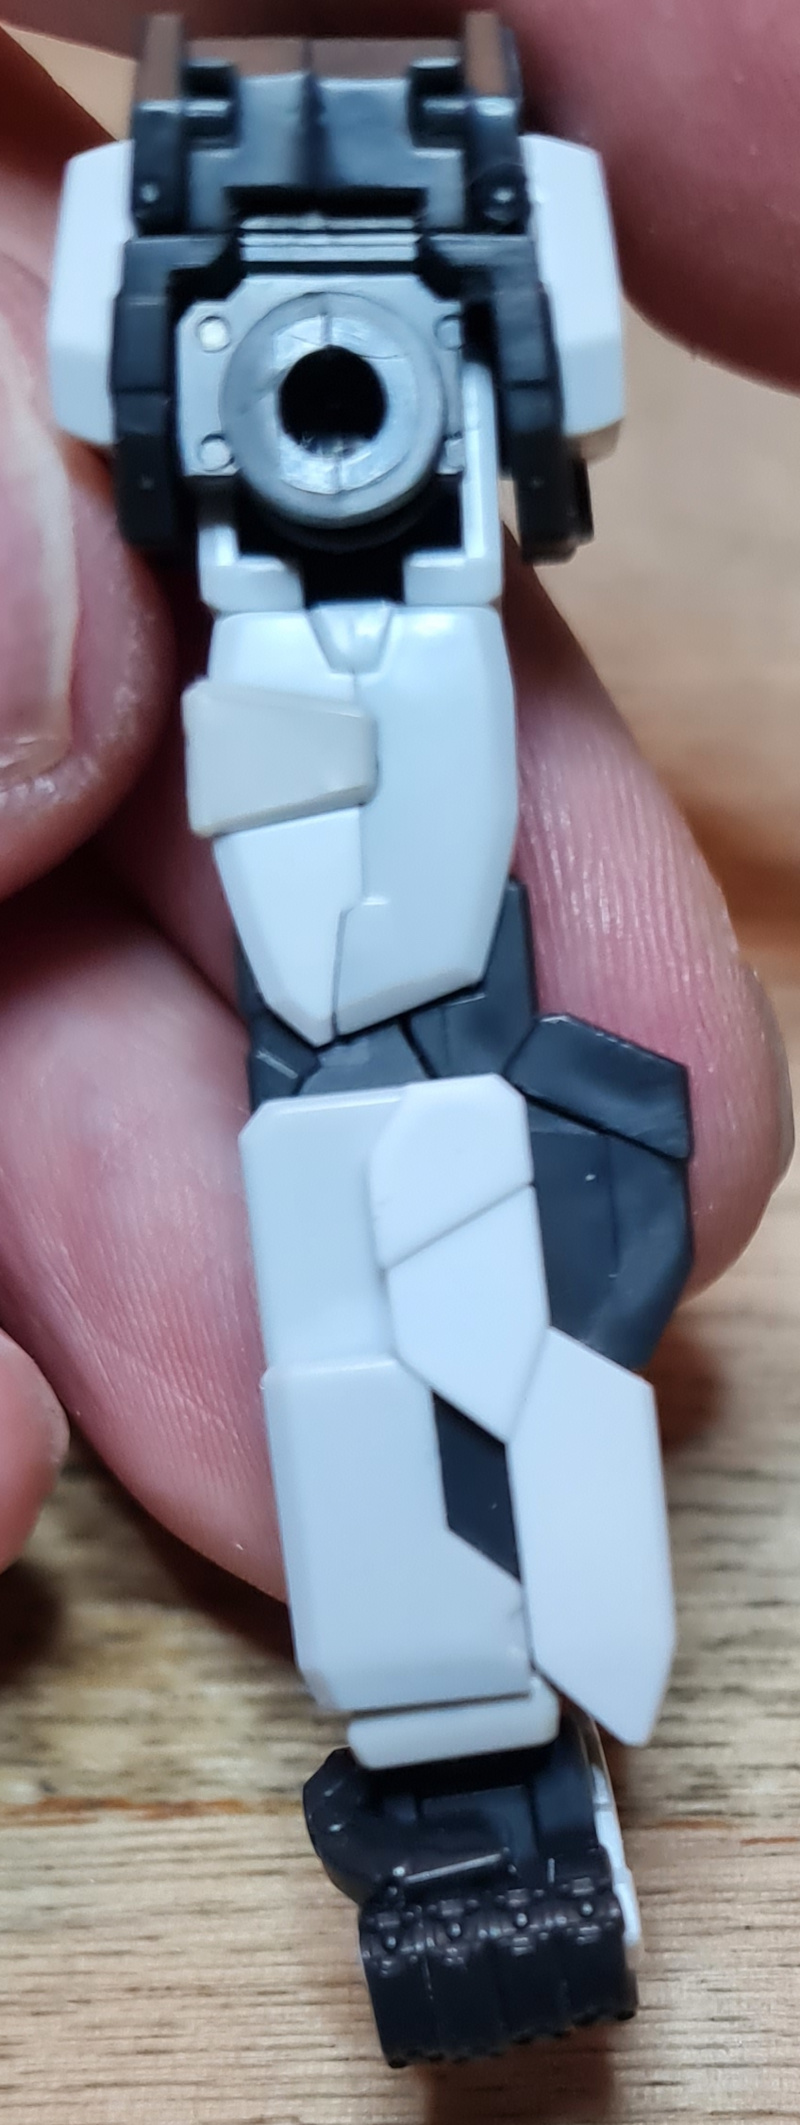
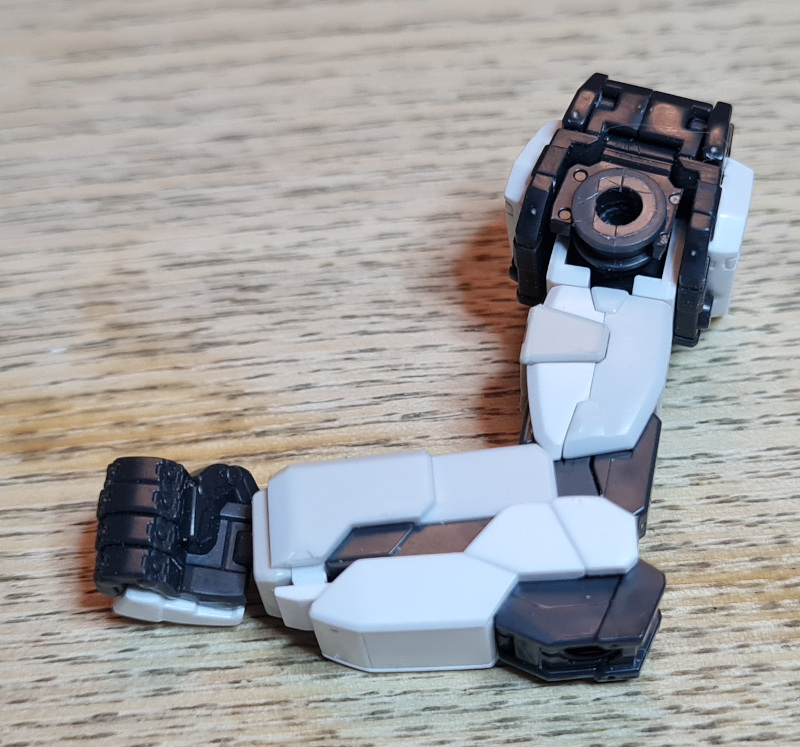
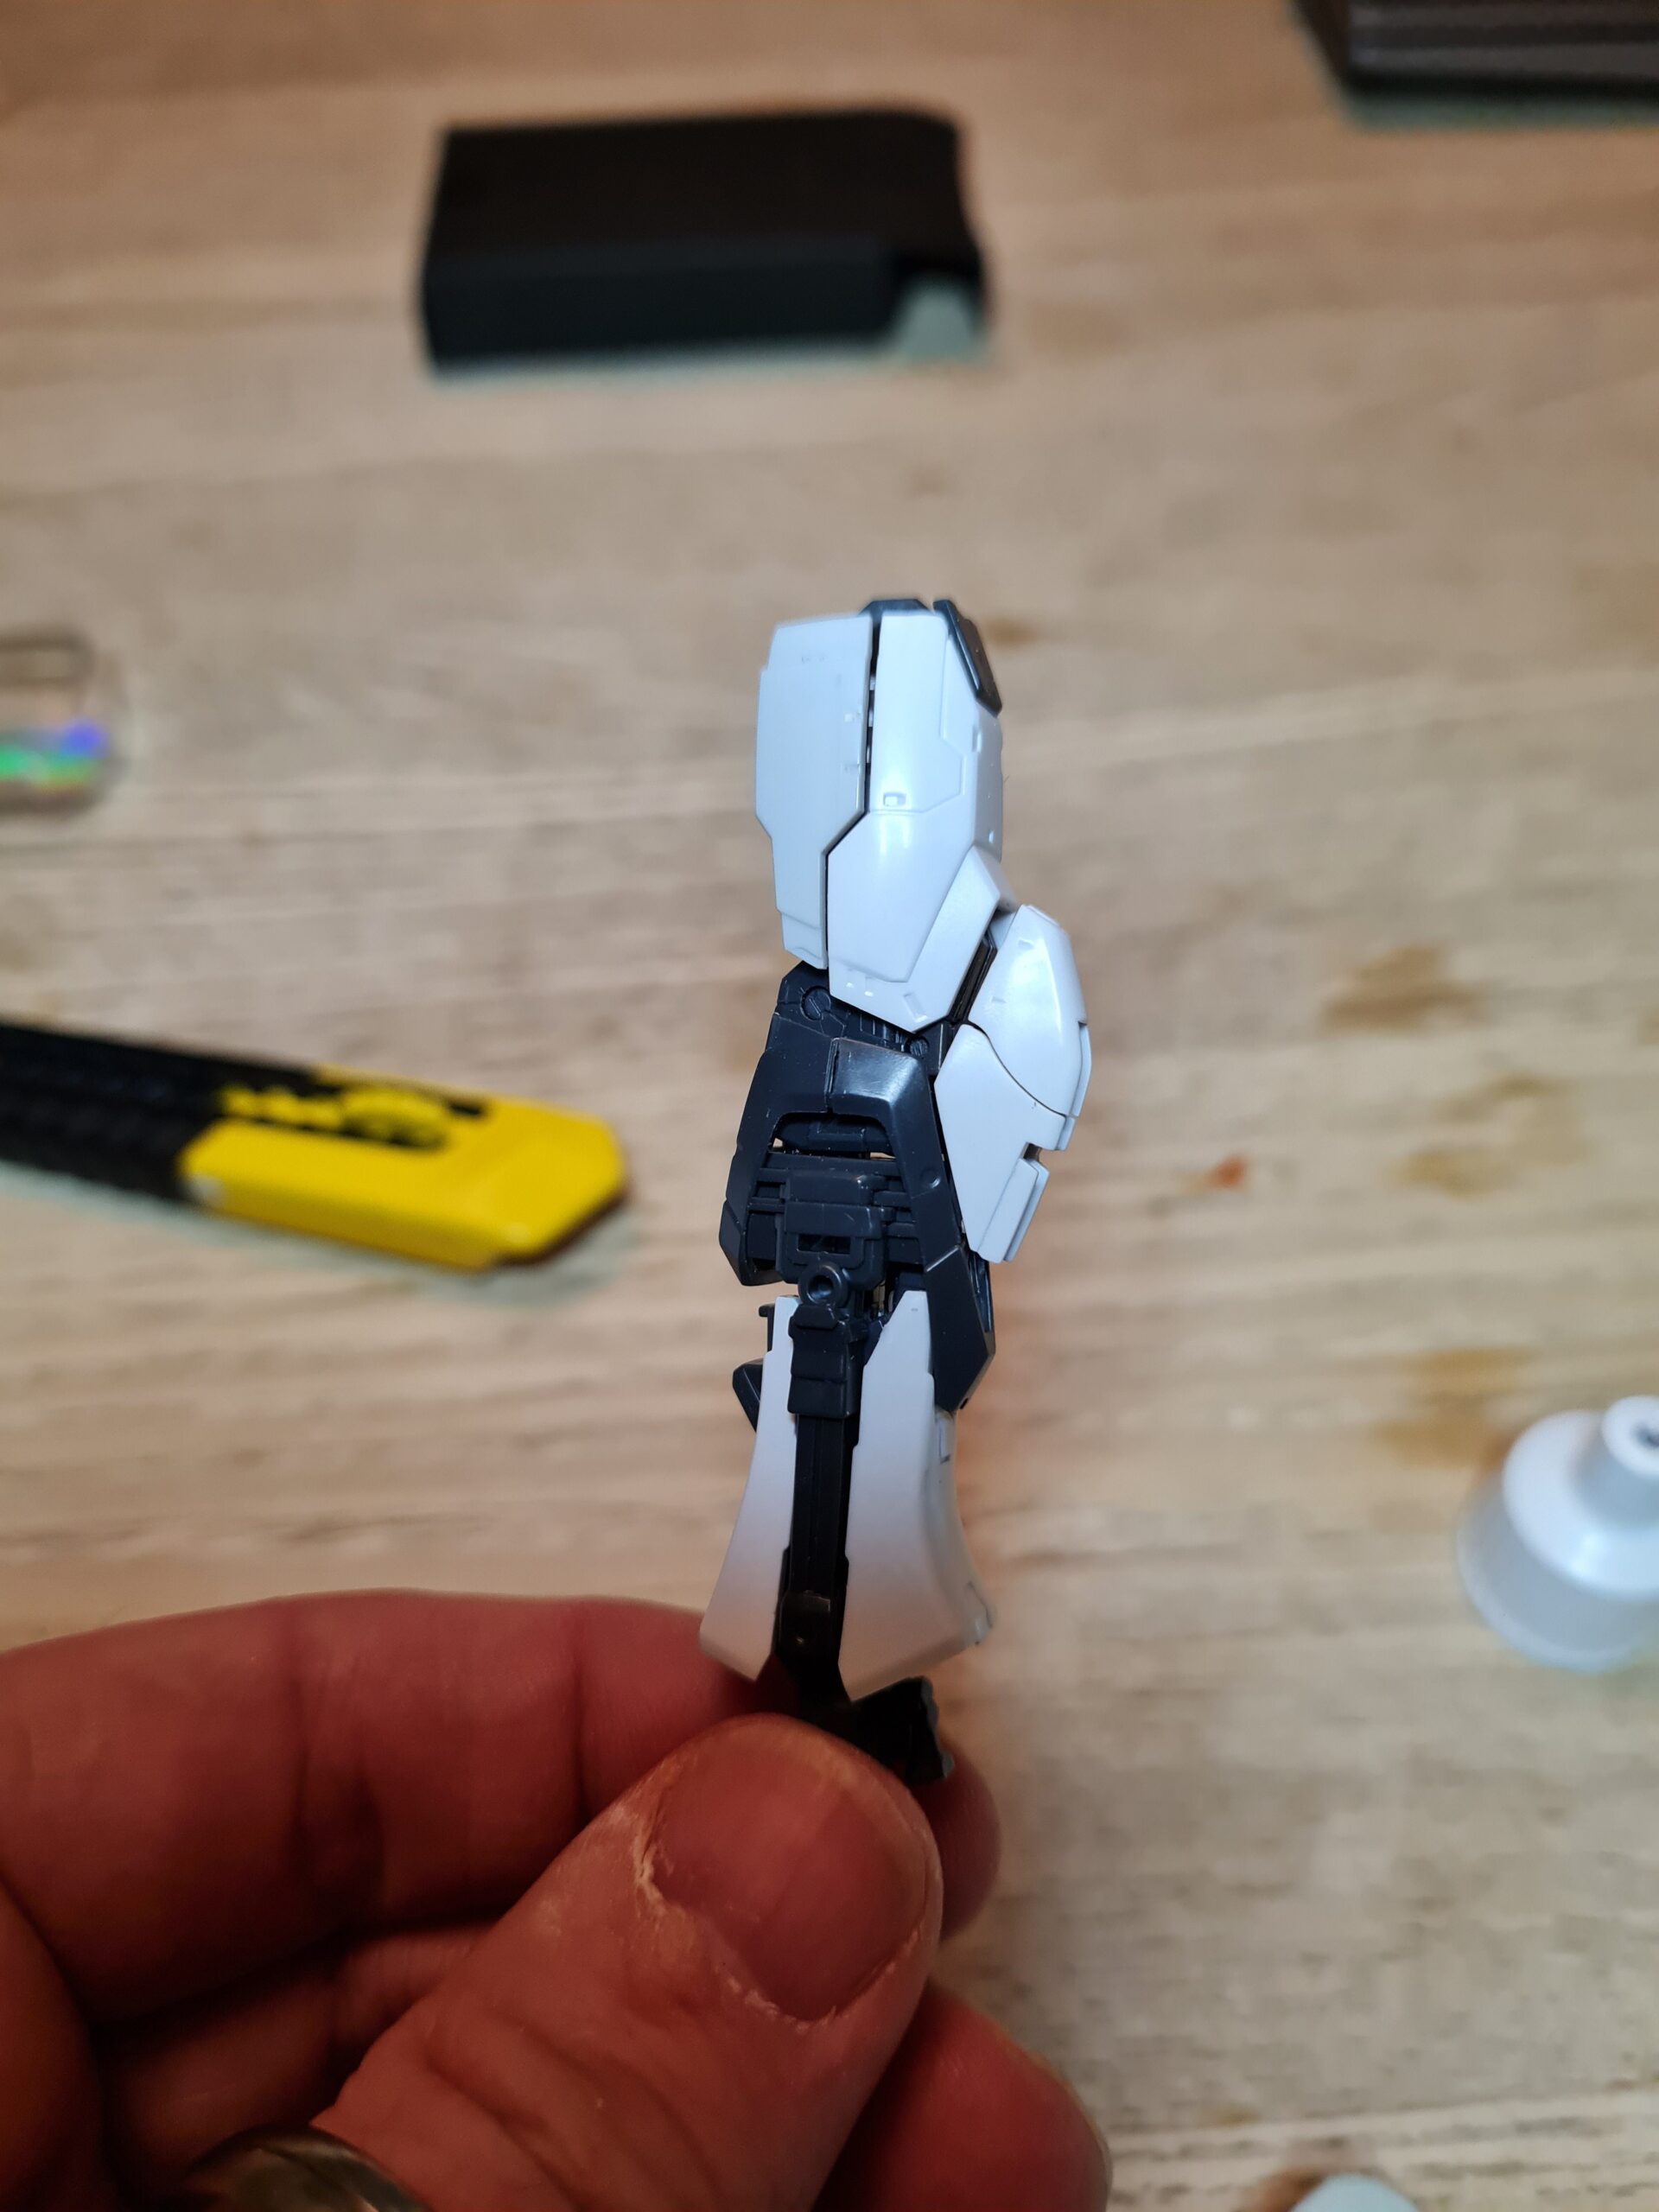
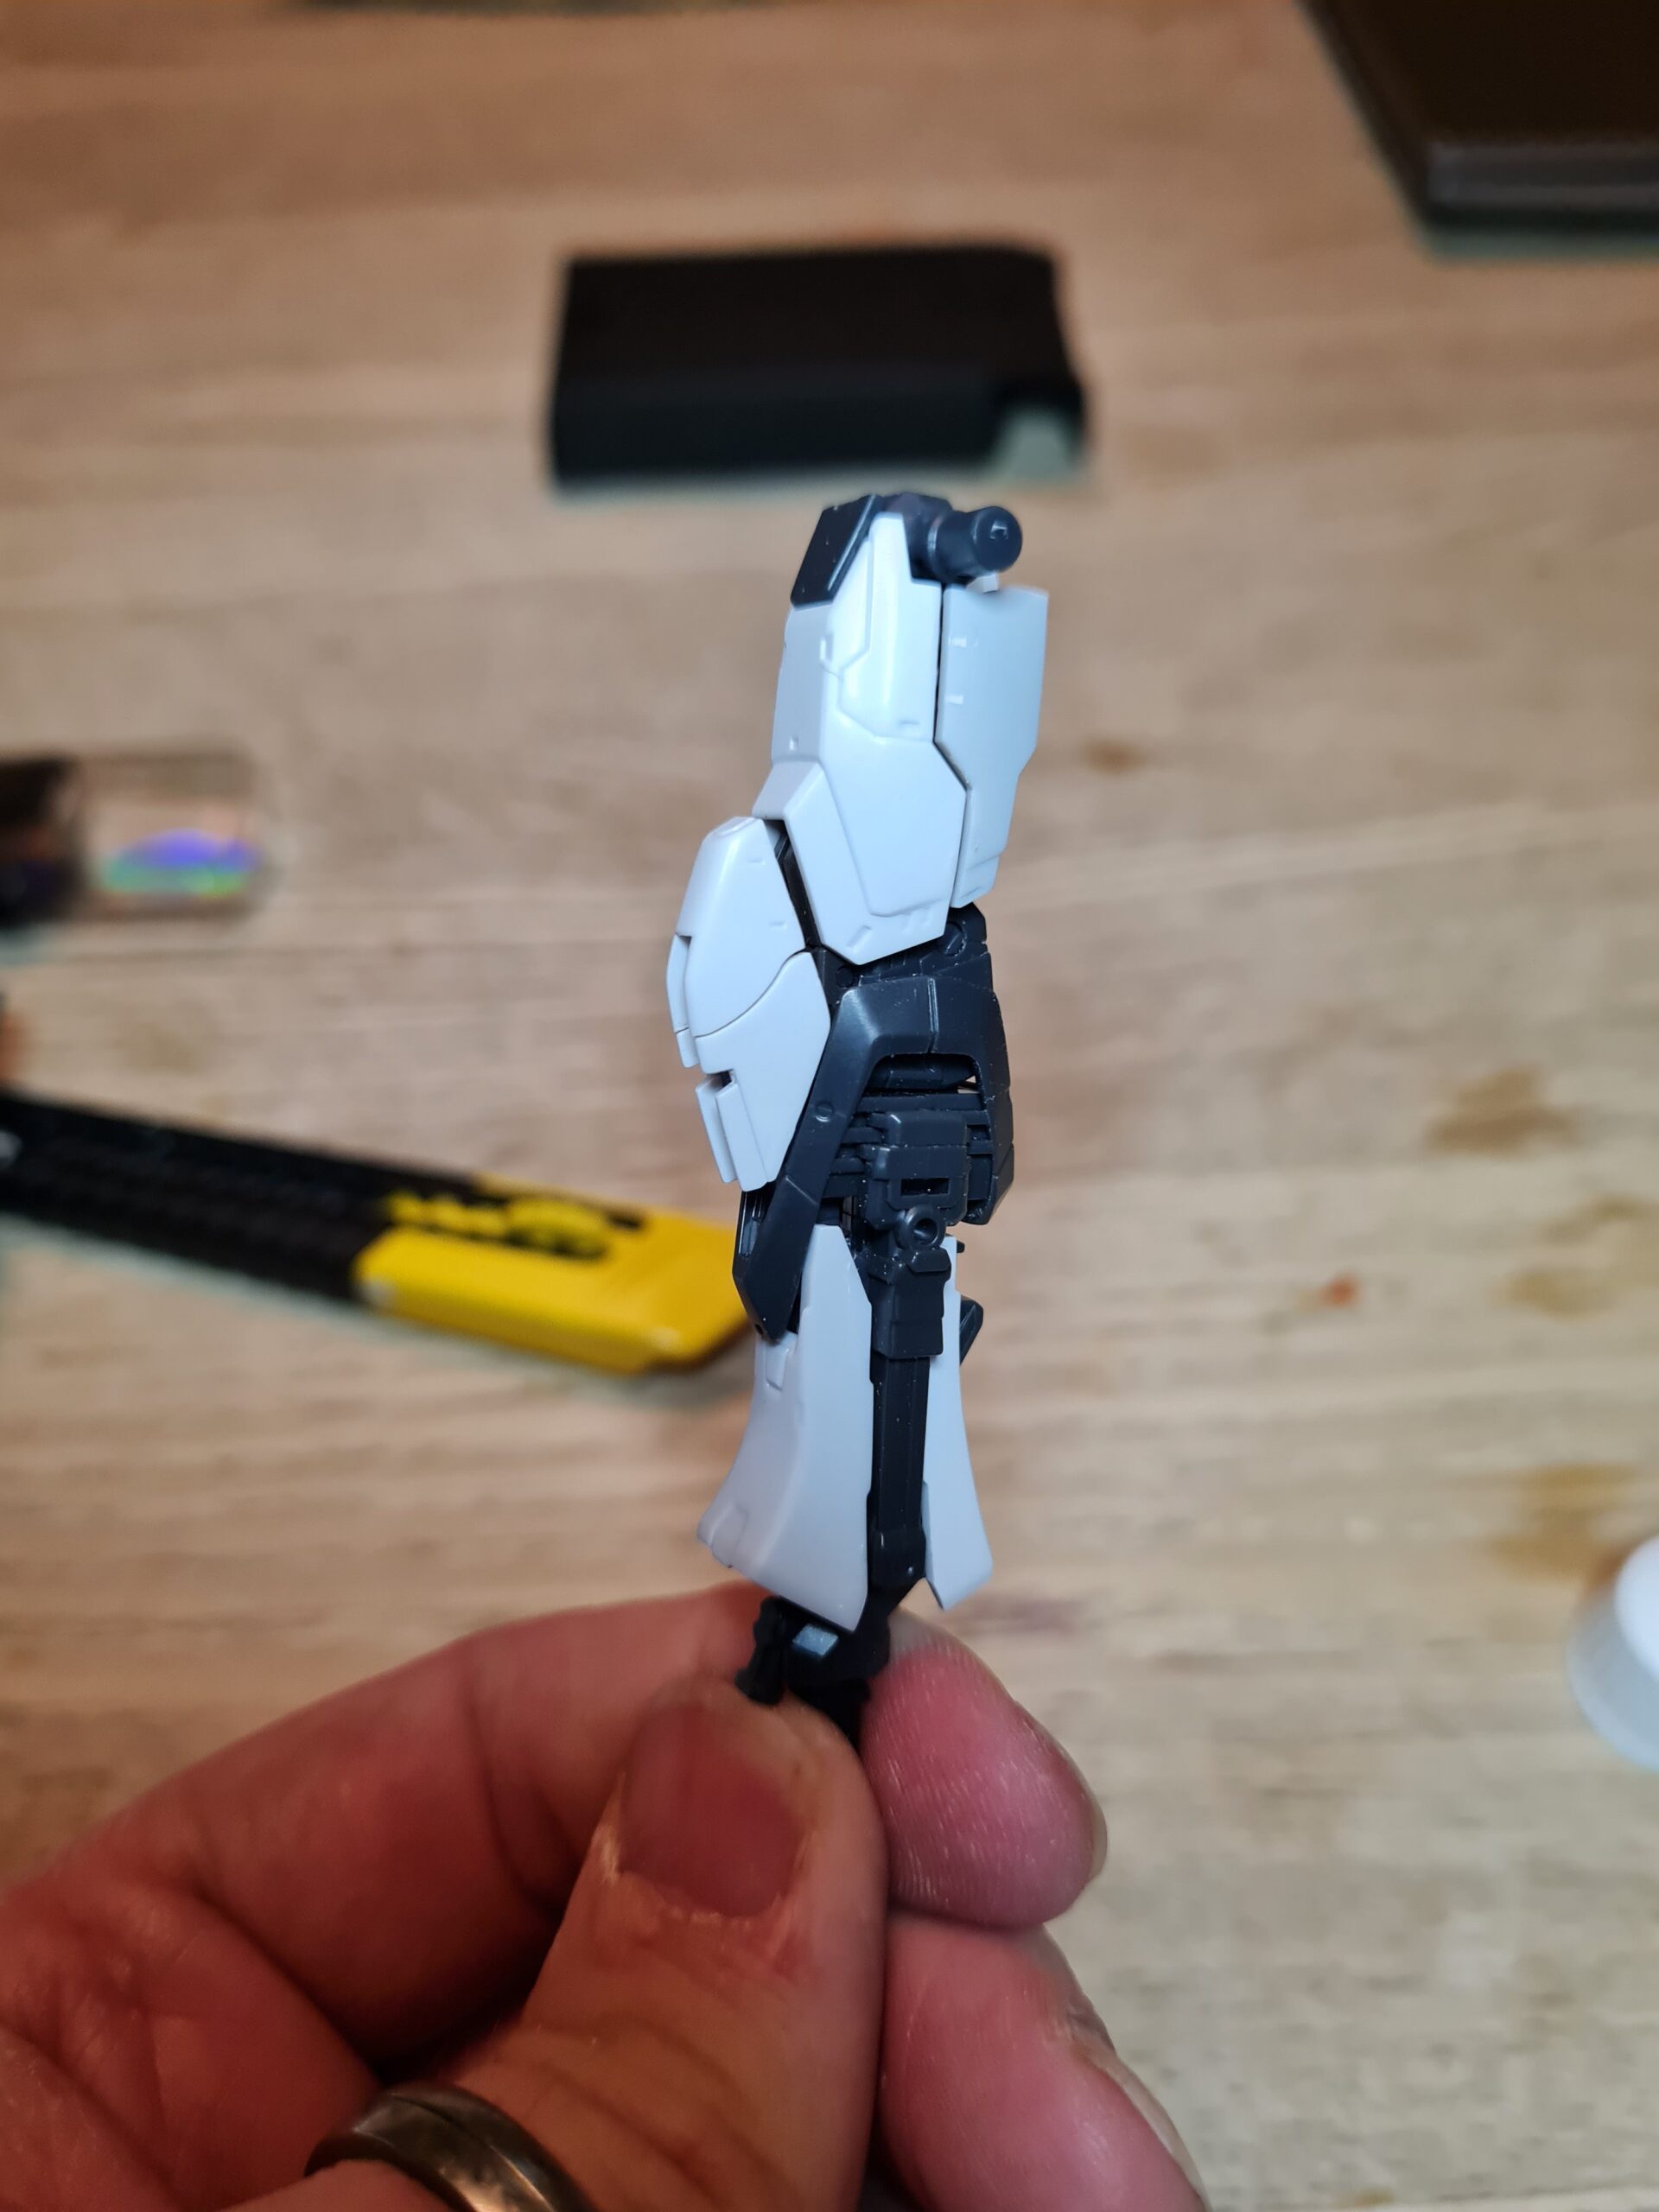
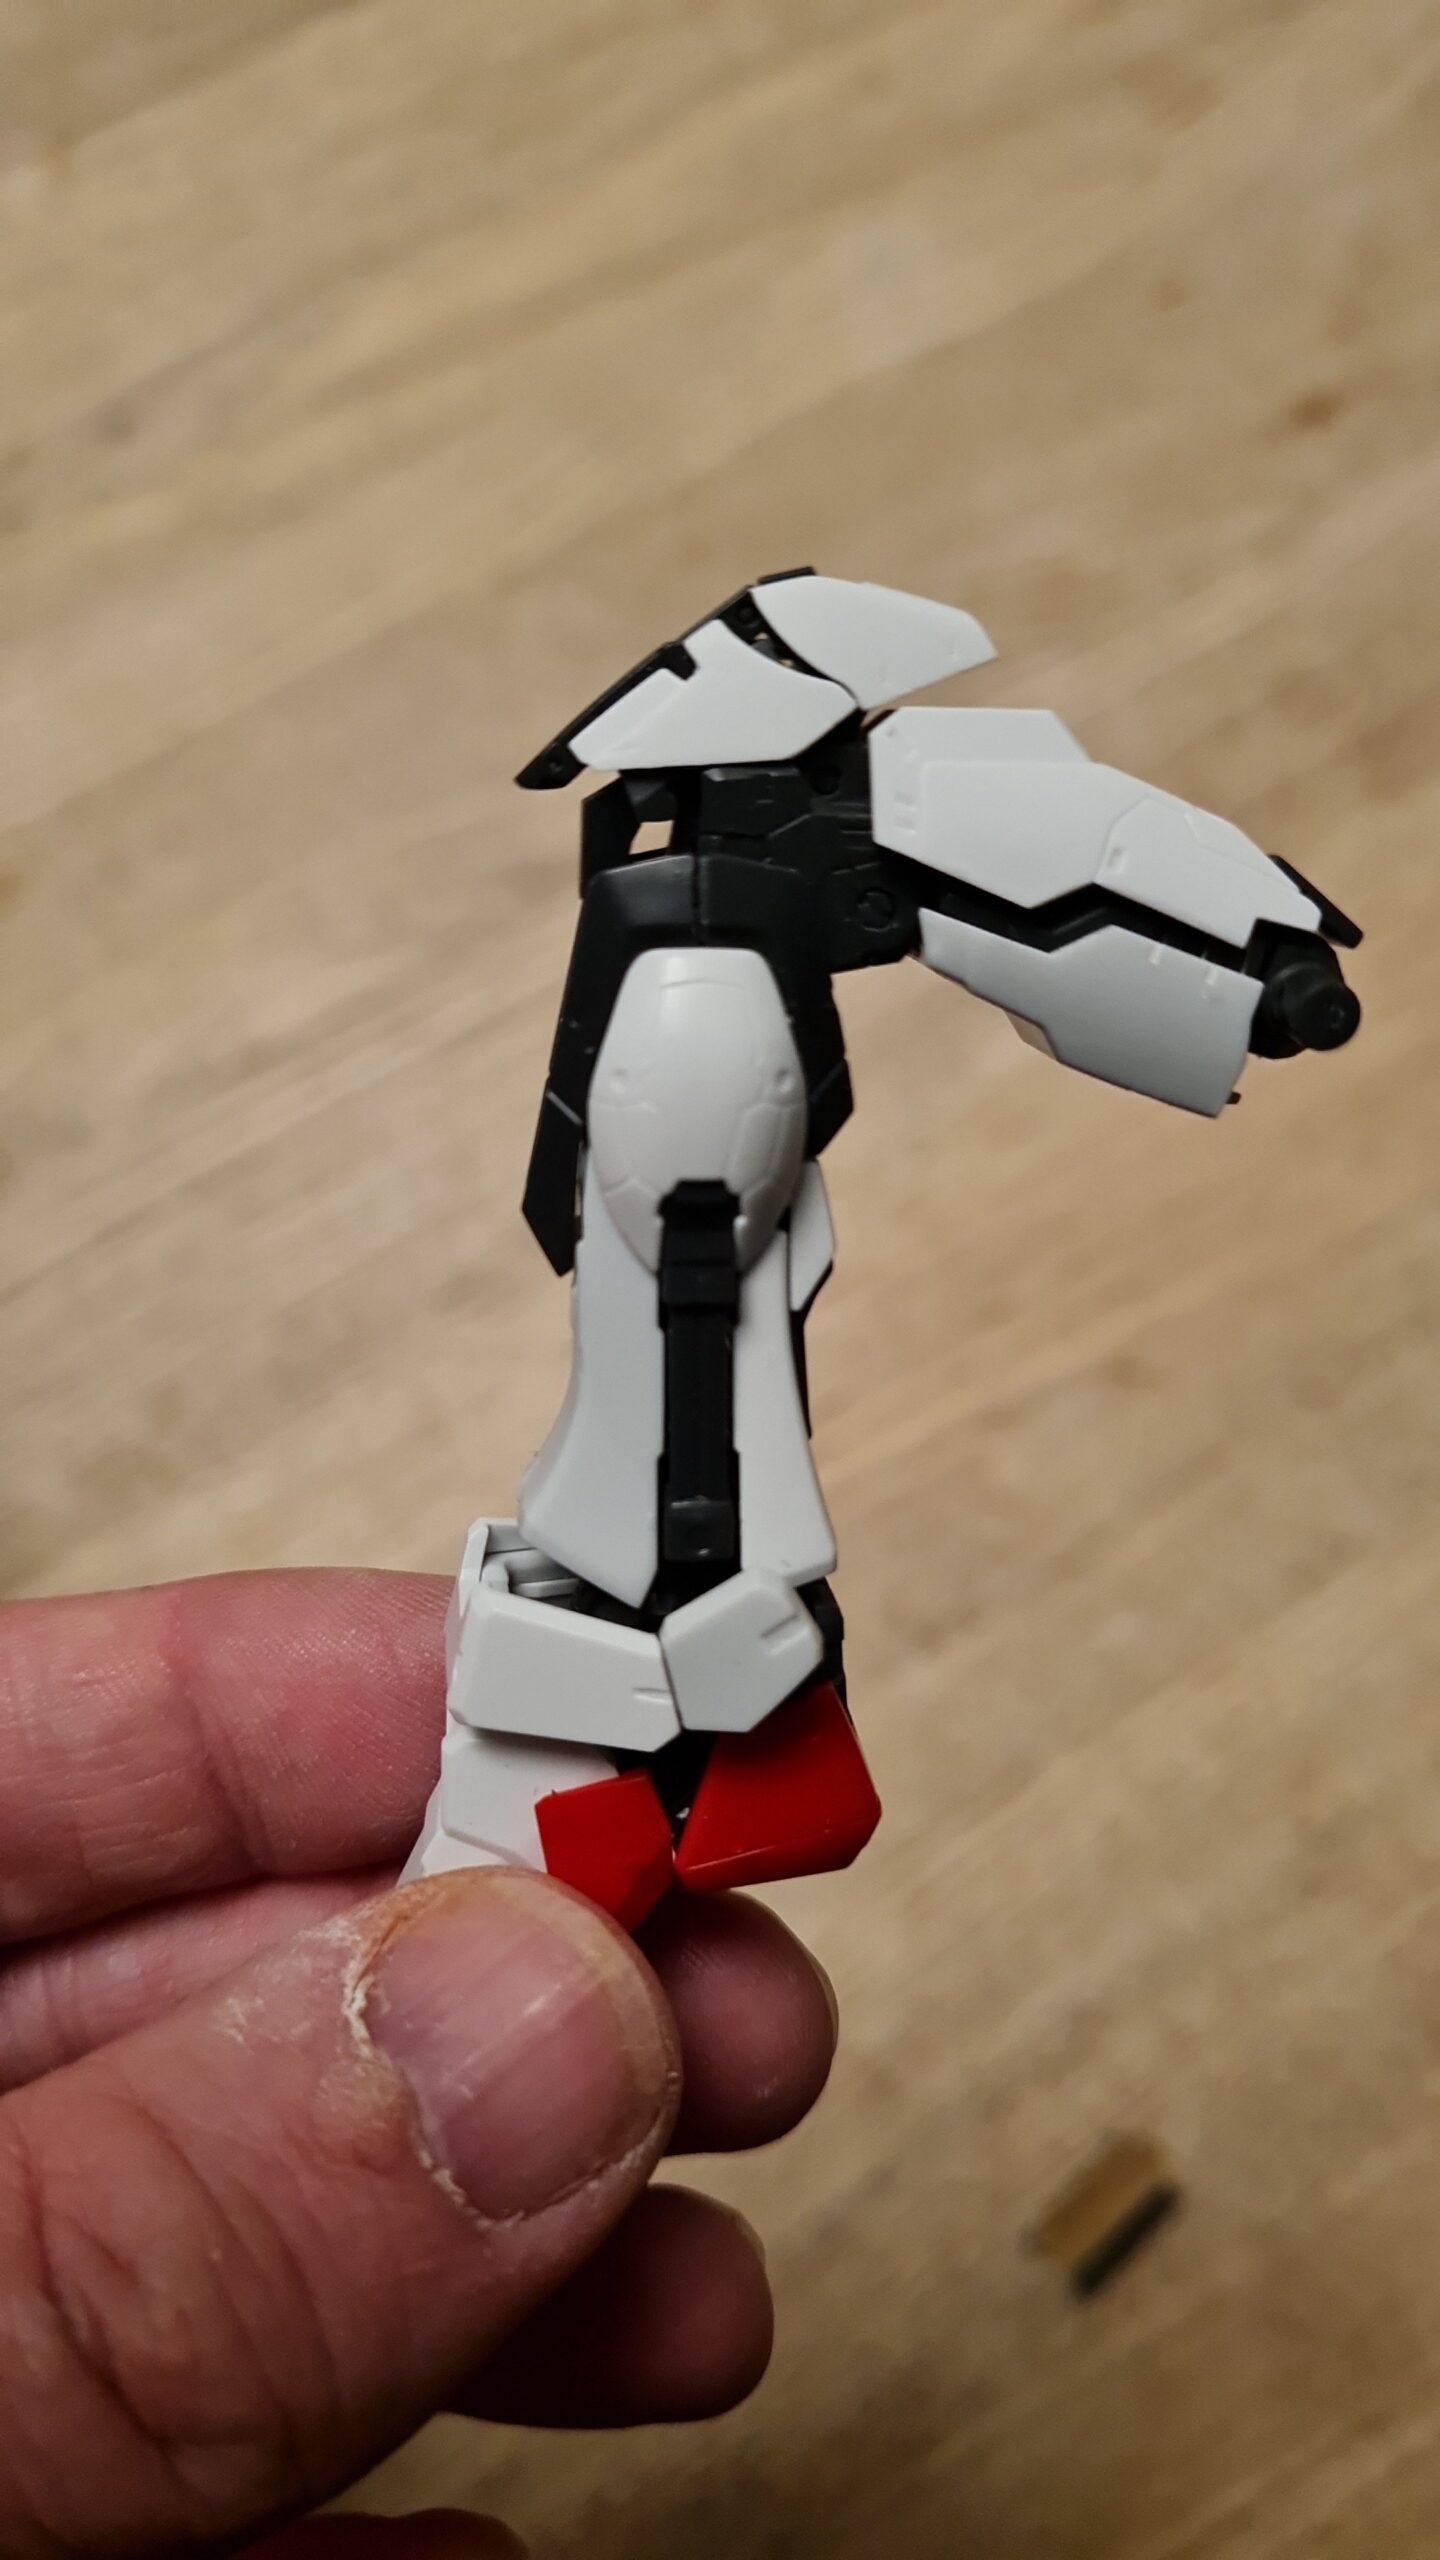
FrontSideRearInside
As can be seen in the pictures above, the arm, in my opinion has come out really cleanly.
Articulation
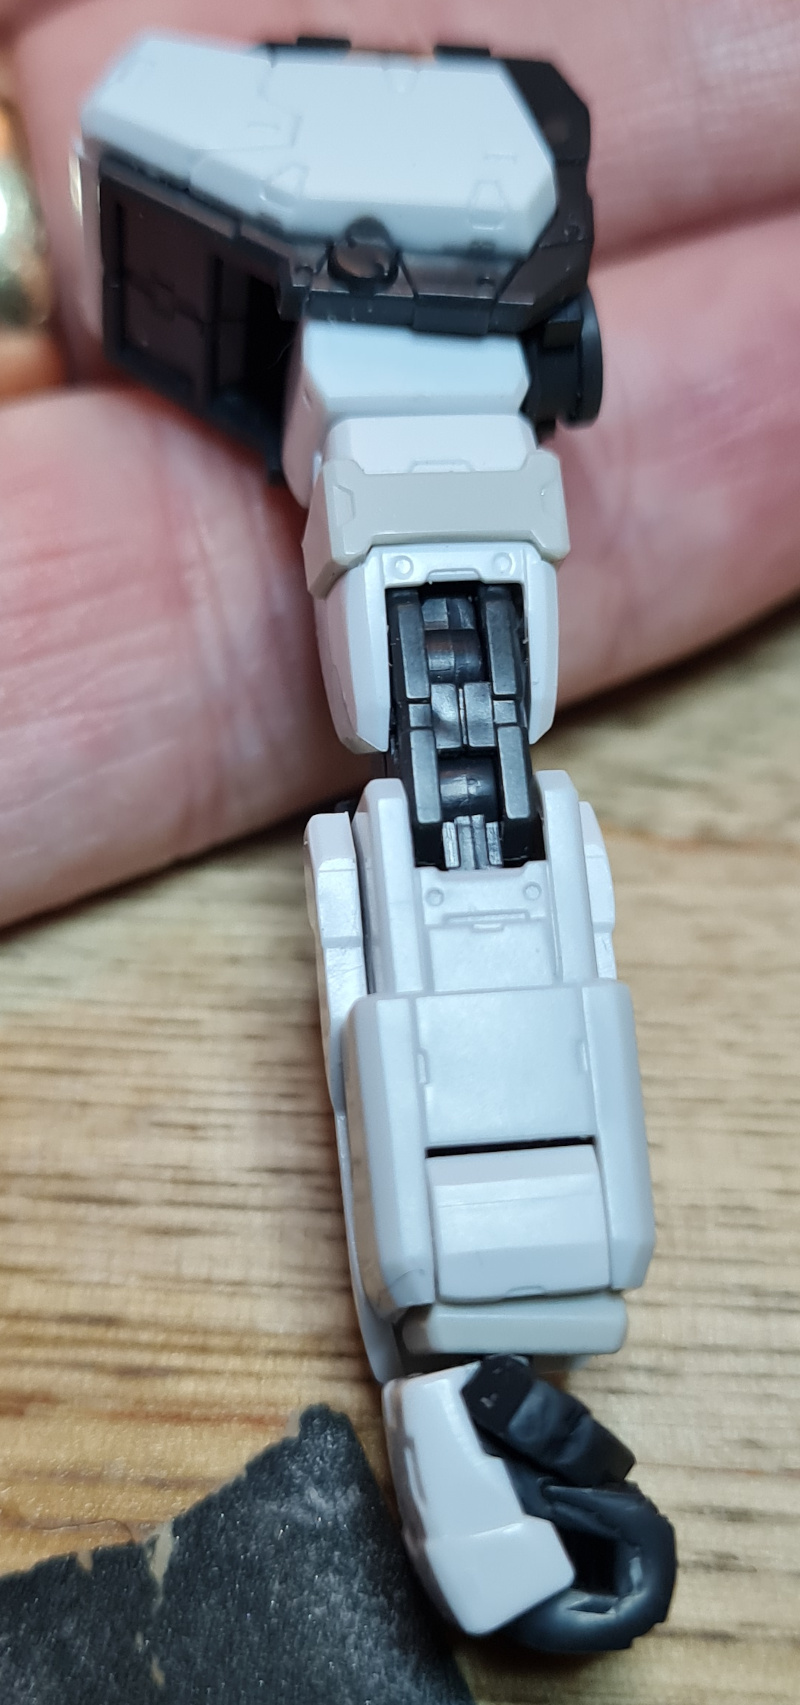
The other main thing on these parts, after how stunning and detailed they are, is the articulation you get with these pieces.
Inside Arm
Outside Arm
As can be seen in the images above, the arm has solid articulation as well. Bending nicely, allowing for various poses.
Conclusion
So in summary. So far I have the legs, waist and an arm. However, there is not a piece in there at the moment that I am not happy with. The build has been really smooth and enjoyable so far. Apart from me wanting to examine by technique on removing the grey pieces from the sprues, I am super happy with this. I definitely think that extra bit of time, and making use of the GUNPRIMER Balancers really does make it shine.
Thank you for taking the time to read this. If you haven’t already done so please like and follow us on our social media platforms and checkout our website!
Ok I admit I didn’t do any building last night. I had so many things on it just got skipped. So this is a mini intermission between the build parts.
Of course that leaves me with the question of what to do to fill the blog! Well thankfully I had a little something in my back pocket.
So I have been trying to work out how to take better photos of my kits. Again, I feel there are going to be a lot more posts on this topic as I learn more.
So before I leap in to what I was playing with let me show you the starting picture.
Ok well after searching my hard drive and my network storage apparently I didn’t keep my original image.
So lesson number 1: Remember to keep the original image!
I will, however, try and describe it.
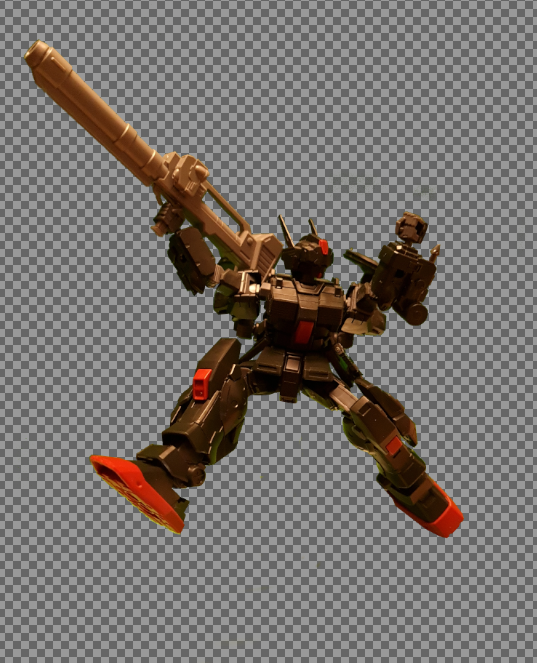
I posed by RX80-BR figure on one of my stands in front of a green screen. Then I took some pictures. After moving them to the laptop I proceeded to open them up in GIMP and choose what I wanted to work with. After filtering through the images I picked my favourite and got to work.
First I had to set up an alpha channel. Then I used the colour select to select the green and remove a load of it. This highlighted lesson number 2. Lighting is all important. Without good lighting making everything consistent you end up with different shades and bits and pieces of green left. I then moved onto my second tool of choice. I zoomed in and proceeded to use the multi select tool to trace the edges and remove any colour too close to the model.
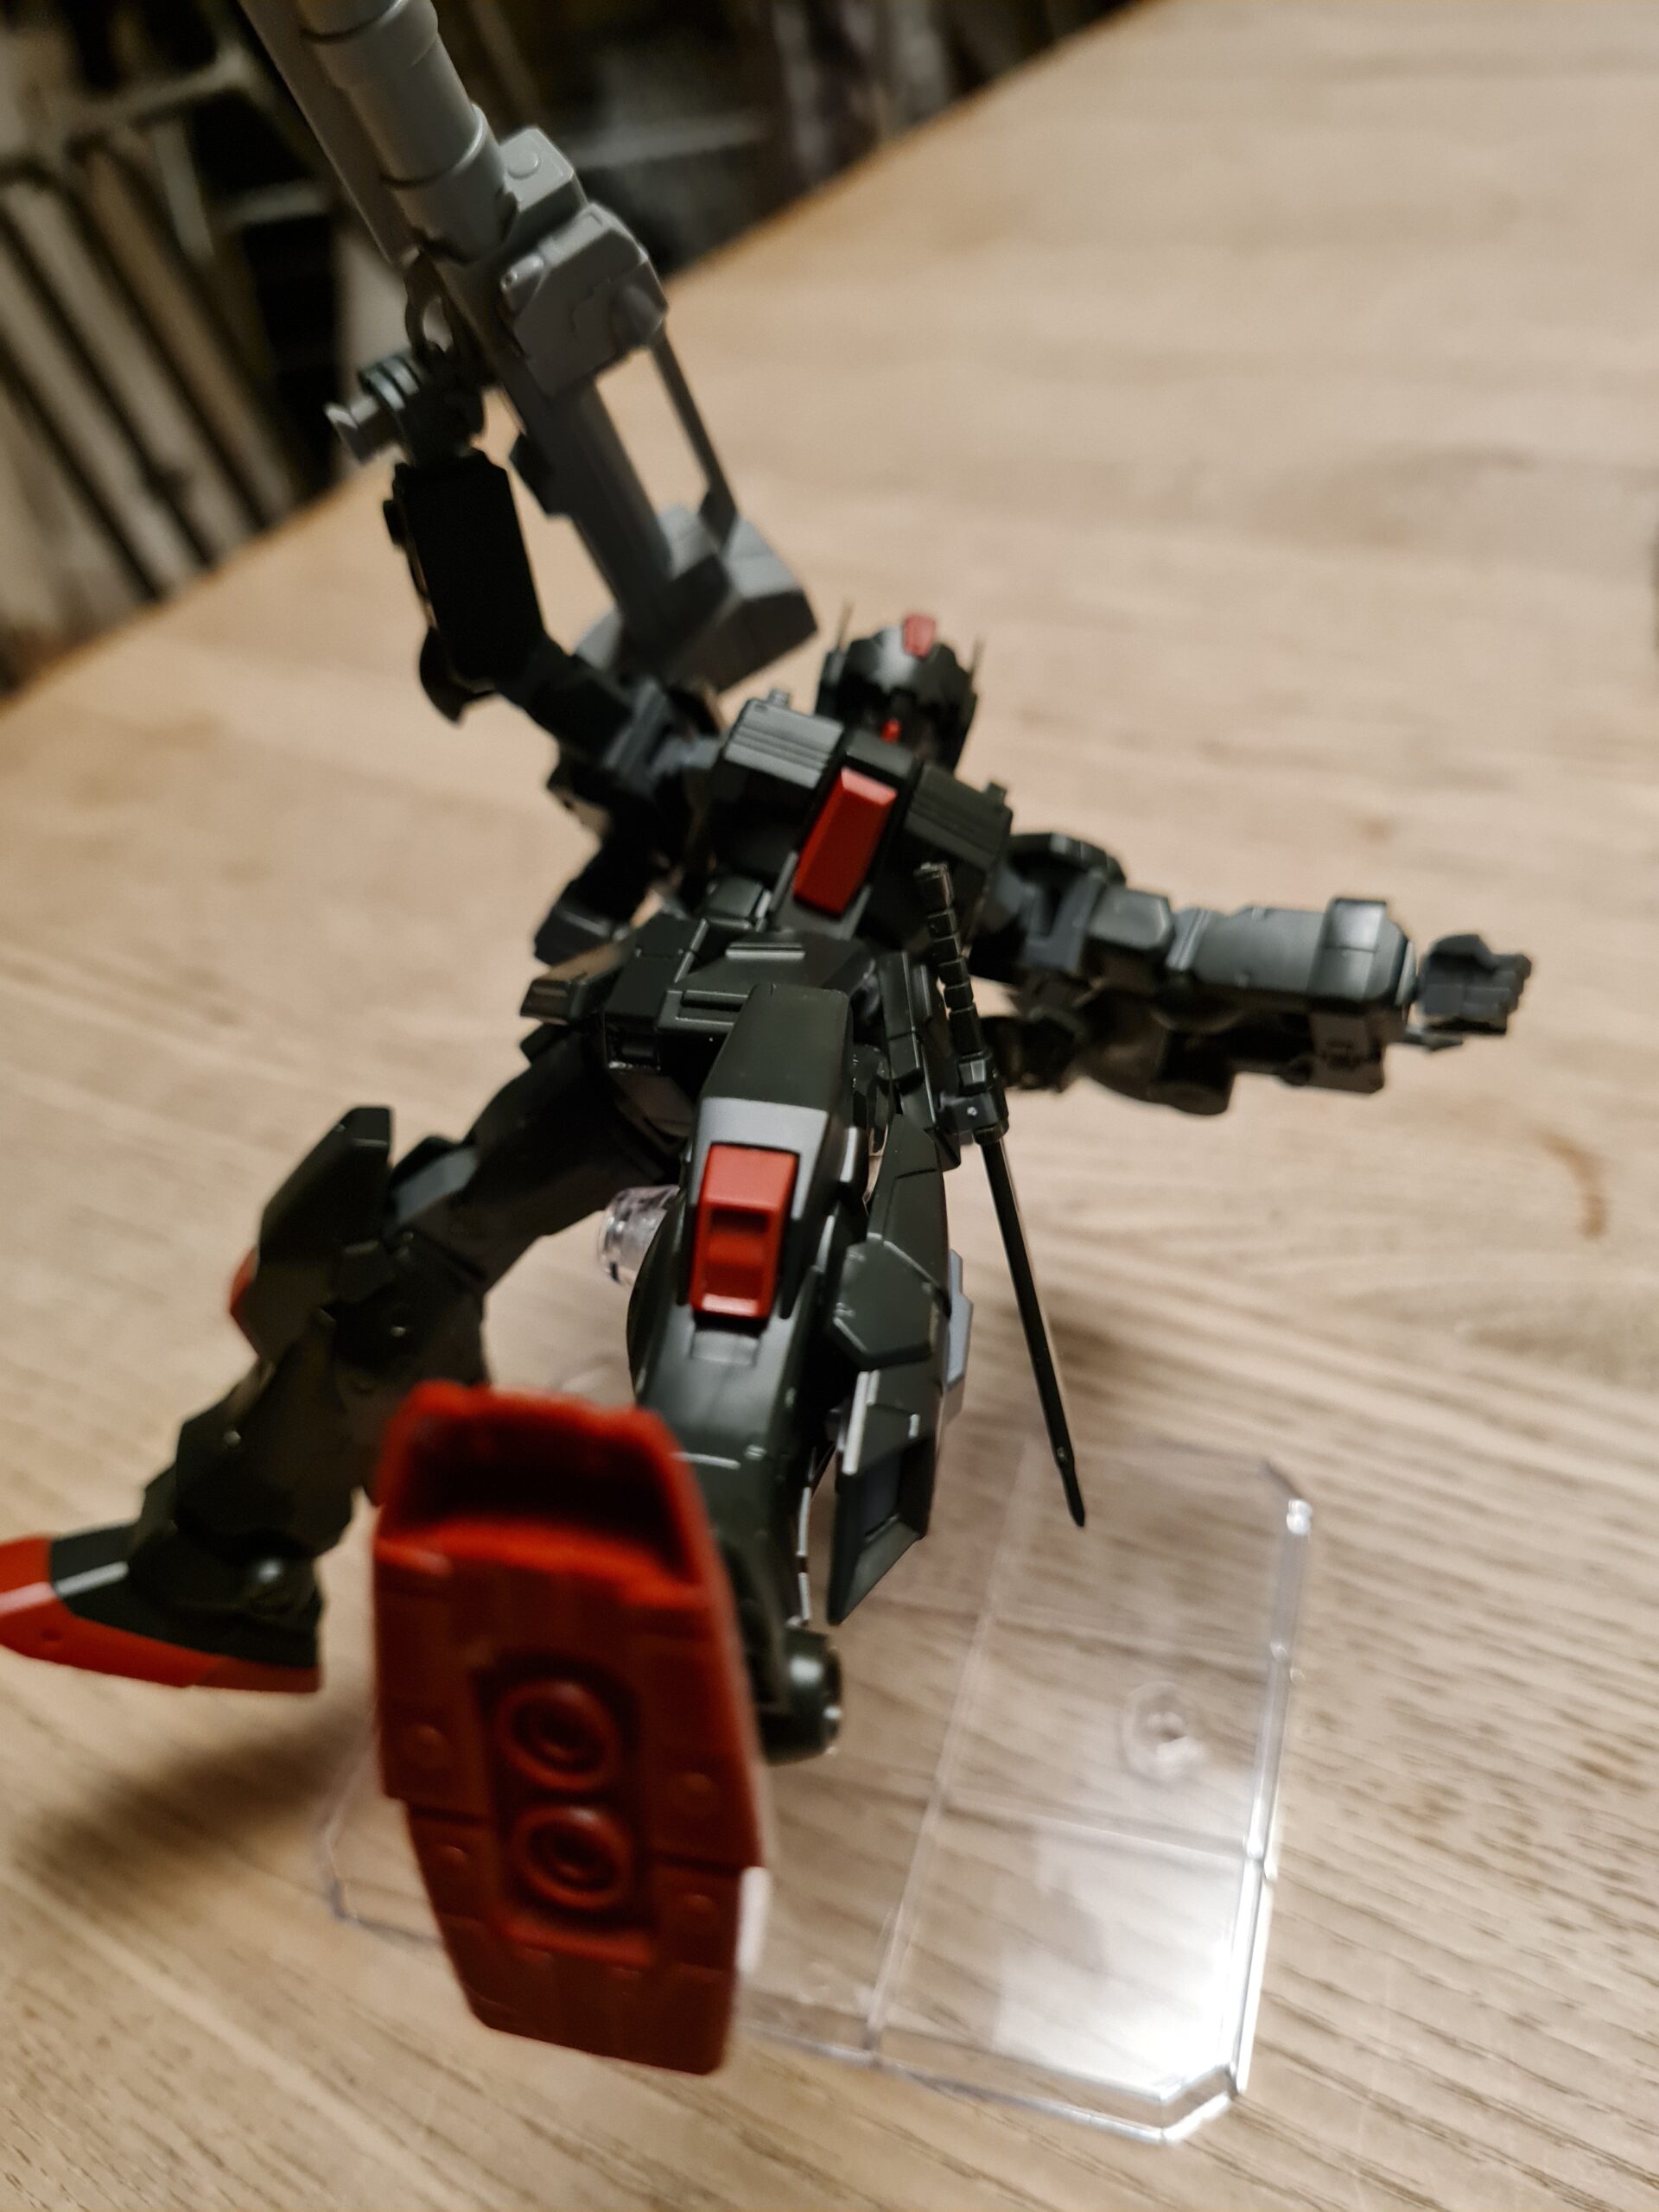
After an hour or twos work I finally had something I could work with … wait I may be able to show you …
No Background!
This brings me to lesson number 3. Always do things in layers, that way you can add and remove them from the view, or even junk them and start again if needed.
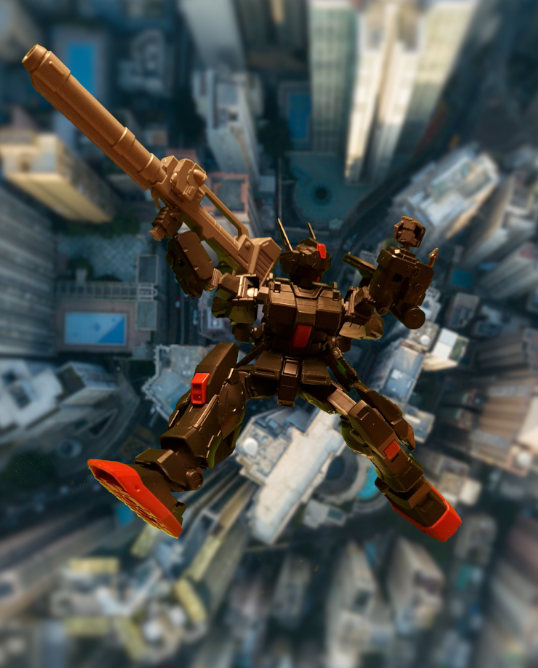
My final step was to select a background and add a blur to it. This gave me the final image which looks like this.
Falling HG
For a first attempt I was quite happy with this. I think it is something that I would enjoy working on improving, and coming up with more ideas for.
If you would like me to do a post in more detail on the GIMP steps I used, and the whole process let me know. I can do a step by step guide for beginners (like me).
Thank you for taking the time to read this. If you haven’t already done so please like and follow us on our social media platforms and checkout our website!
Welcome to “RG Aile Strike Build Day 4” where I am building up an RG Aile strike model. If you haven’t read any of the other parts I would recommend going back to the start. You can find that here. In the first post I covered the box, runners and provide the manual.
If you want to skip that and just get up to speed. I had in previous posts gone on about how nice I think the RG Aile strike model is. I had gone on so much I decided I should put my money where my mouth was and build one myself. This ongoing series is that process. I am not rushing, as can be seen in the earlier parts, and if I am not happy I will go back, disassemble and re-clean and re-build anything I am not happy with.
With that all out of the way lets get to it!
The process
Unless otherwise noted I followed this process for each piece:
Cut off roughly leaving plenty of nub
Trim back the nub with my better nippers
Apply water to my wet and dry sandpaper and sand the nub marks down
Dry the piece
Brush it off with the tooth brush to remove any bits
Re-apply the matt finish using the Gray Balancer
Prep the part with the green side of the White Balancer
Shine the part up with the white side of the White Balancer
If after this I wasn’t happy I would repeat the sanding steps down, and keep iterating until I was happy with the finish.
First Parts
Leg FrameSide ViewFirst PartsParts Attached
As you can see the next thing to build was this leg. The inner frame is straight off the runner. You need to take your time on this. The manual shows you the bits you want to cut. Pay special attention to this as the nubs are tiny and you don’t want to snip anything by accident. The first two parts go on either side of the leg. They clip right on and fit really nicely.
Second Parts
With NubsCleaned UpSide CleanAttached
The next pieces start to attach the armour. As you can see I was leaving healthy nubbage on each piece. I followed the process outlined at the top of the article. Once clean, and seated I moved on to the next armour parts.
Third Parts
Parts With NubsNubs TrimmedPolished PartsApplied rmourArmour Reverse
As you can see this section is adding more armour on to the frame. Each piece fits really nicely. I did have to slow down and double check how everything was sliding in to place. But after slowing myself down a little it all slotted together really nicely. Again I was really happy with how the white armour pieces were cleaning up.
Next … you guessed it more armour parts. Each one I’ve tried to show the nubbed parts and the cleaned parts. Hopefully the end result warrants all this time … I feel that it is looking really nice so far.
Fifth Part
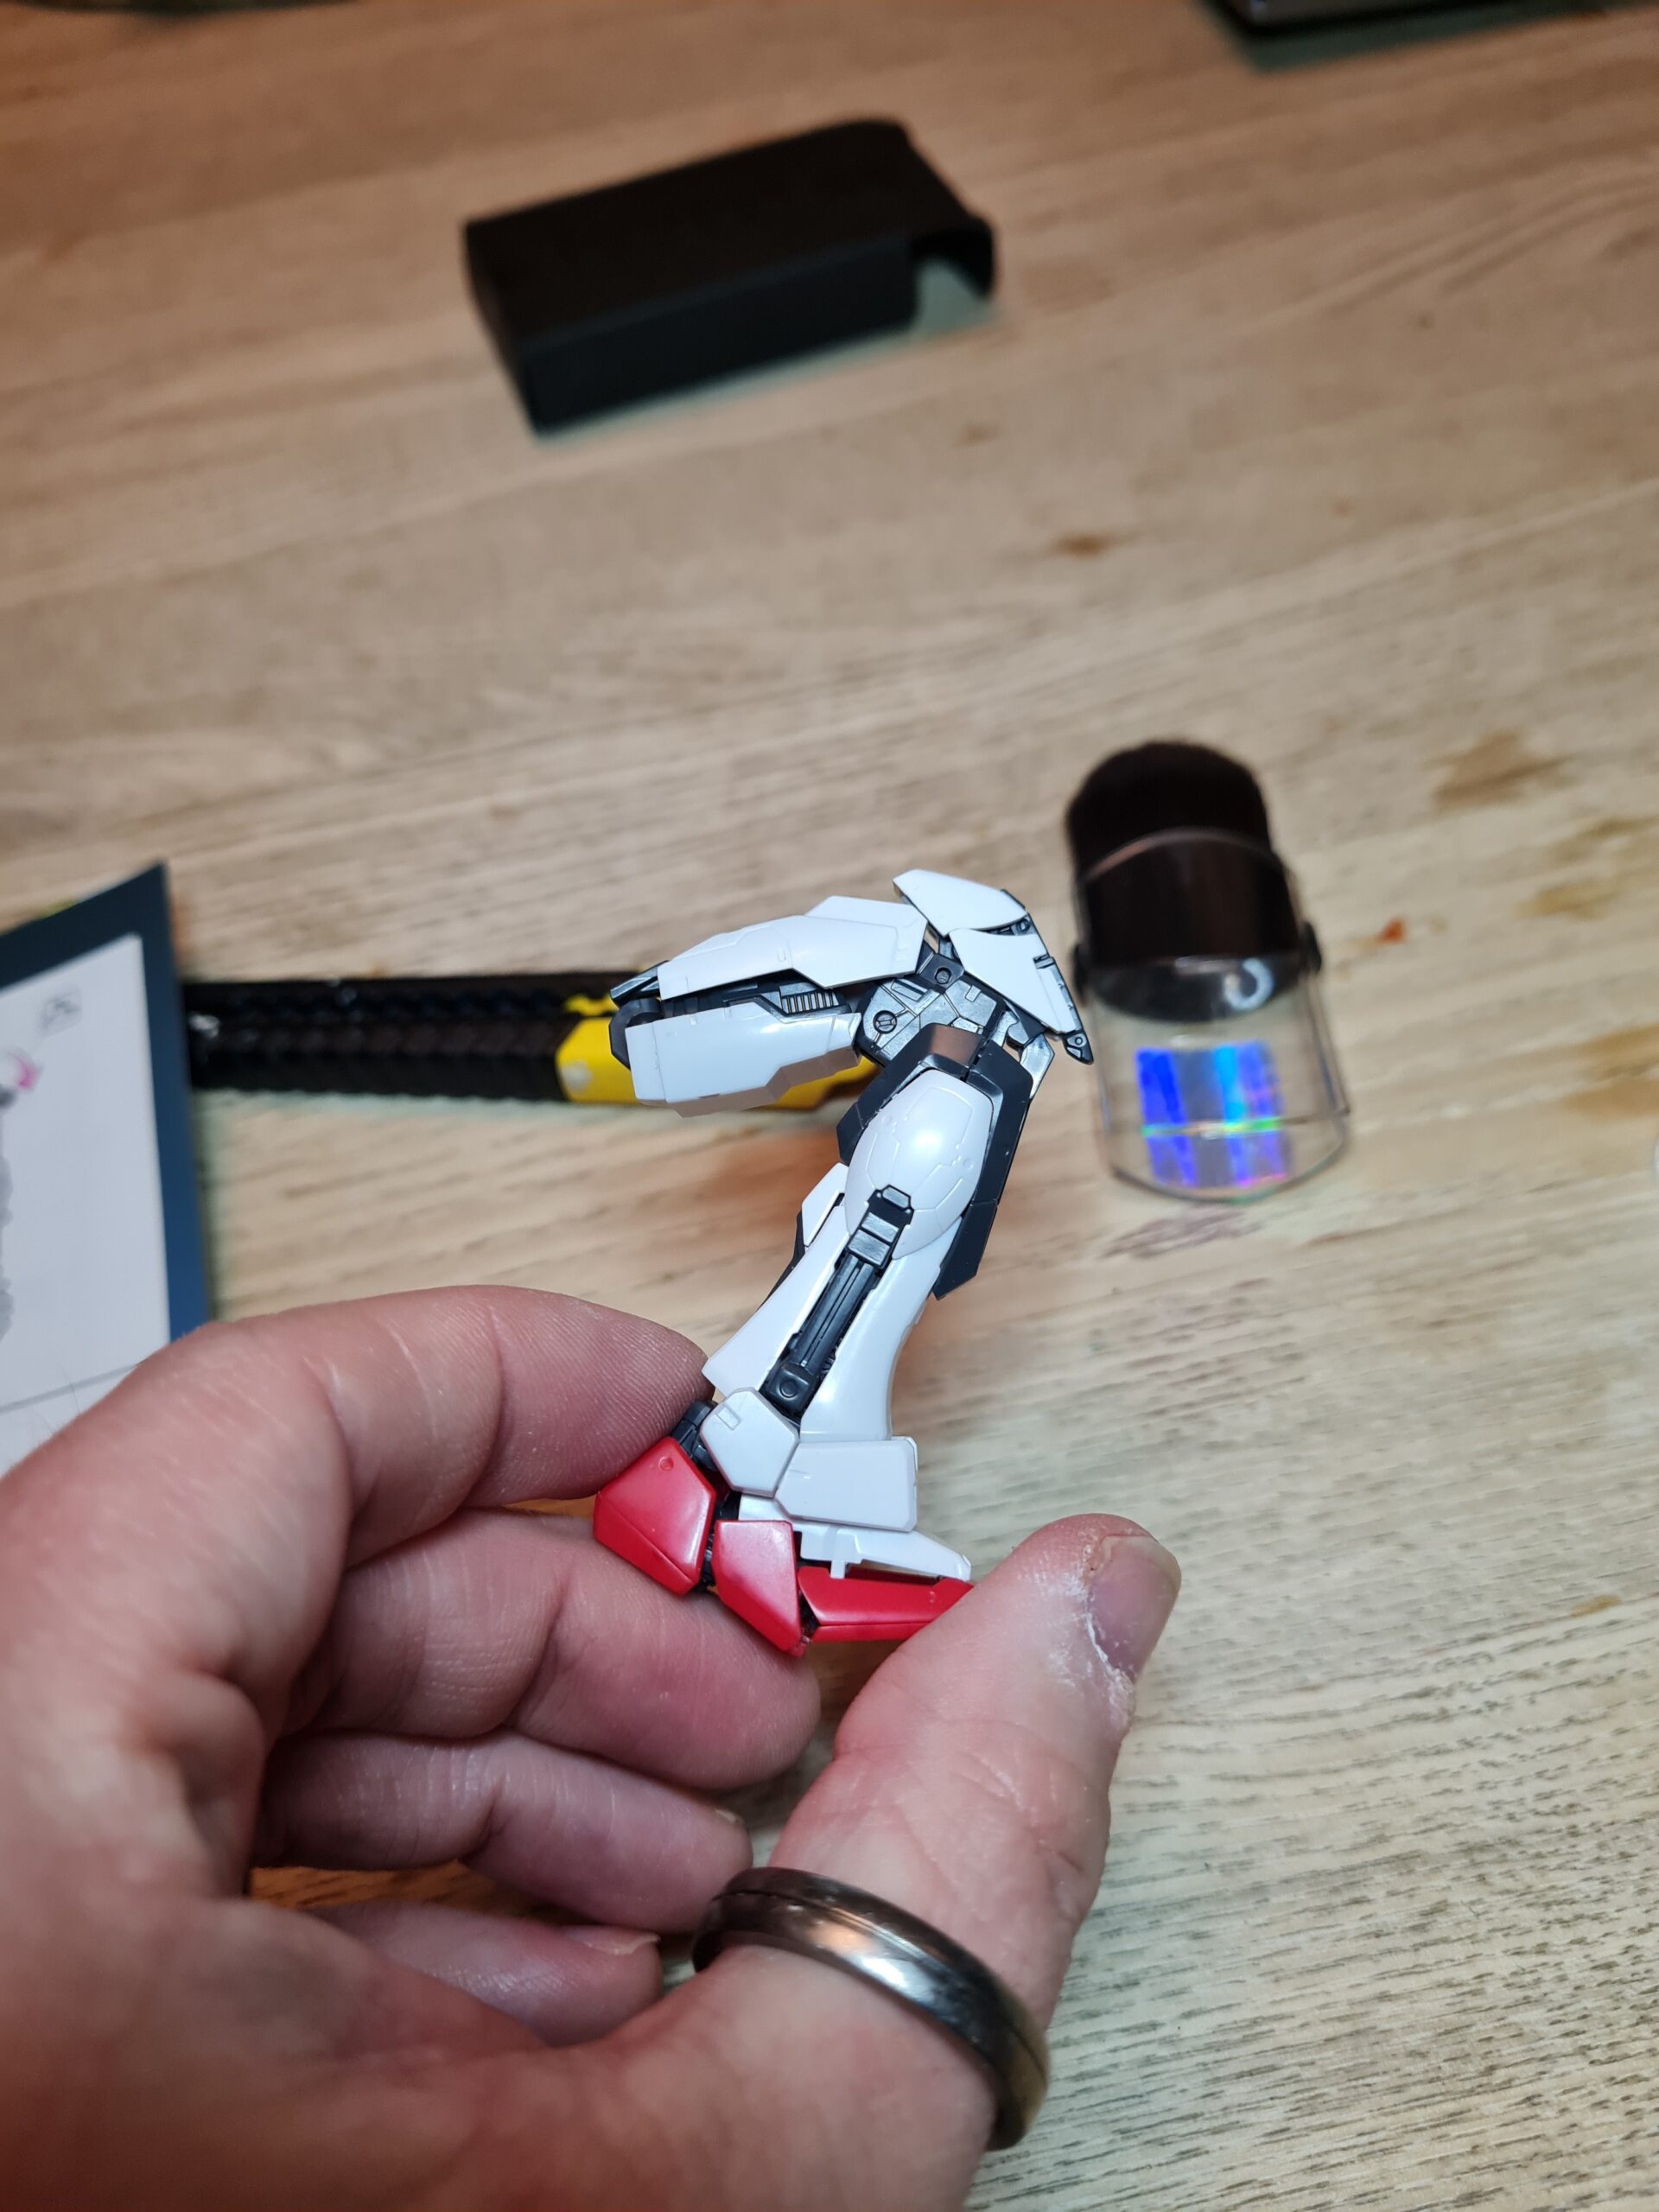
Final Nubs!Cleaned PartsBent LegStraight LegBent Leg
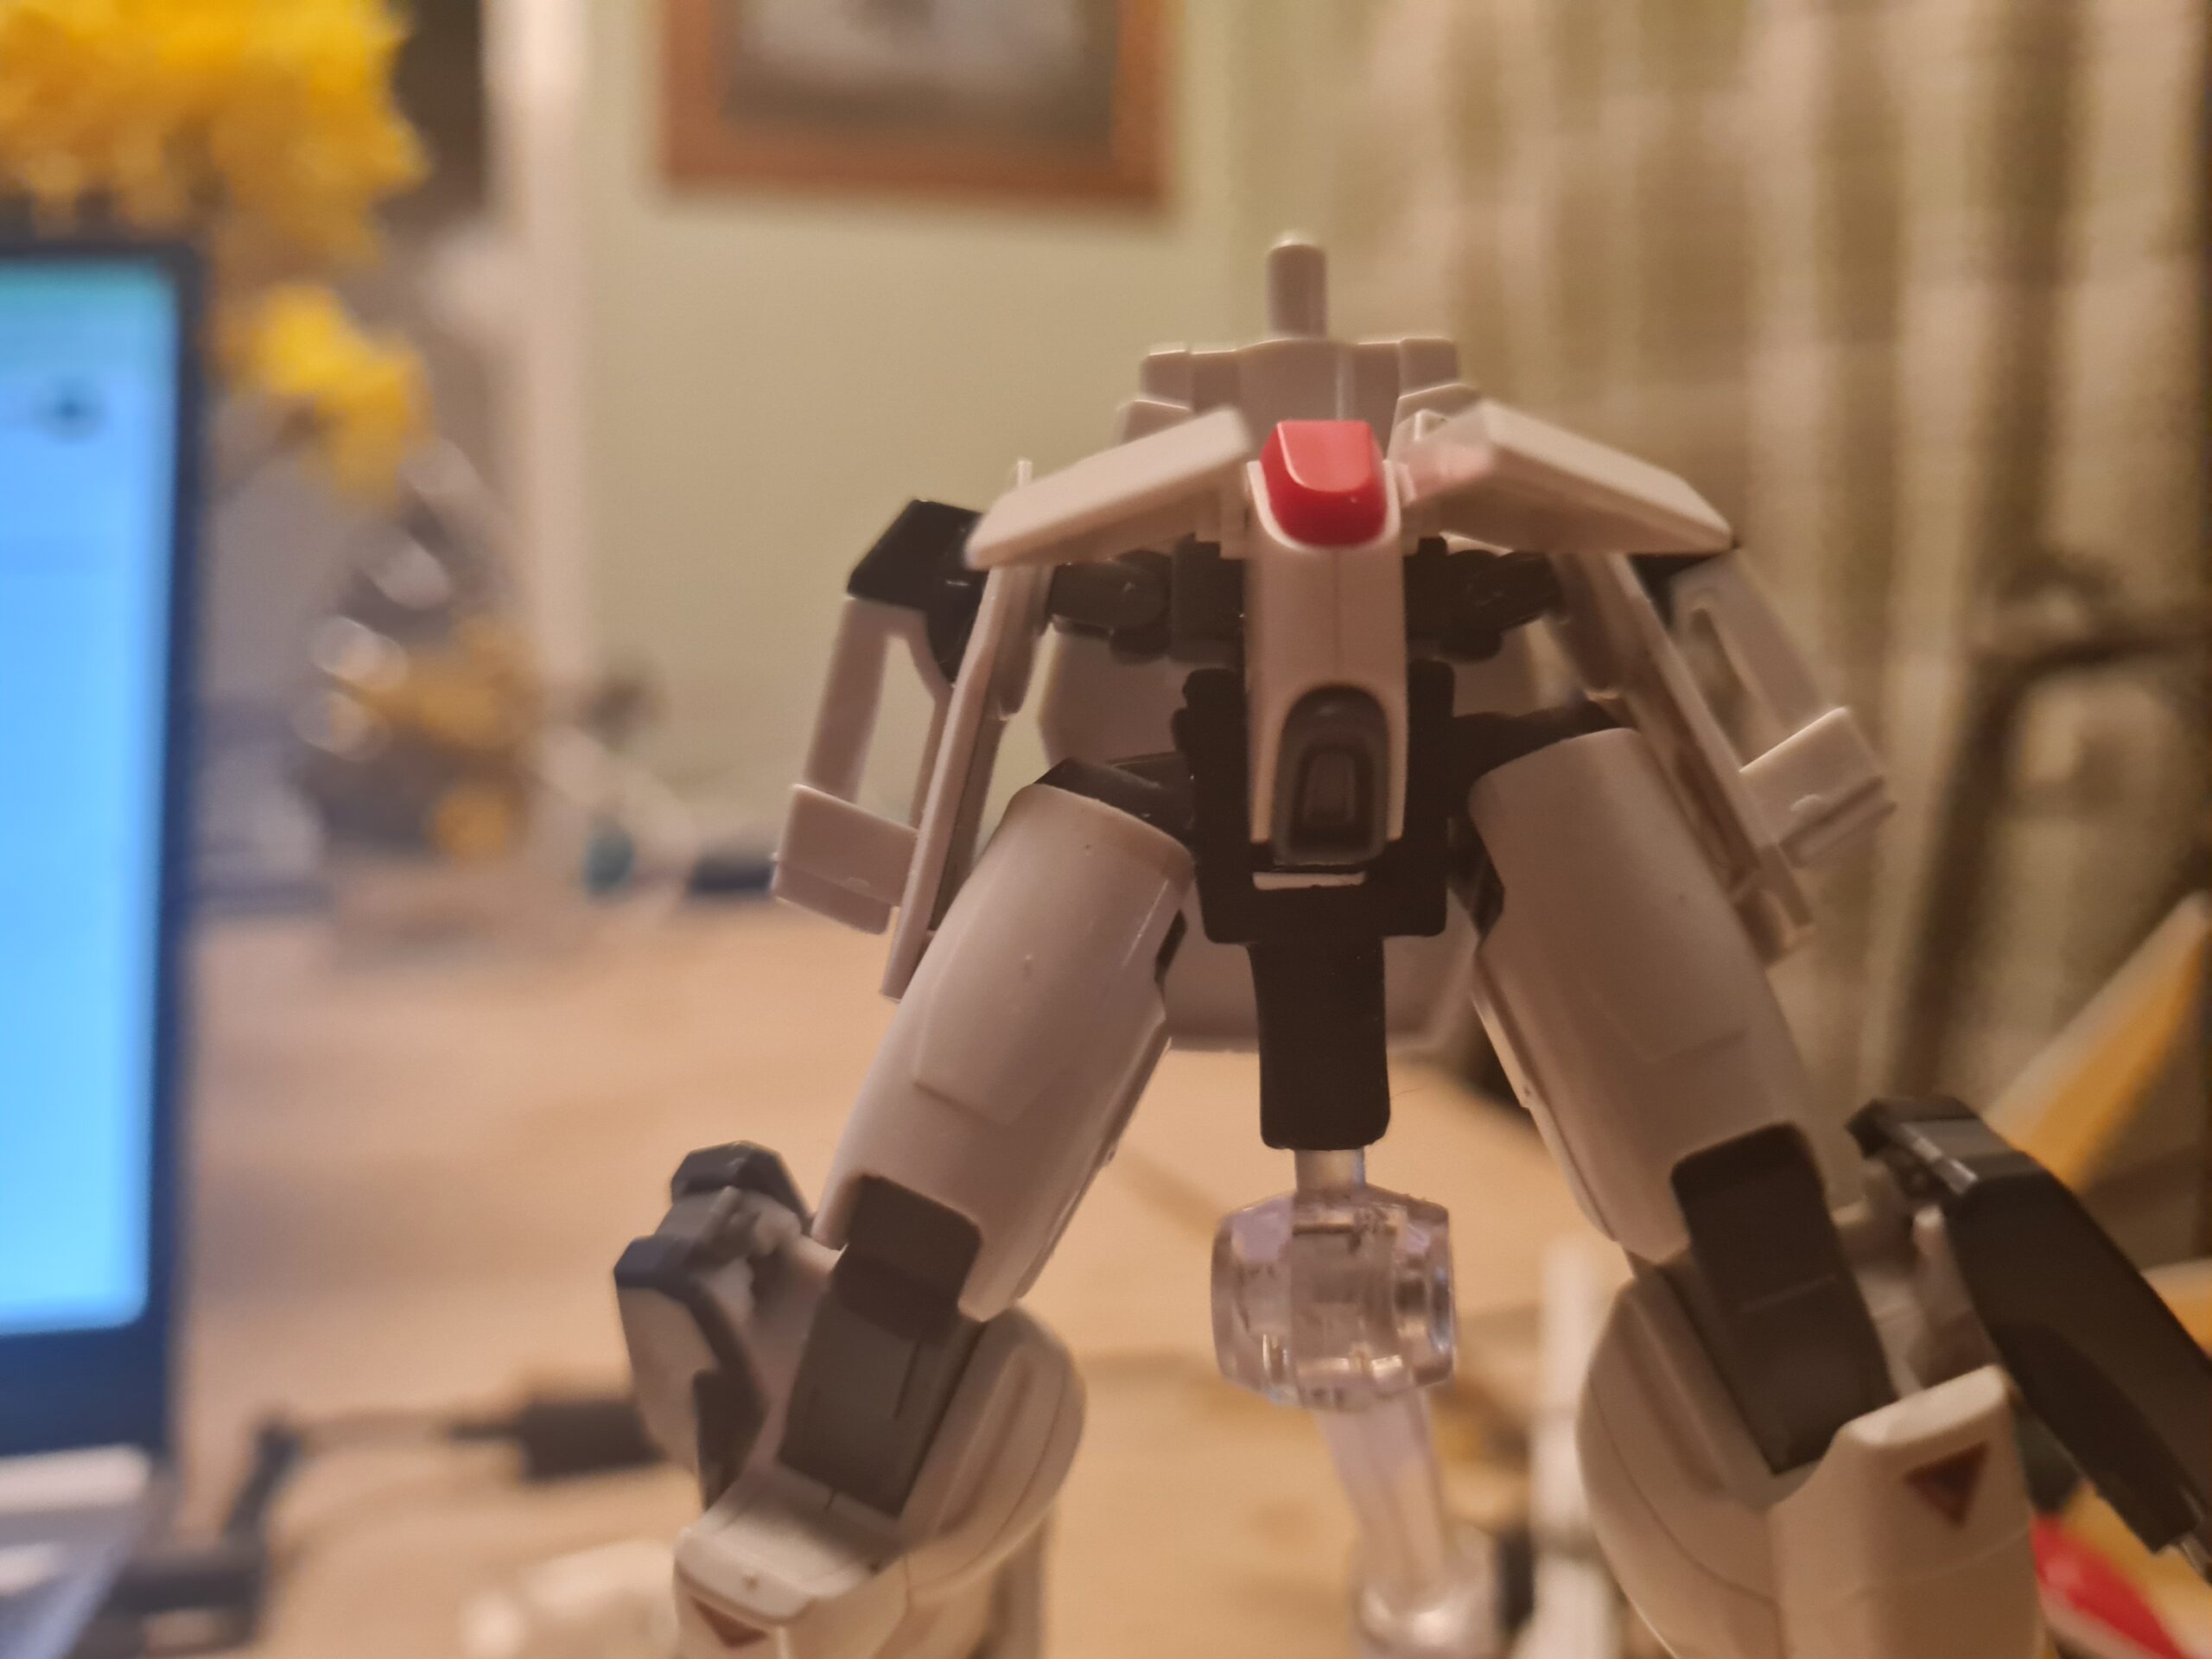
The final set of armour pieces on the leg really do complete the piece. Also look at that articulation!
Conclusion
There are several parts here that have to slide or clip into specific places. However, I found that slowing down, have a close look at the manual, the structure of the grooves and ridges on the parts led to them fitting together beautifully. I am really happy with how the parts have cleaned up, and the current state of the leg.
Thank you for taking the time to read this. If you haven’t already done so please like and follow us on our social media platforms and checkout our website!
Put my money where my mouth is! Ok that sounds like a click bait title. But let me explain!
So in my previous post I was banging on about how amazing I think the RG Aile Strike is. I also, in previous posts have banged on about how great I think the GUNPRIMER products are.
So to this end I have decided to quite literally put my money where my mouth is. My next series of posts are going to be centred around the RG Aile Strike.
What is the plan I hear you cry. Well I think it is time to start showing off everything start to finish.
Step one is the prep. I have just ordered what I hope will be a workable mini green screen style box to improve my sometimes shonky photos. I will also pop to my storage and pickup an RG Aile Strike for the build. I already have the GUNPRIMER Gray and White Balancers here so that gets it ready to go.
RG Aile Strike Box
From all the images this looks to be a truly outstanding model. So I thought why not take people through the build, and give honest feedback on the whole process. This isn’t going to be a rushed job, and I will have to take slight detours from time to time. However, hopefully, the end result will show what a fantastic model this is.
For anyone interested you can pickup the model in the shop (at the time of writing) here.
Thank you for taking the time to read this. If you haven’t already done so please like and follow us on our social media platforms and checkout our website!
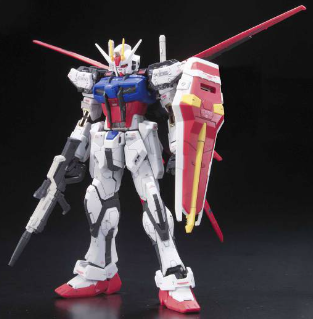
I currently have a box in my living room. In that box should be 5 RG Gundam Aile Strike models. I picked them up partially because I think they look amazing, and partially because I may nab one for myself!
If you haven’t seen it the model looks like this:
Aile Strike
Background
The model was originally released in April 2011 and featured the latest advancements in joint technology. It was also the 3rd model released in the commemoration of 30 years of Gunpla.
The suit itself was first introduced in Gundam Seed (a show I still need to watch despite having already watched Gundam Seed Destiny … yes I know the wrong order:) ). It was originally piloted by Kita Yamato.
If you want to see a full detail of the kit, and the parts, and the general makup have a look at the information on dalong.net. Note you will want to have your translation software/plugin/extension of choice to hand unless you happen to read Korean.
One of the items I found interesting reading through the information there, is that like other RG models the hand consists of multiple parts. As a result this leads to it being split into a palm, the thumb as it’s own jointed part, the index finger as it’s own jointed part, and the middle, ring and little fingers all forming the final jointed part. Subsequently the separation provides a much larger range of posing and options with the hand. It is one of the items I find absolutely amazing with these kits.
Conclusion
As can be seen by looking at the model images, and the quite comprehensive images on the dalong website I think this looks like a phenomenal kit. The little details, like the styling on the shield, and the slightly tapered in calf / lower leg, all give this a really unique and stylish look. As a result I think I may just be talking myself into getting one into my backlog!
Thank you for taking the time to read this. If you haven’t already done so please like and follow us on our social media platforms and checkout our website!
I was curious, about making some custom decals. Now this wasn’t a case of I had to, this was purely an experiment. As the sticks are sometimes a bit jarring when they are applied, I thought I would look at how hard it would be to make my own decals.
Tools of the trade
After some research I found that really, you don’t need a lot of things to do this.
Water slide decal paper
A printer (suitable for use with the paper you bought)
A graphics application
Some topcoat
Water Slide decal paper can be bought online. It isn’t the cheapest, and it normally stipulates what type of printer it works with (for example inkjet). The printer, topcoat and graphics application I actually already had. So the only thing I had to buy specifically for this was the paper.
For the graphics manipulation I chose to use GIMP (available here) as it is free, and there are plenty of online tutorials that can help you get the best from it.
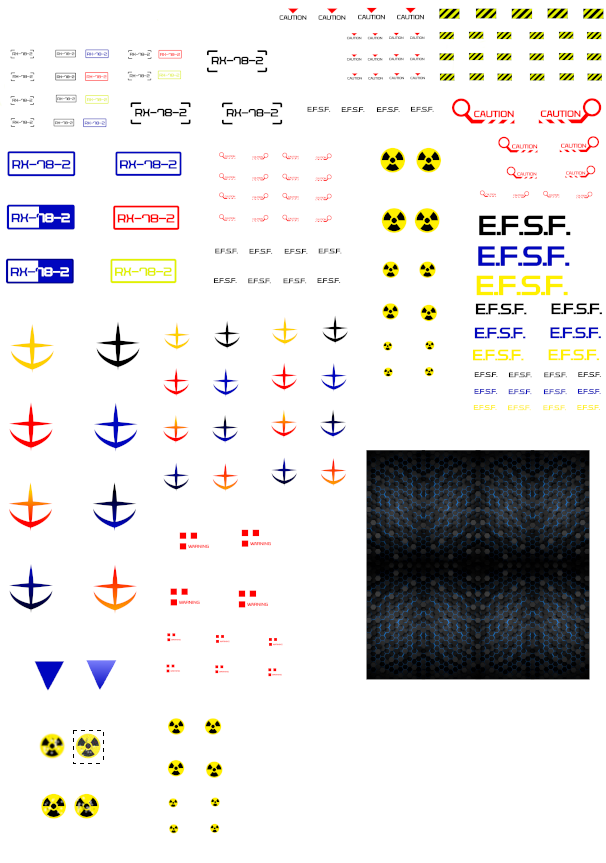
Making the images
To create my sample page / decals I decided to do some googling. I found some great examples that I used as inspiration for creating my first sheet. The final A4 page looked like this:
Decal Sheet
I realise there is a lot of wasted paper here but I just wanted to test it all out. Next I used the waterslide paper I purchased off ebay and printed the above image onto it.
I left it overnight then just to make sure the ink had dried. I realise this is overkill, but I wasn’t in a rush.
The next step was to apply top coat to the sheet. I opted for 3 coats leaving it well over 10 minutes between each coat.
I finally had my sheet to try!
Testing
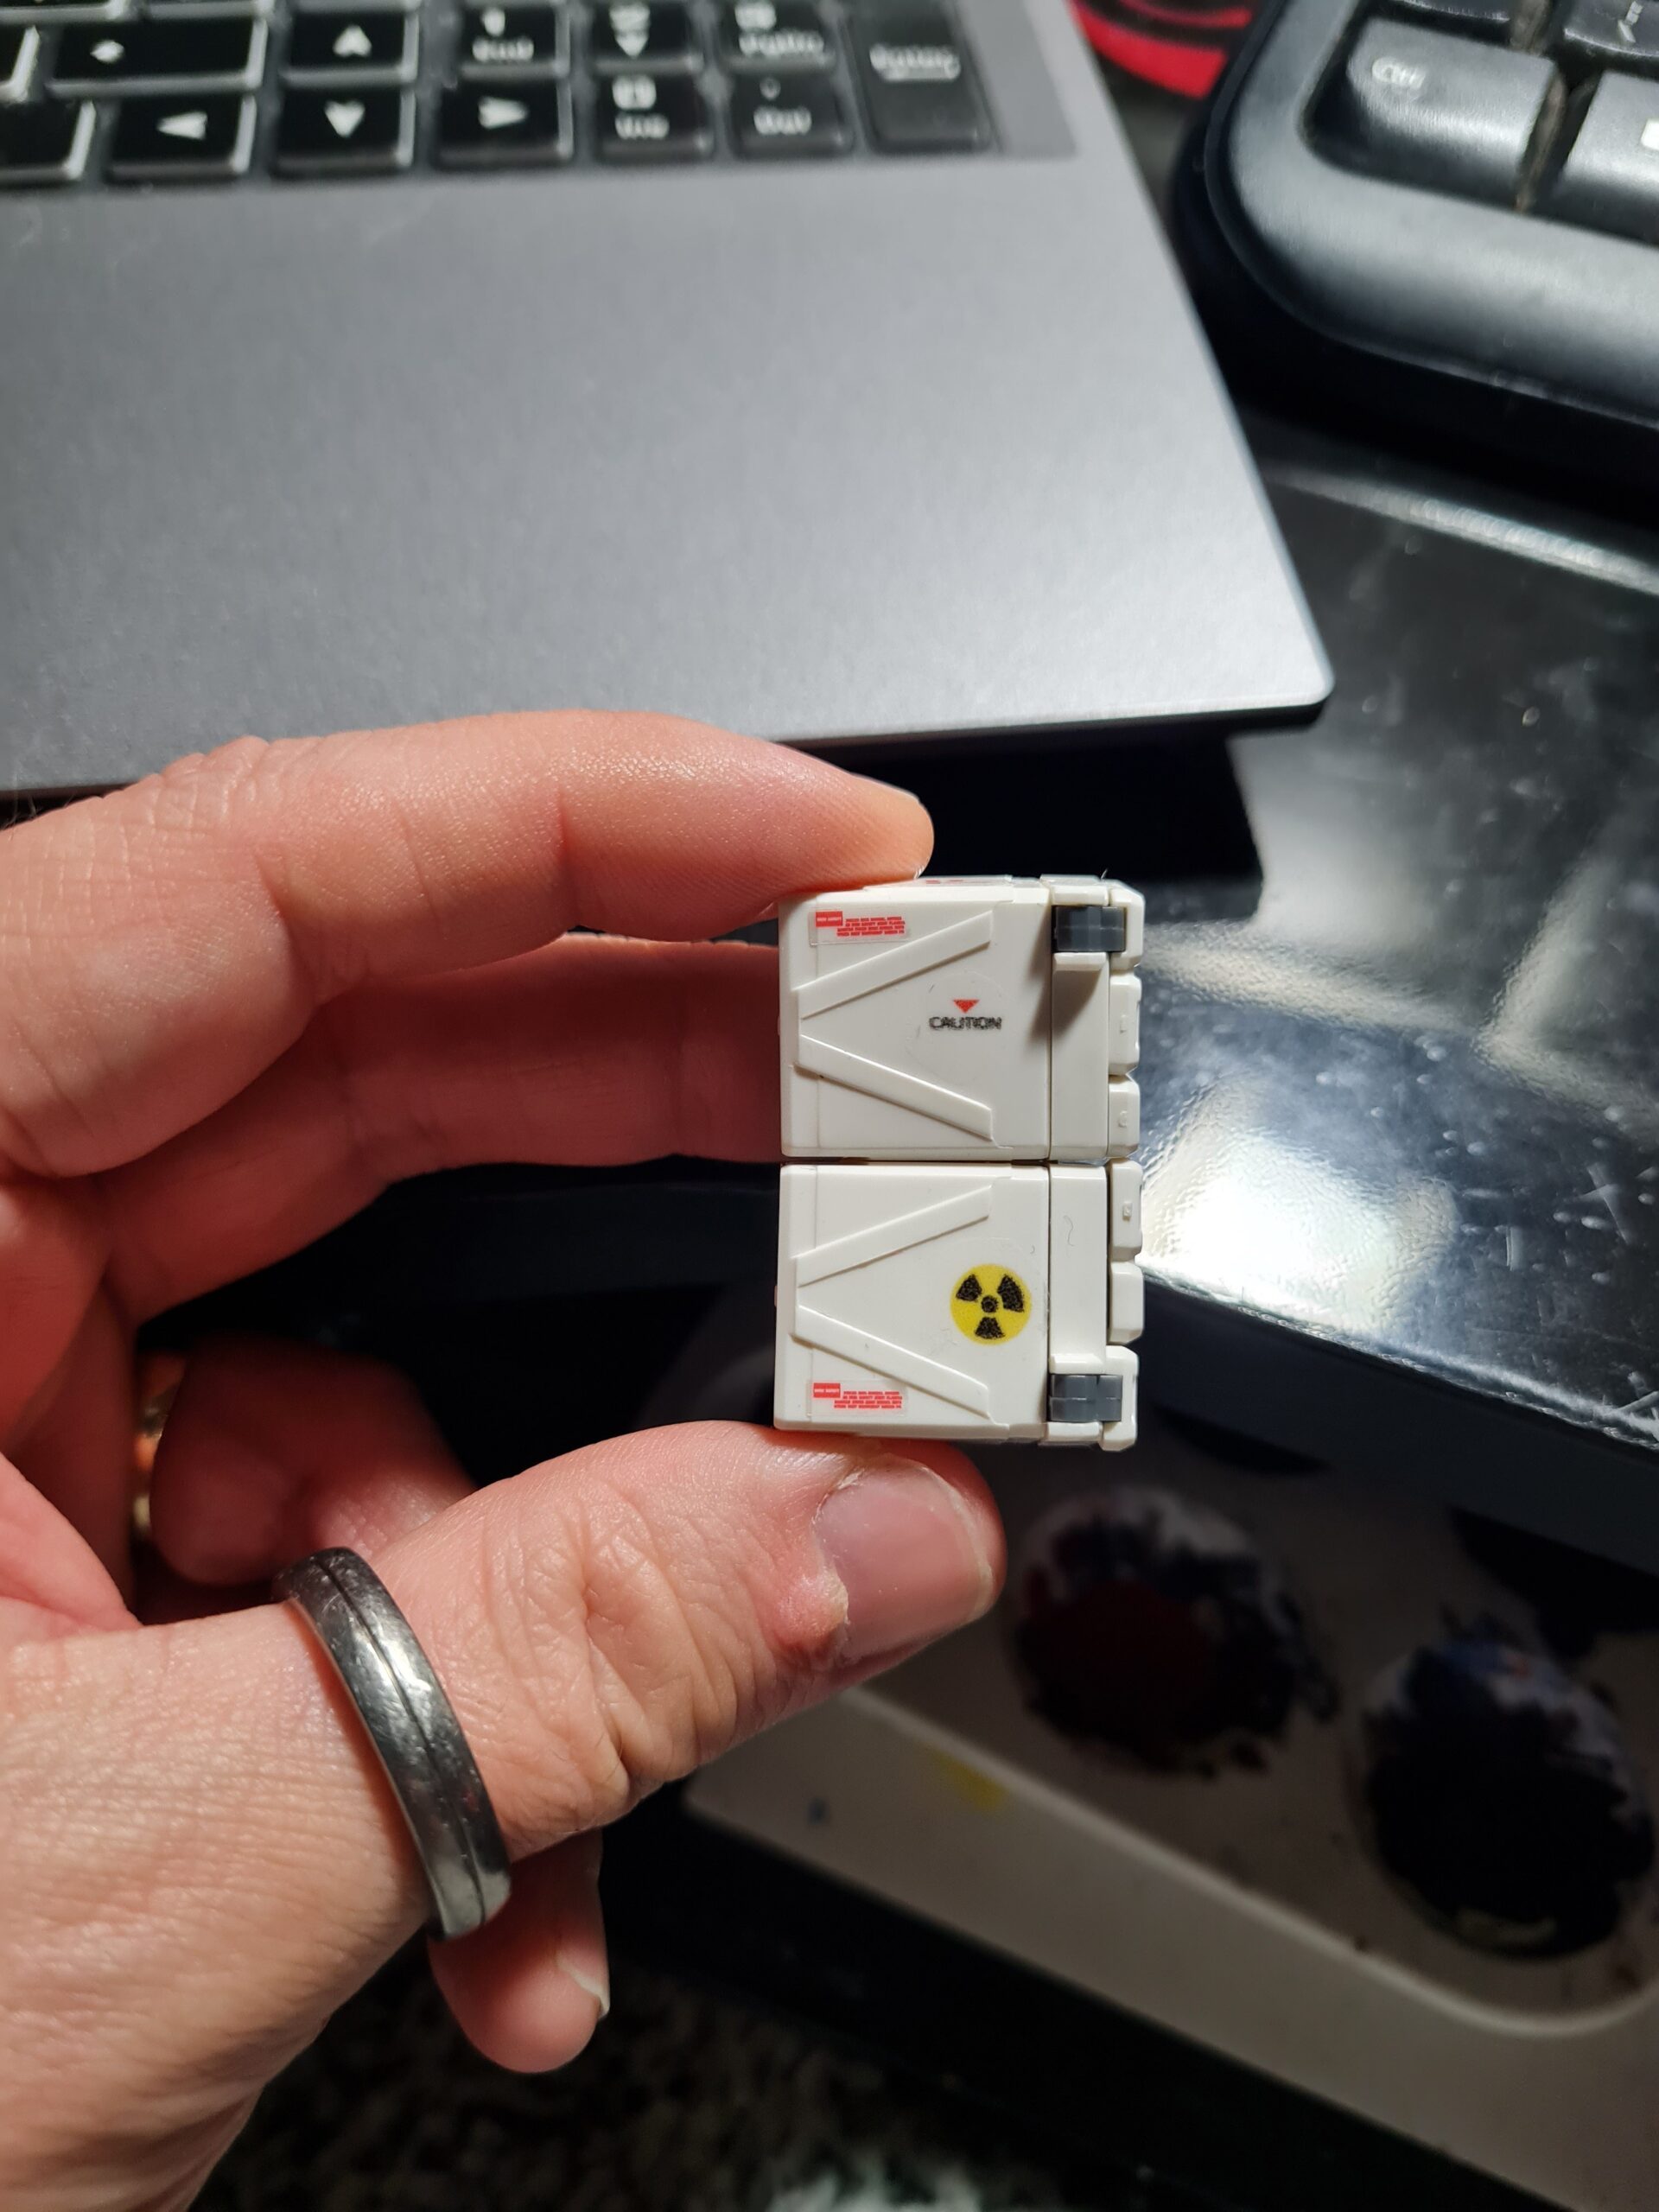
Ok I won’t lie. My first test was a disaster. But I think that was more to do with me not understanding how to apply them, and less to do with the decal. Applying them was, once I had some practice, easy enough. I ended up adding some to my heavy arms leg launchers.
Side DecalsTop Decals
On the images above the little nuclear sign, and the red triangle and “caution” sign on the left image were custom ones from my print. The one on the image to the right is also a custom one.
Conclusion
All told I think the experiment was a success. I definitely found they worked best on lighter/white backgrounds but other than that I was very happy with the end result.
Thank you for taking the time to read this. If you haven’t already done so please like and follow us on our social media platforms and checkout our website!
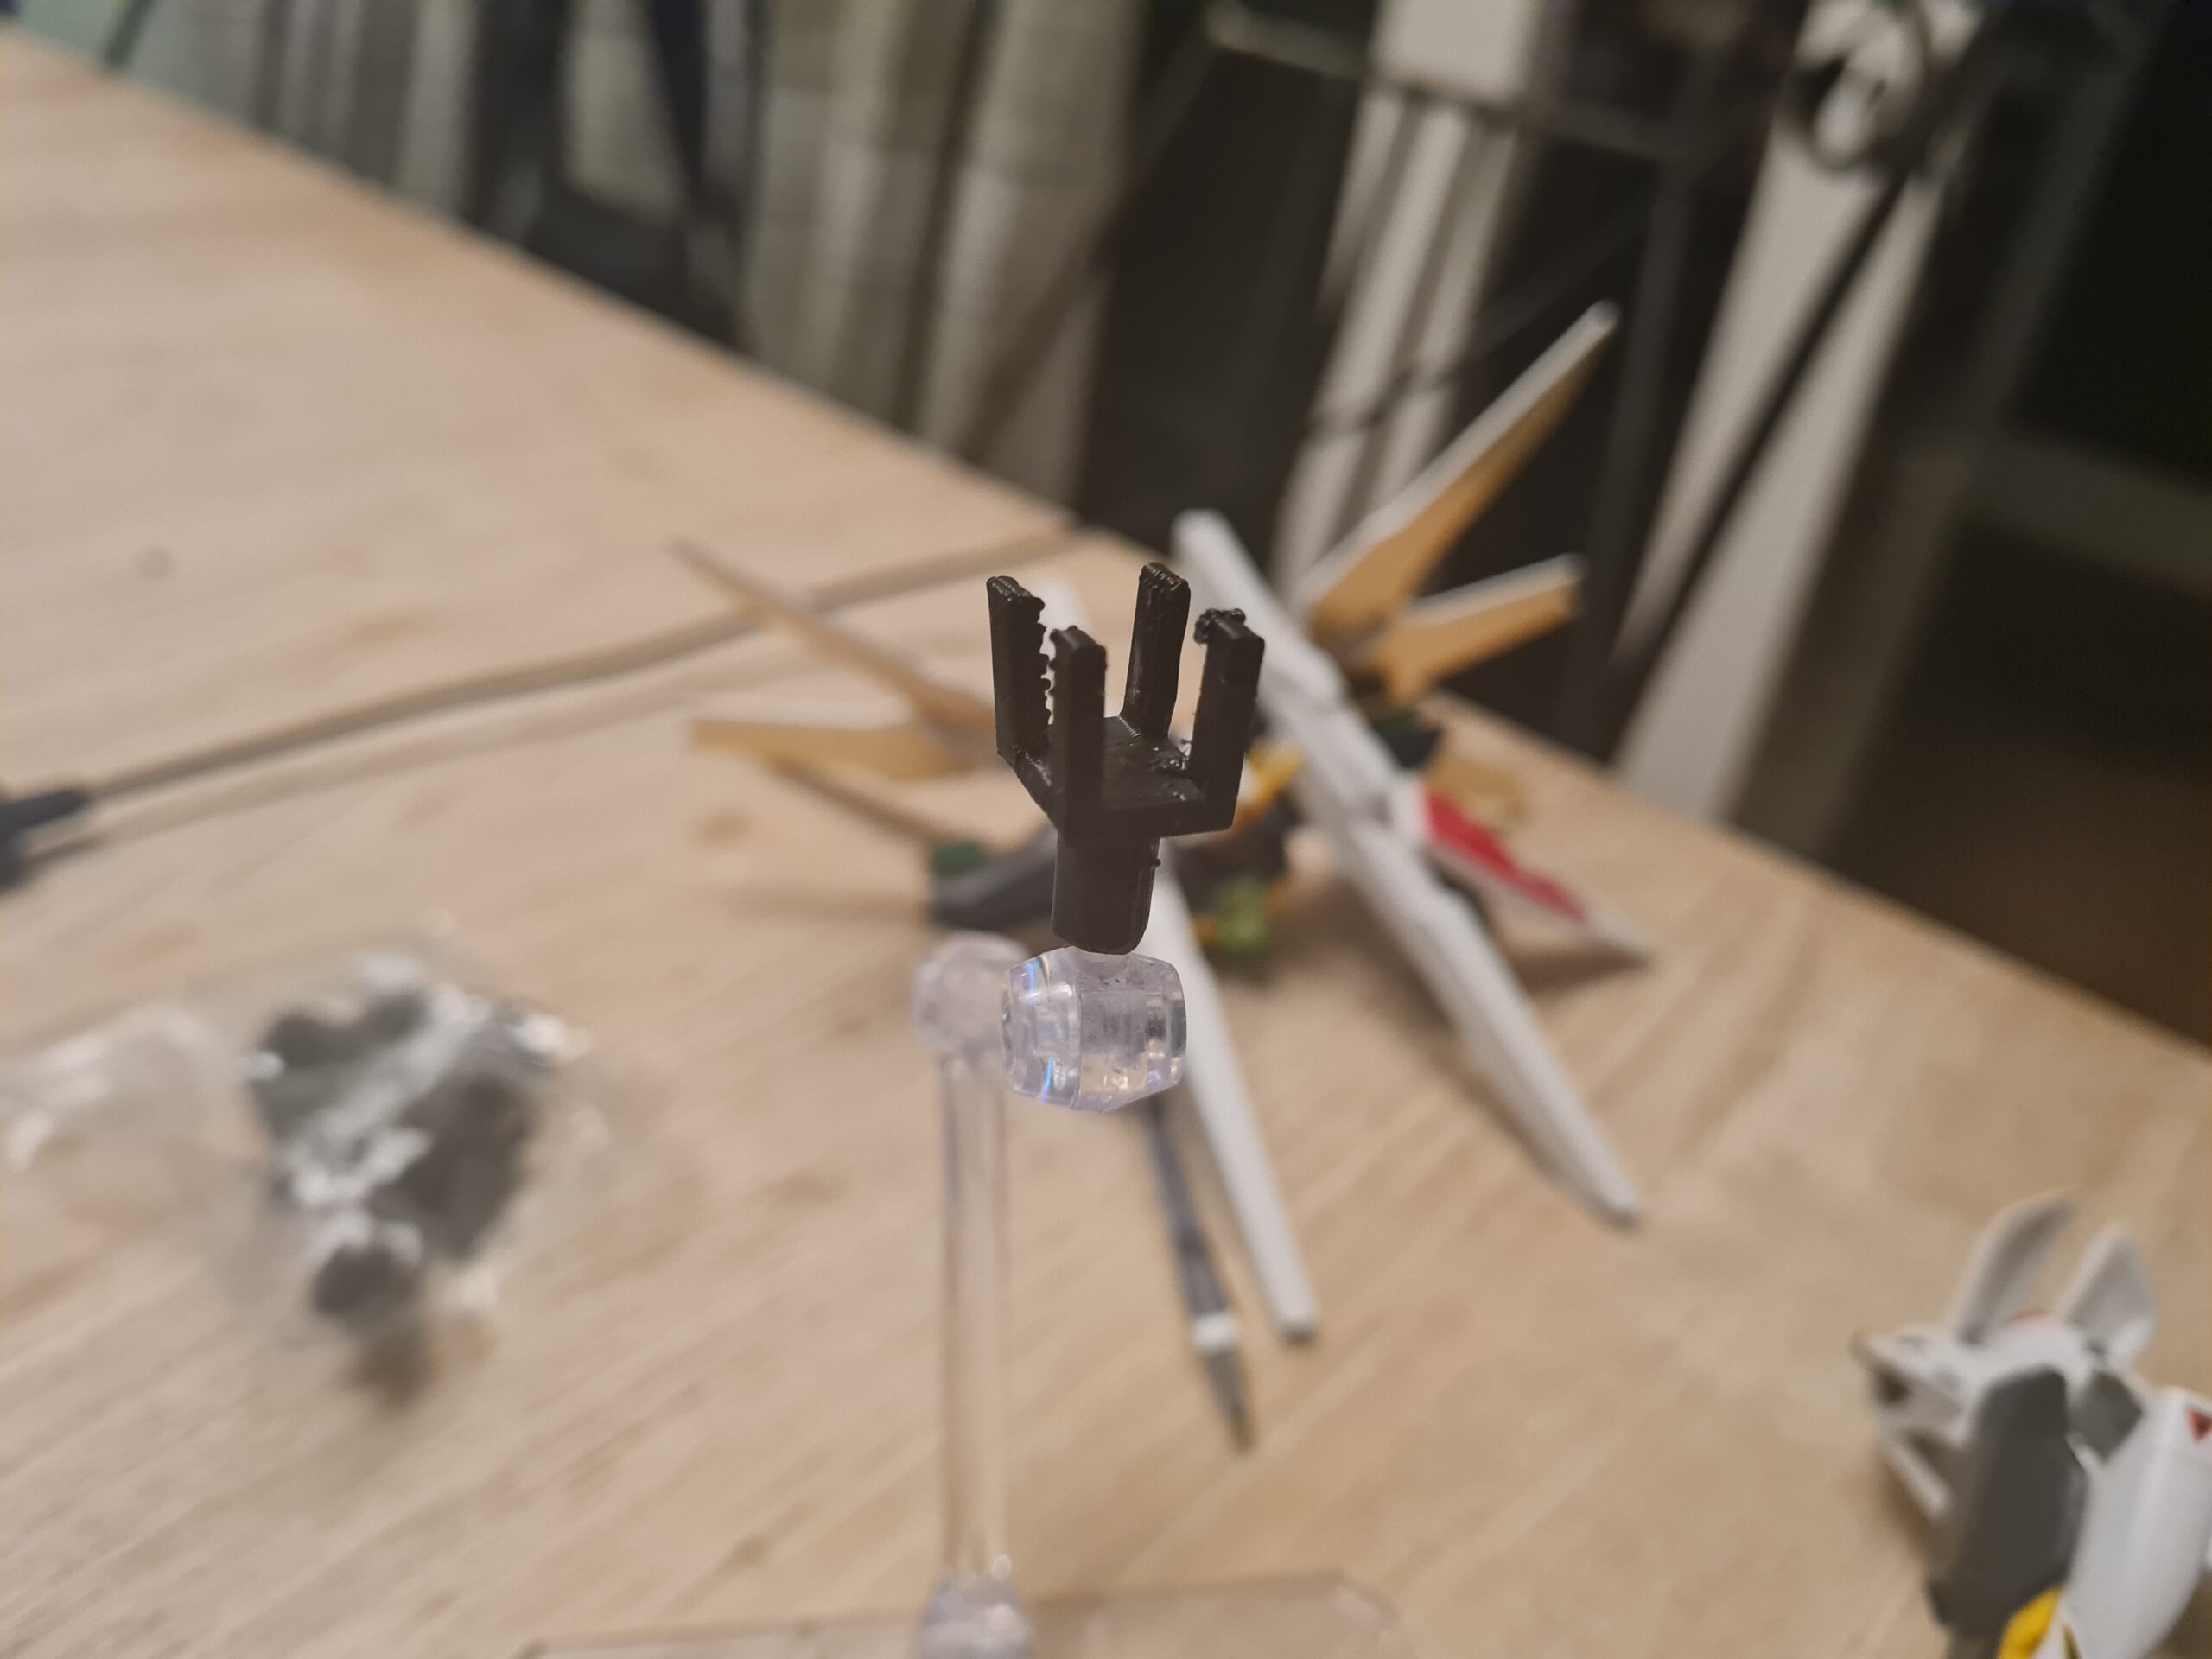
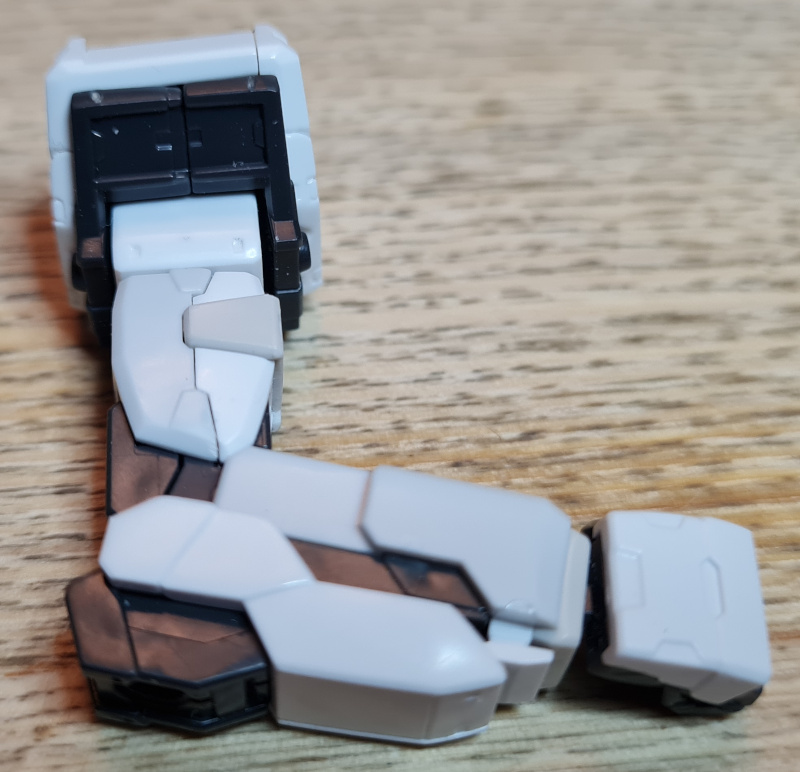
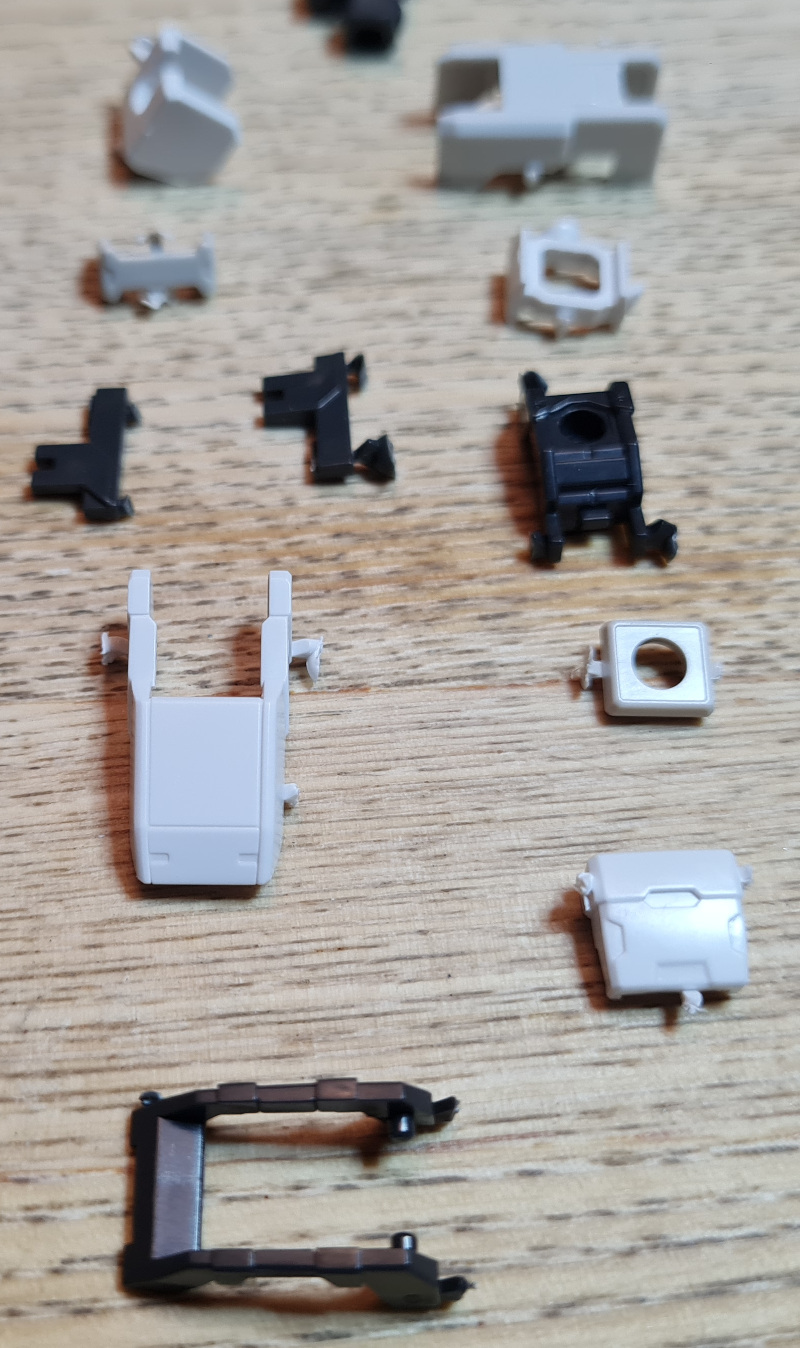
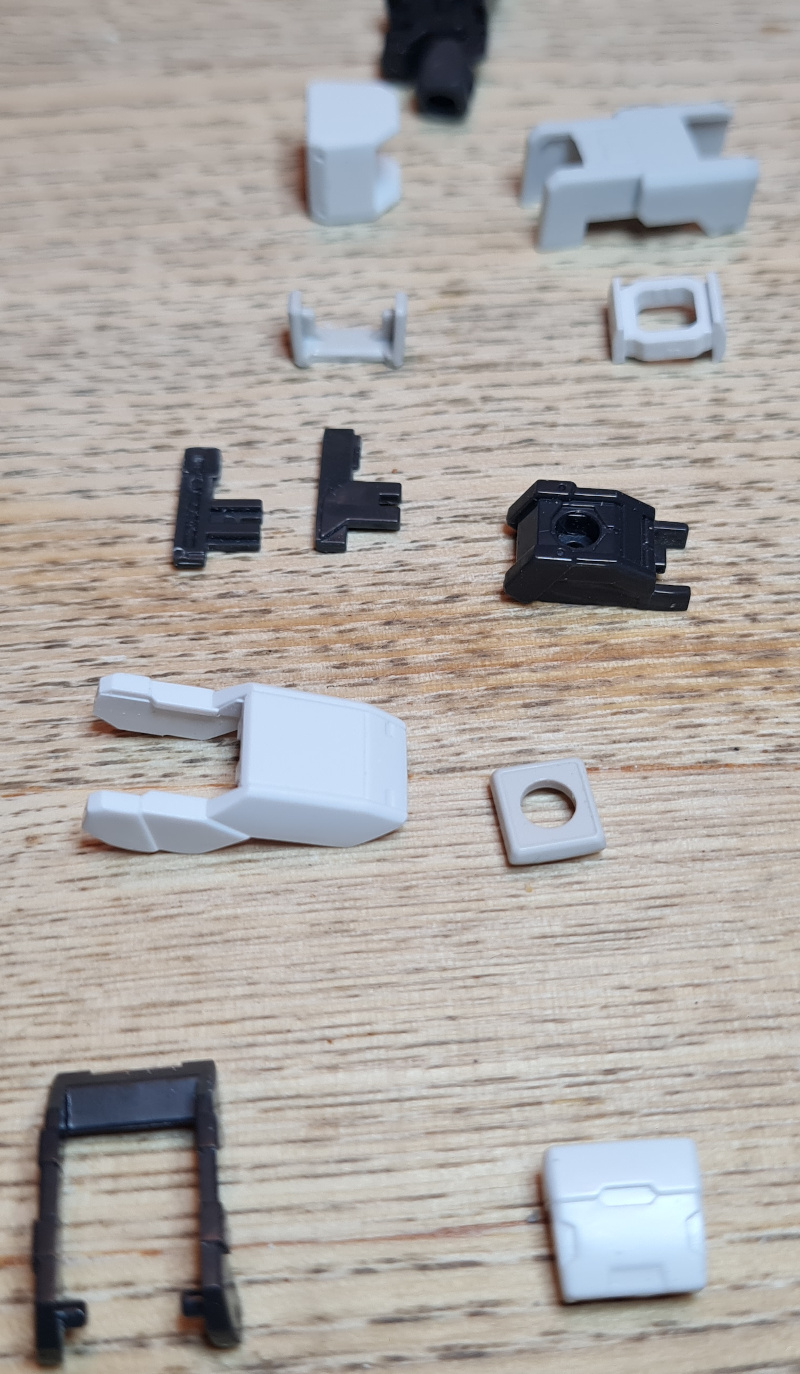
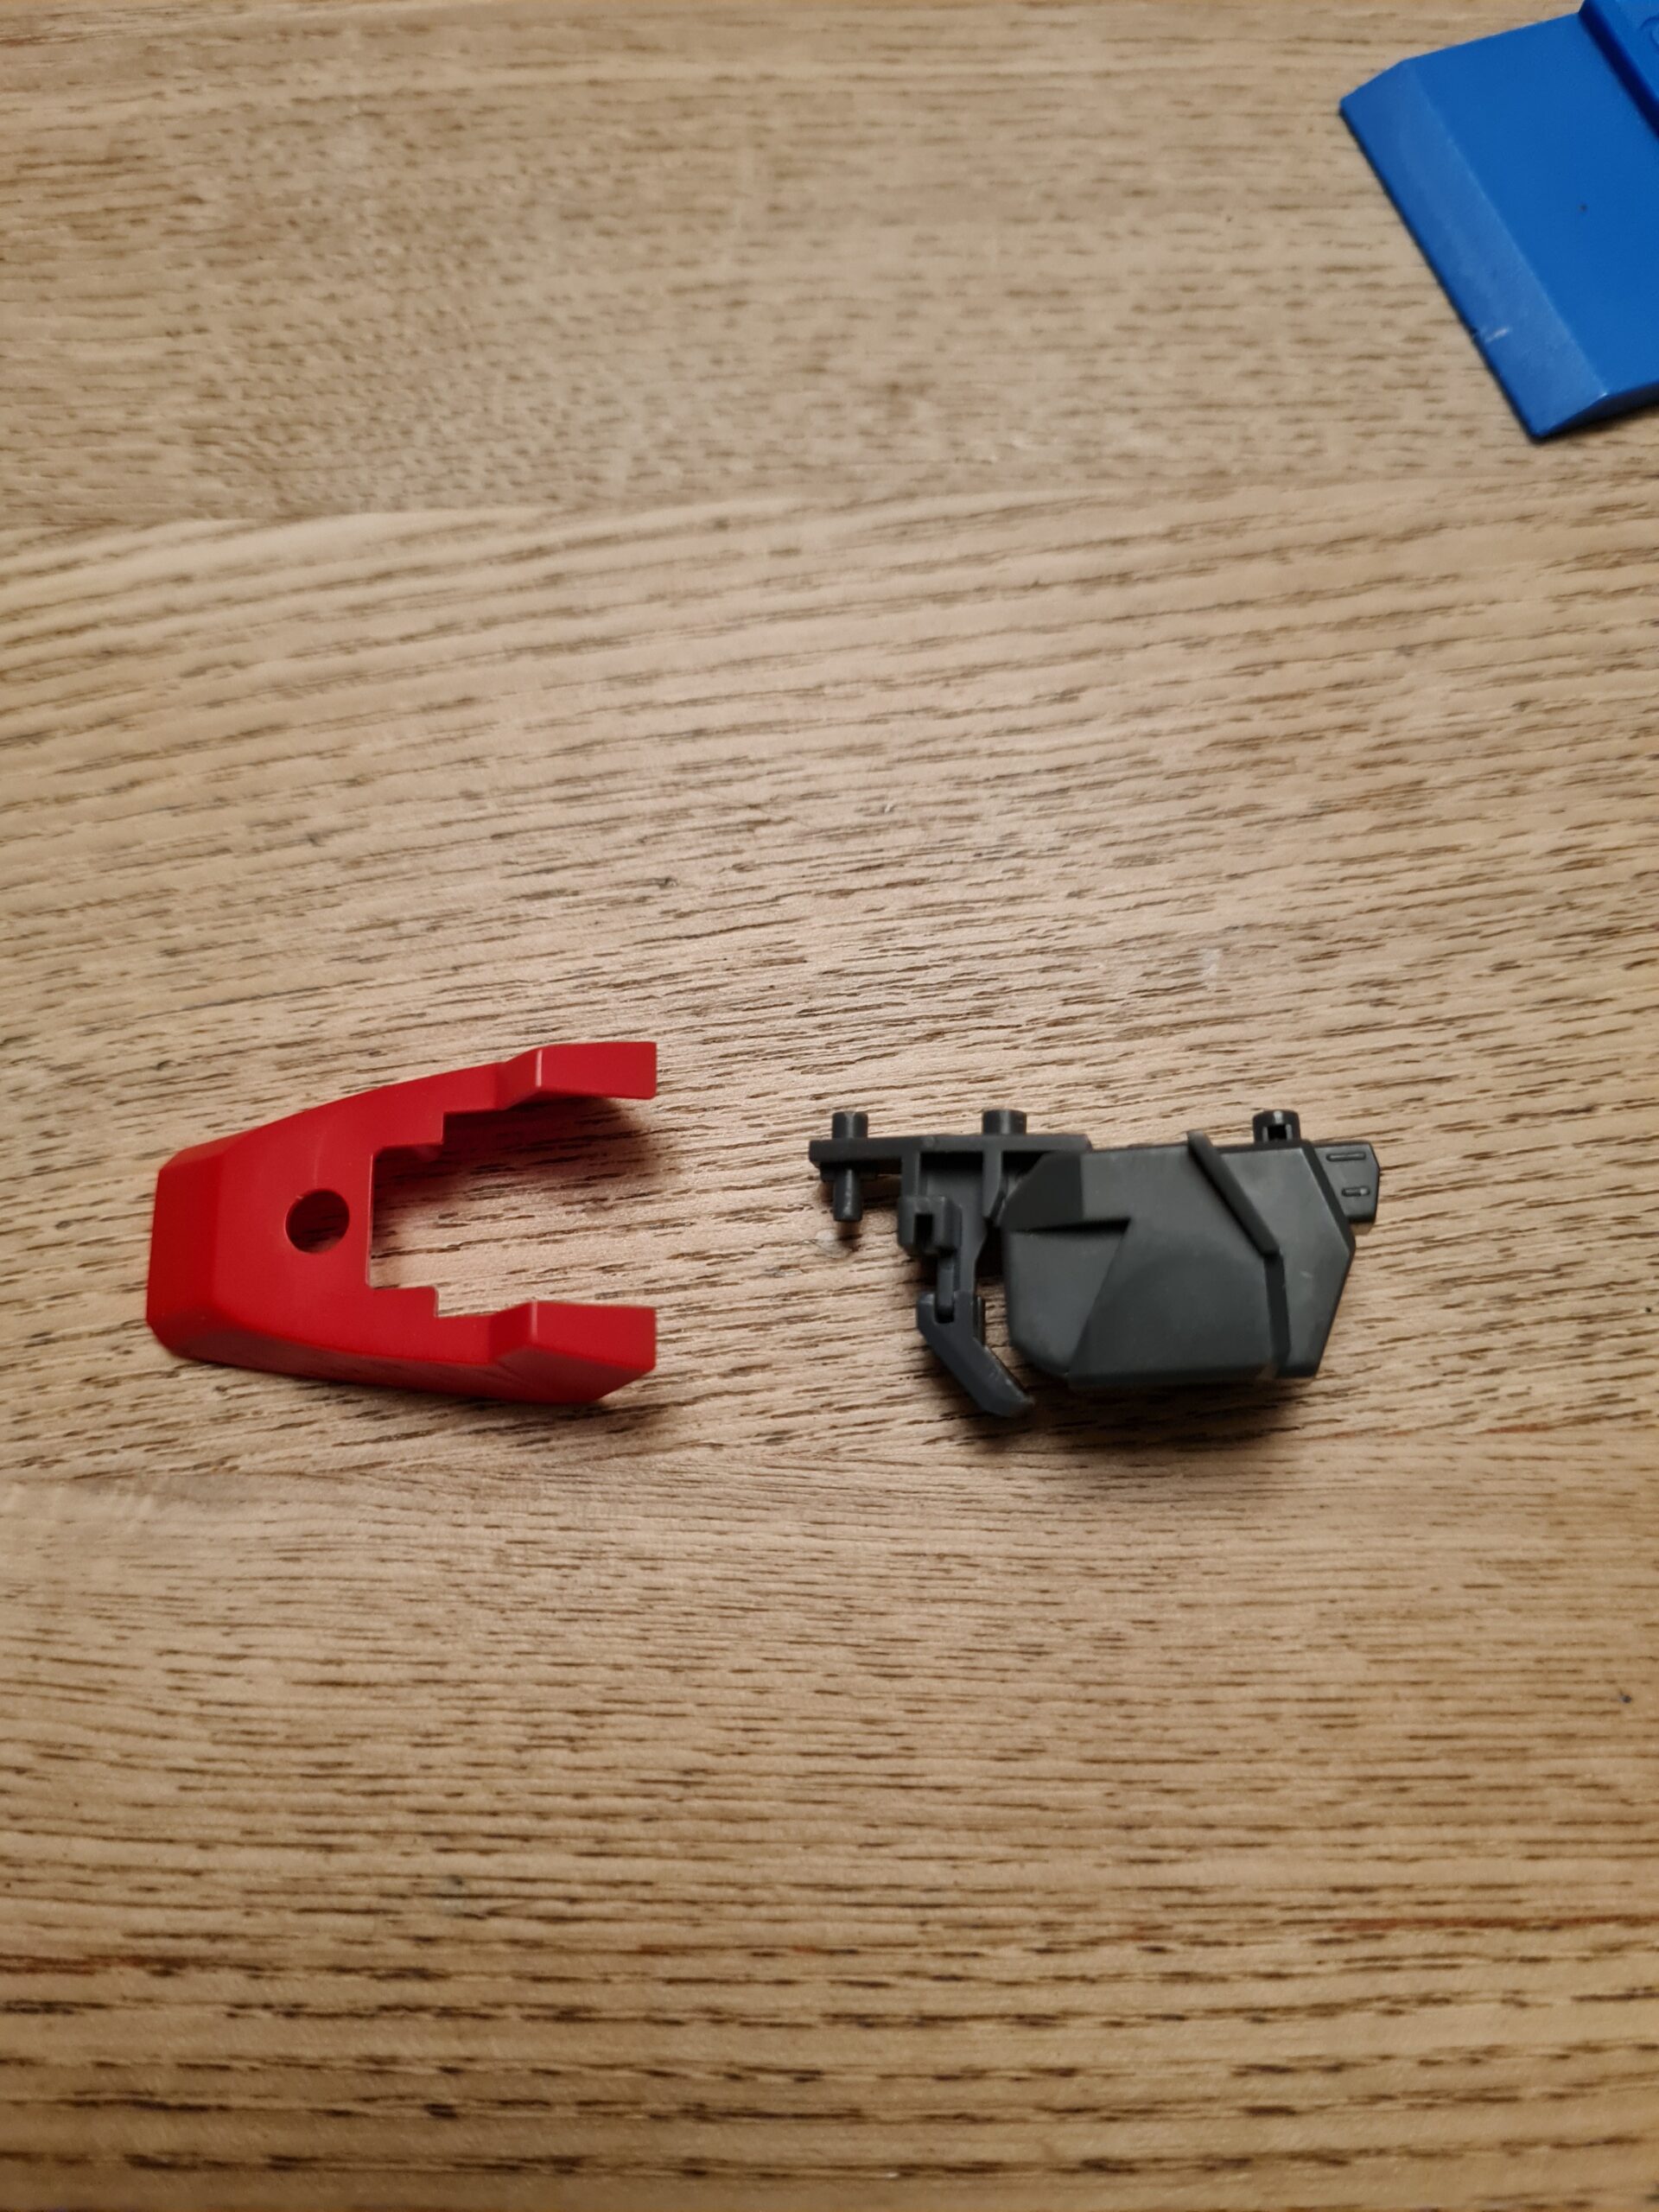
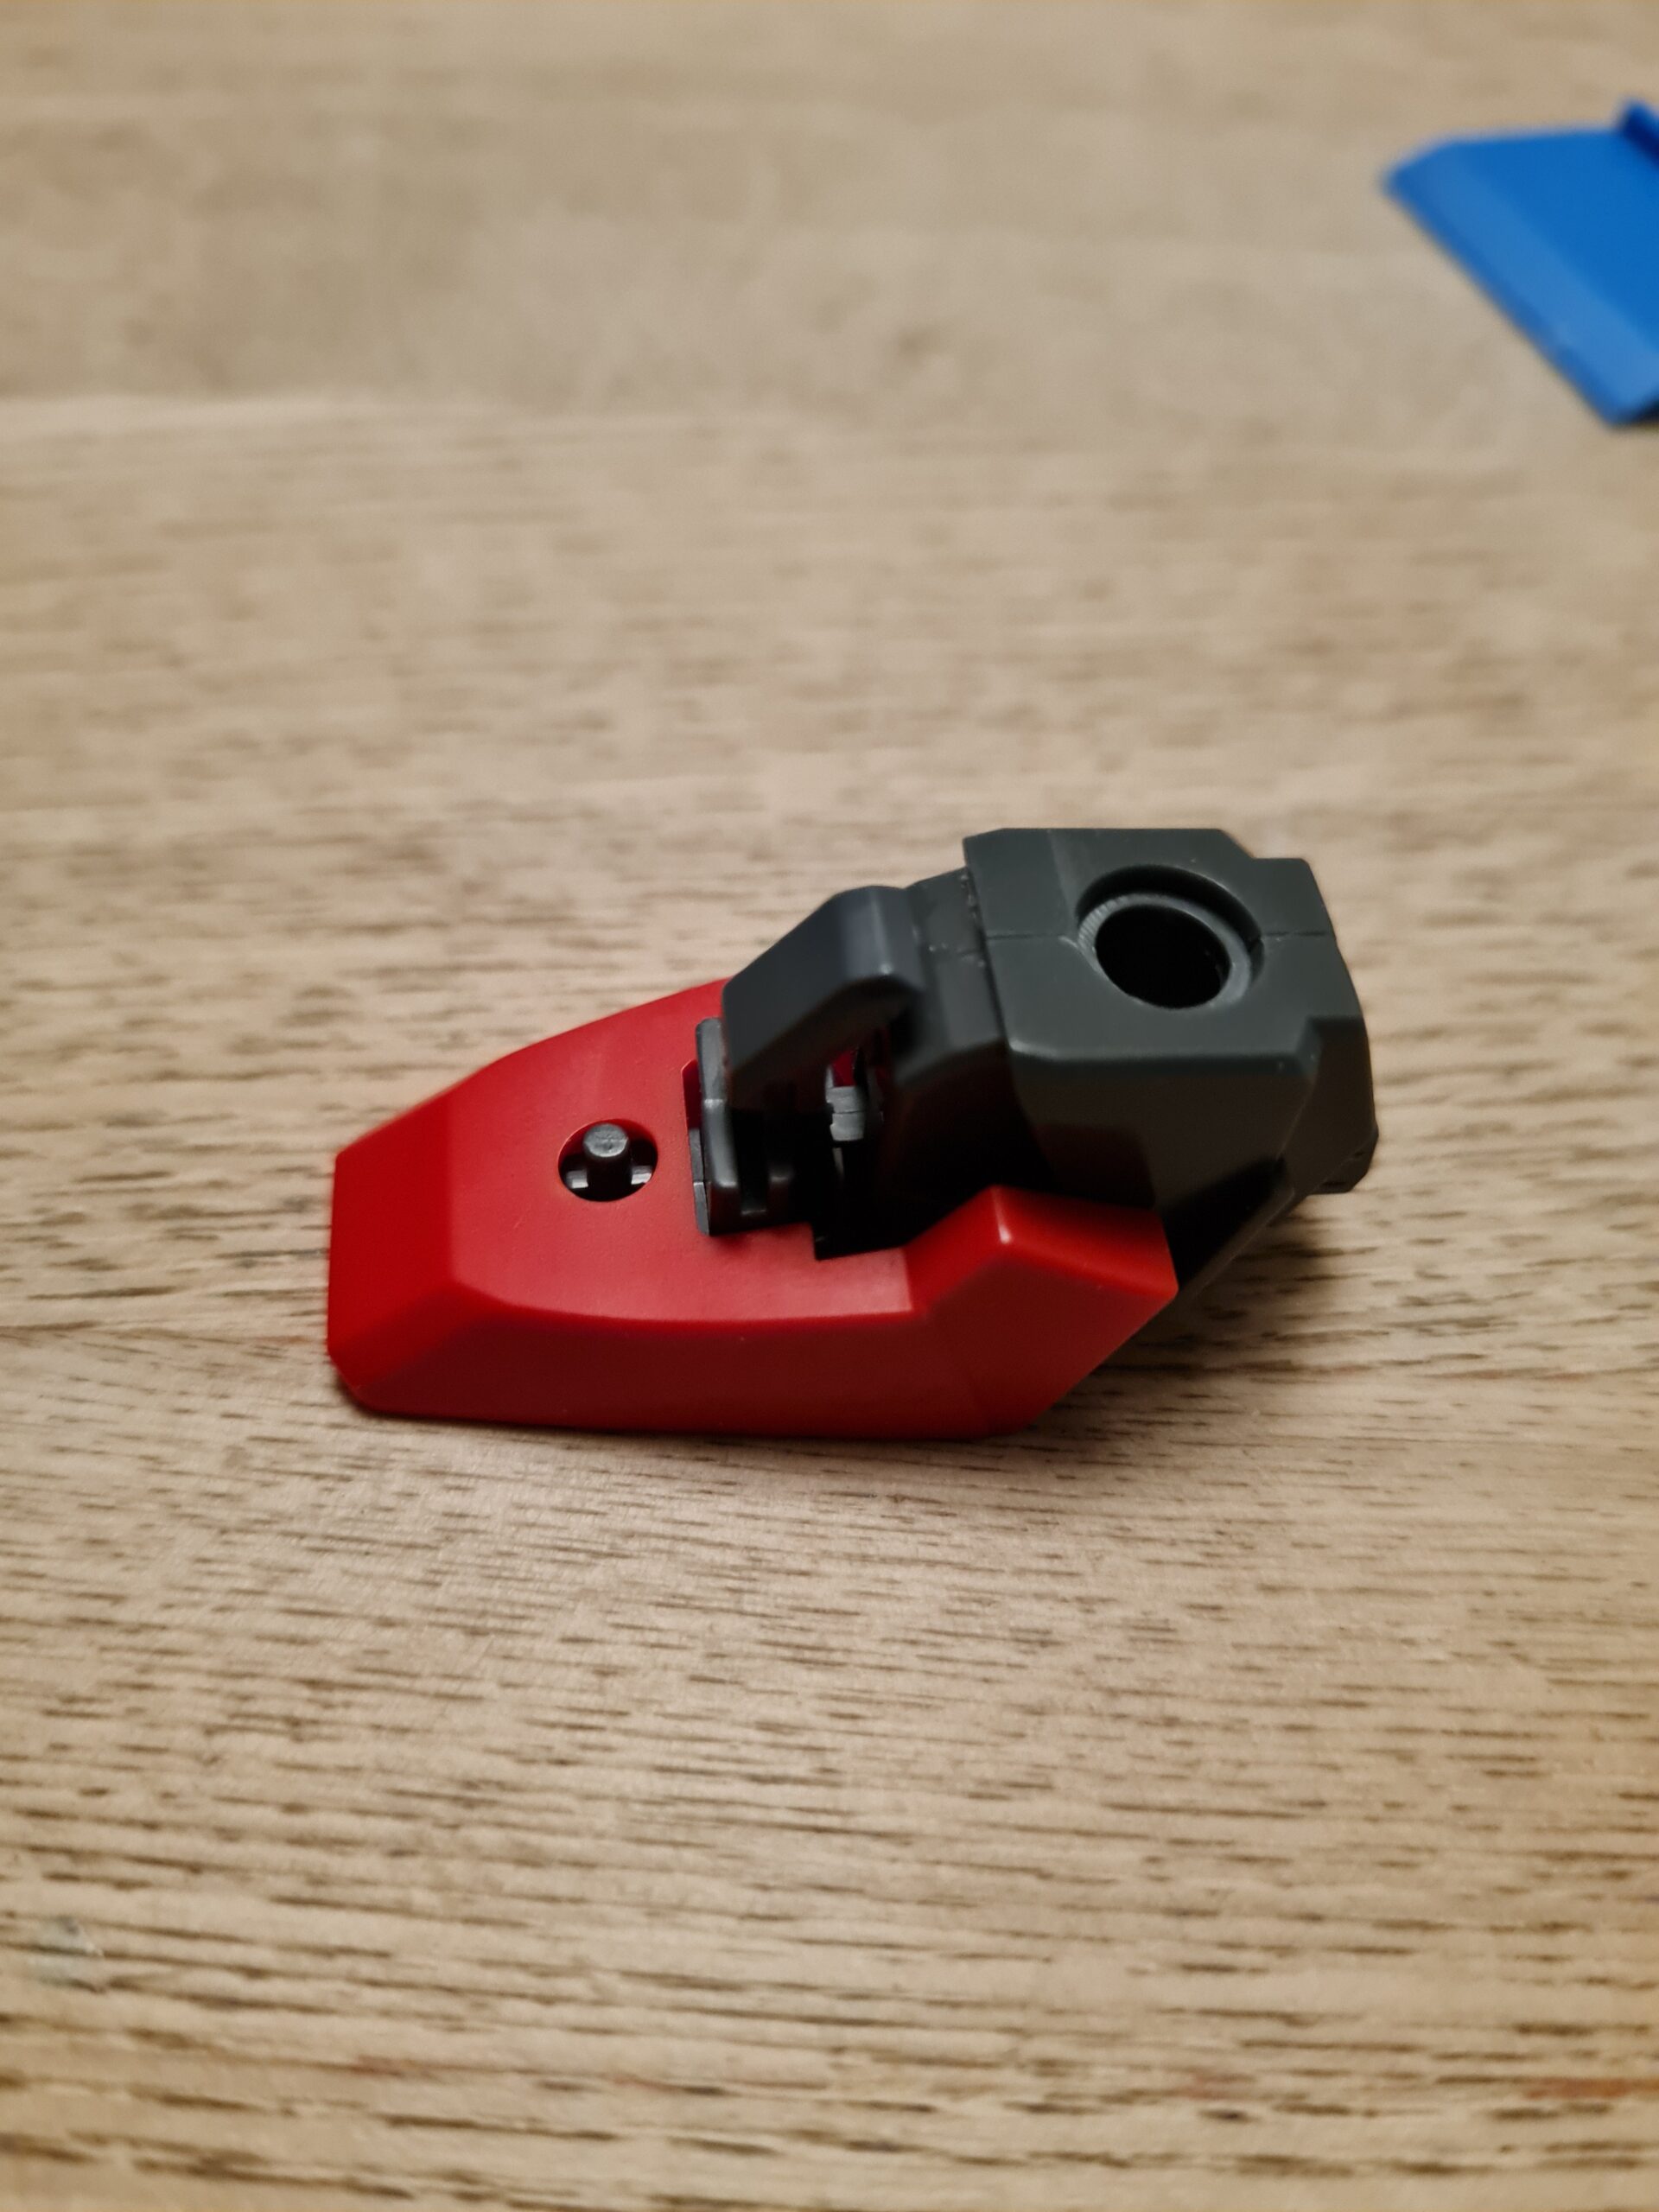
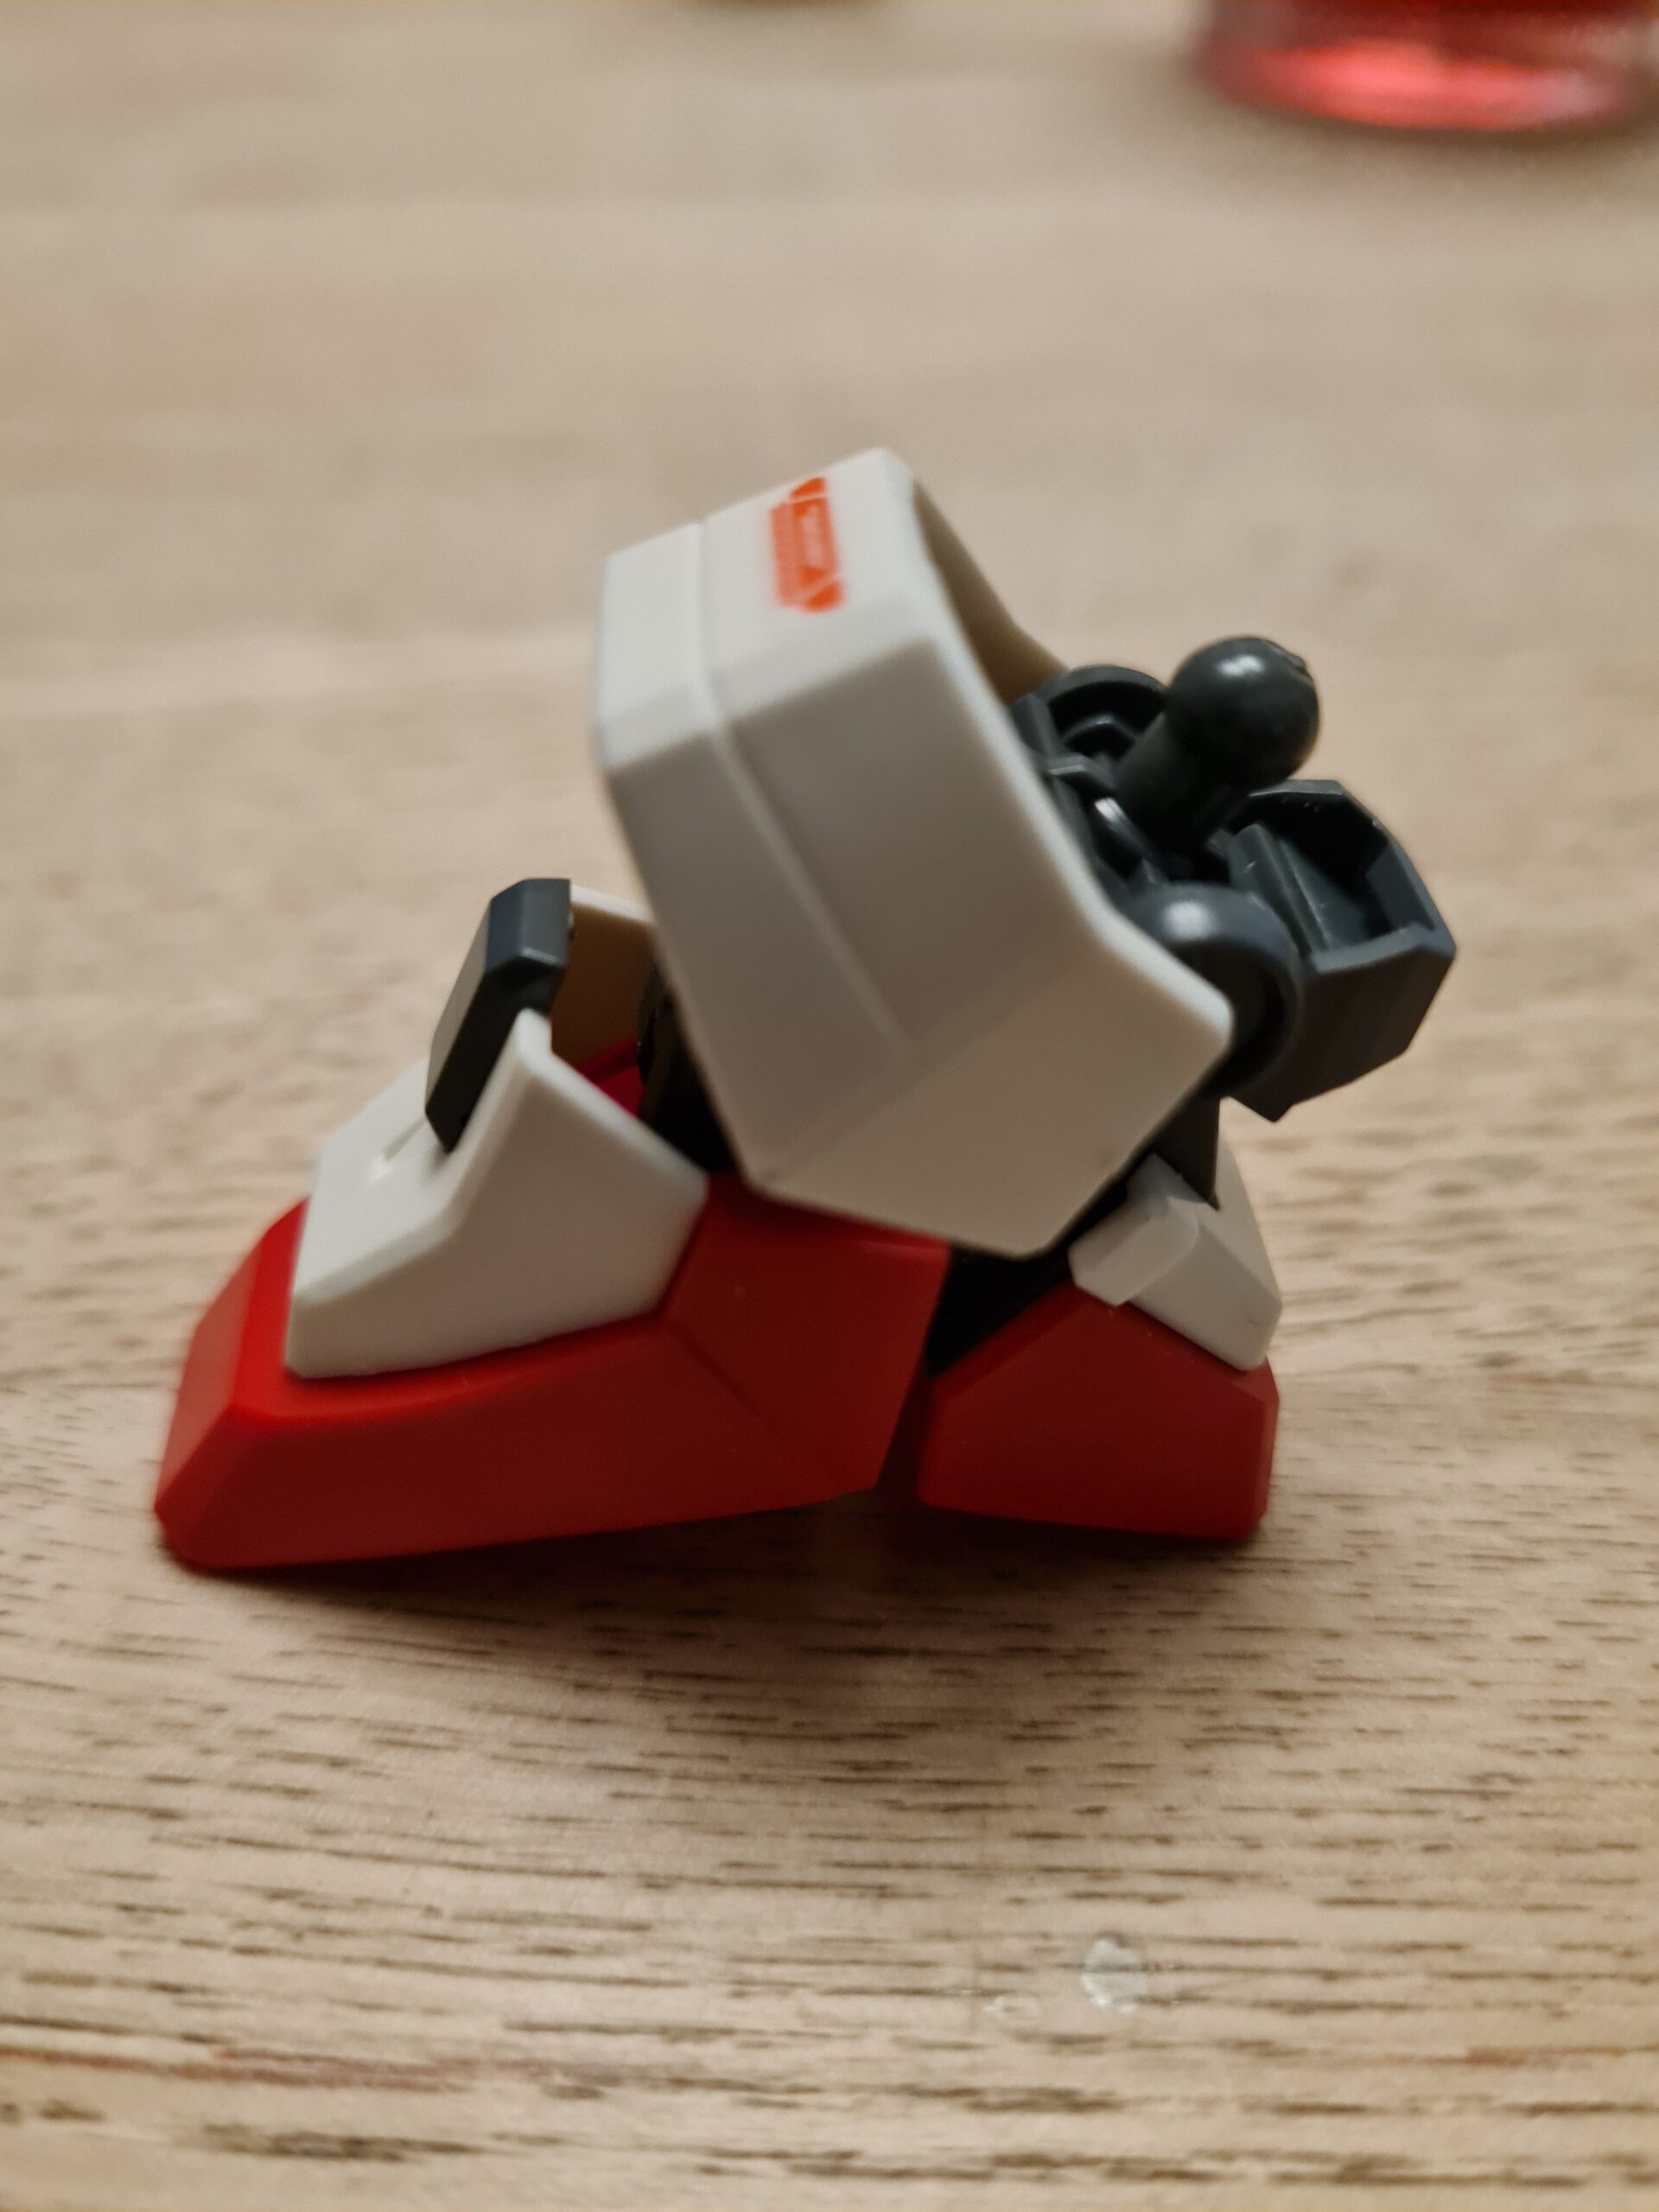
Today I am going to strip down a MG Heavyarms Foot and build it back up. On the whole this isn’t a difficult process, but for anyone who hasn’t built one and curious, here it goes!
The Parts
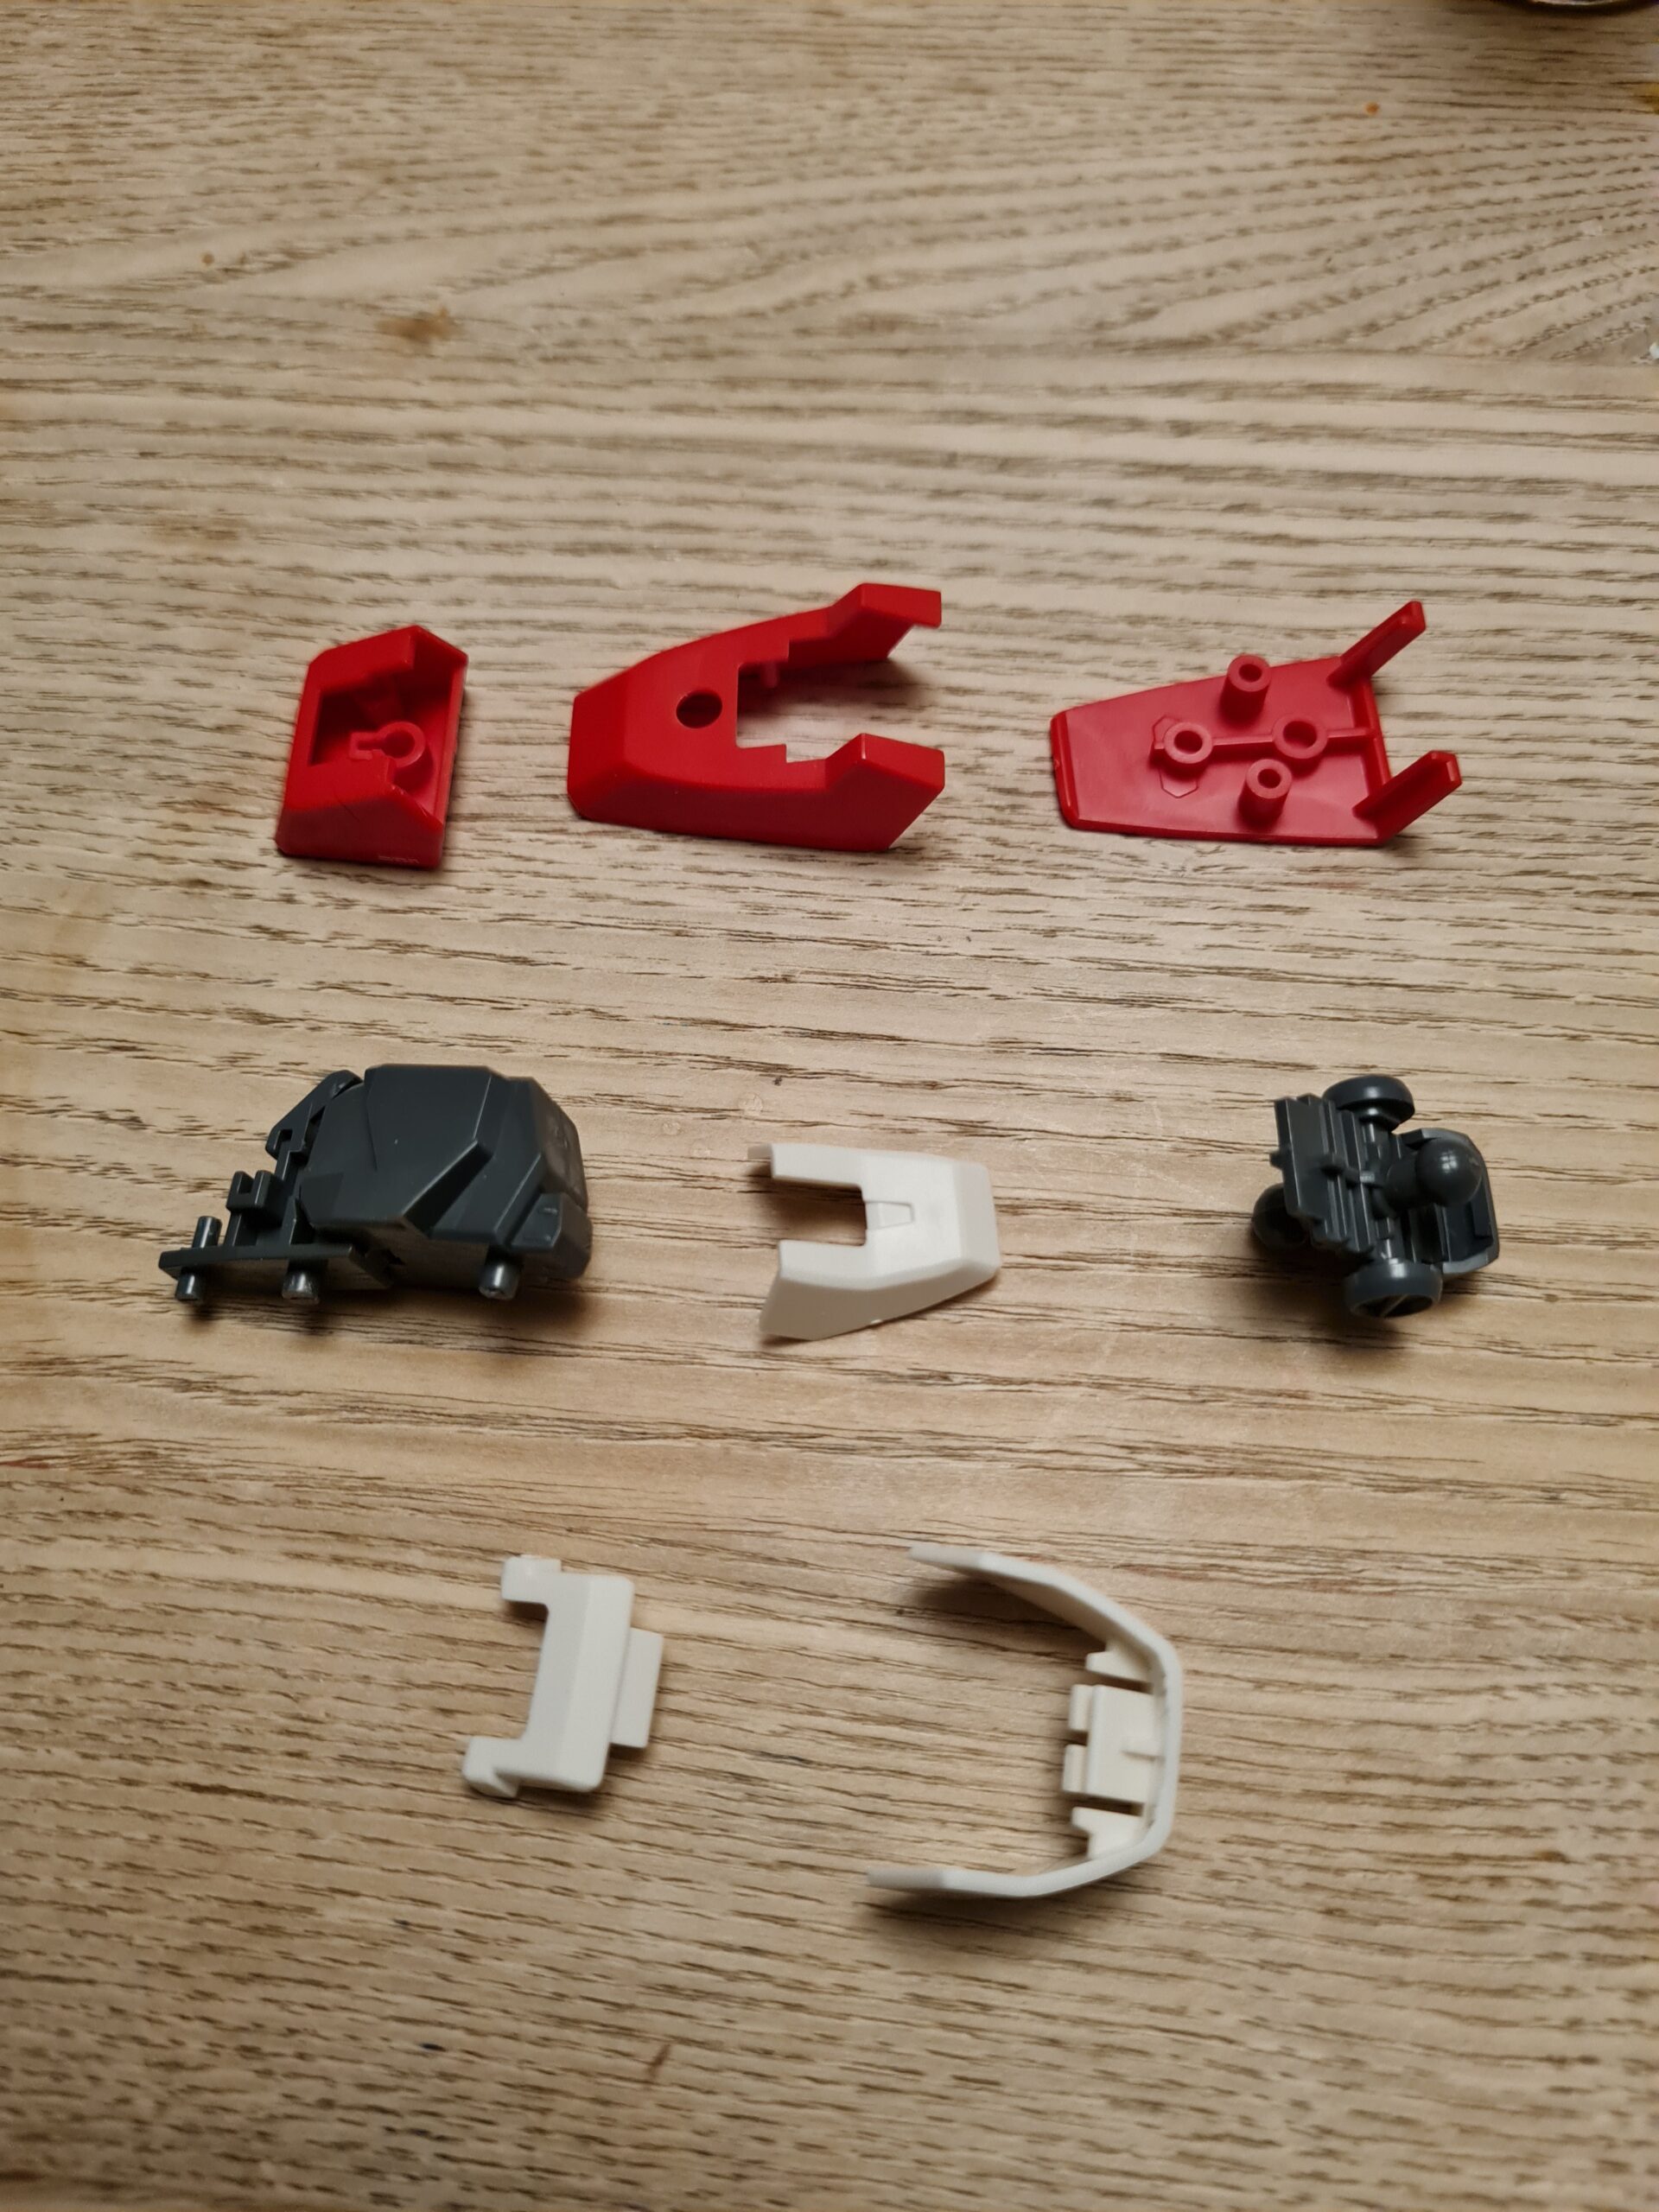
MG Foot Parts
With a little help from a parts separator I split apart the pieces. As you can see the MH Heavyarms foot consists of 8 separate parts.
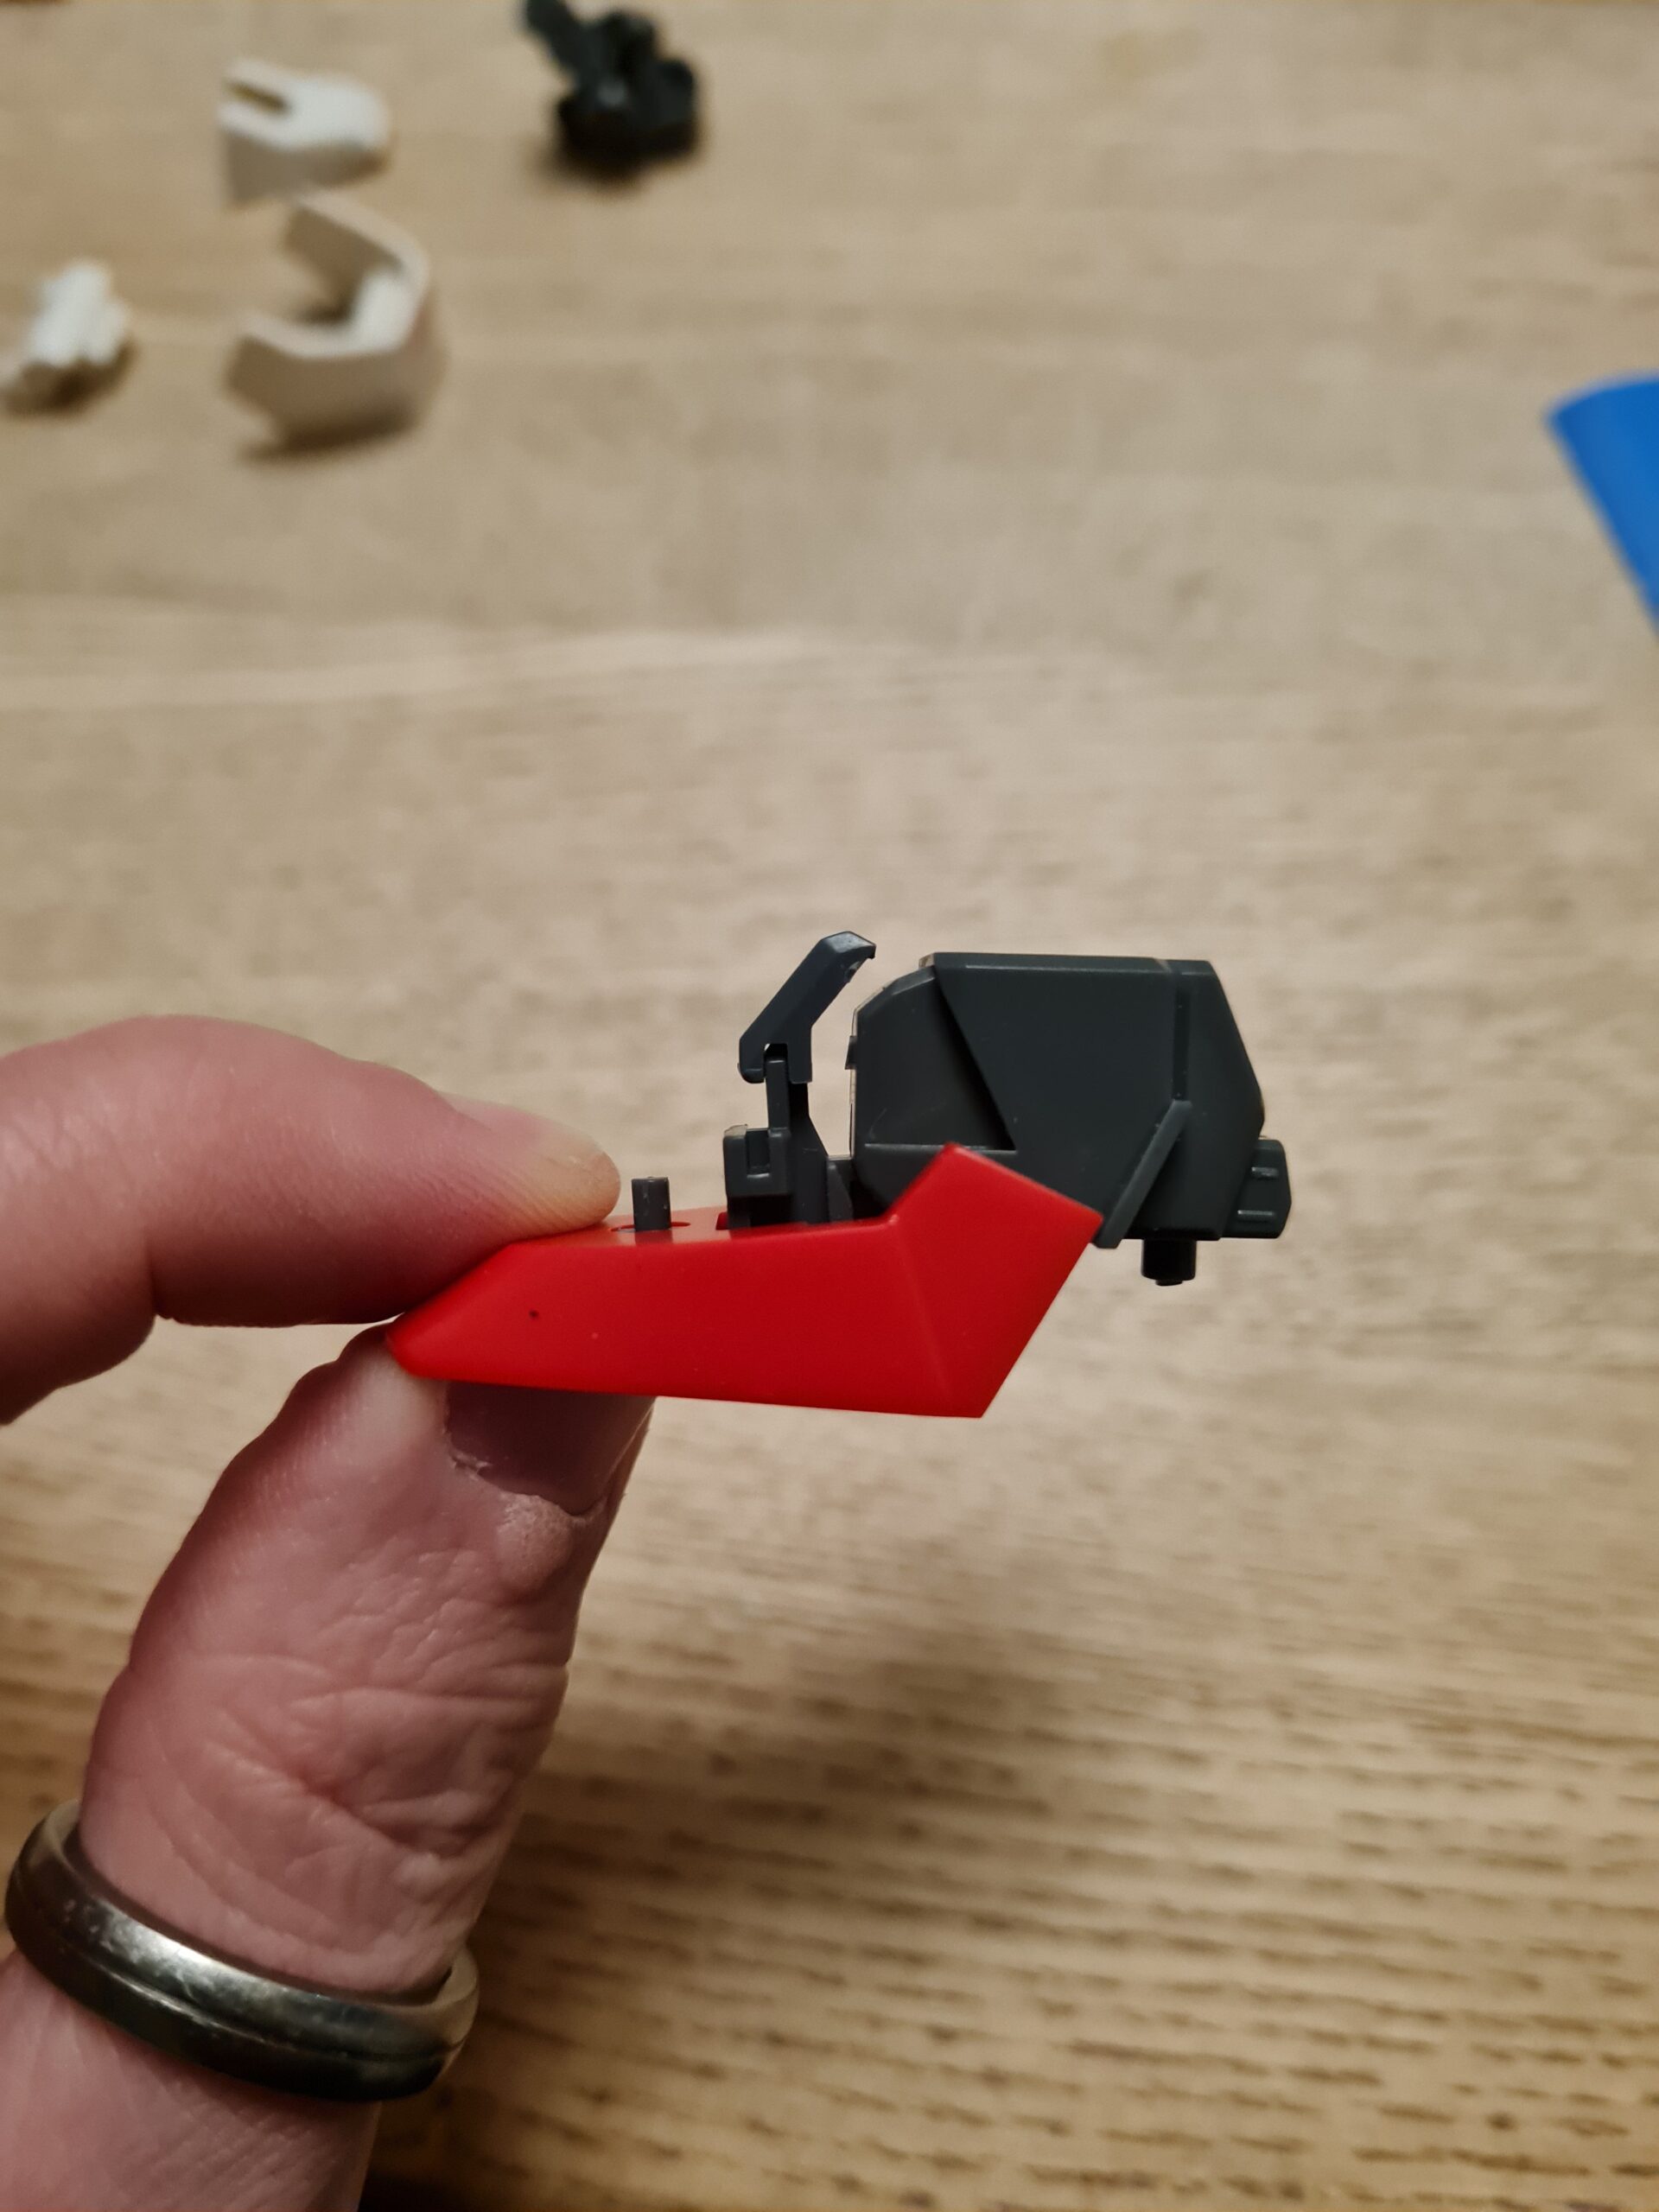
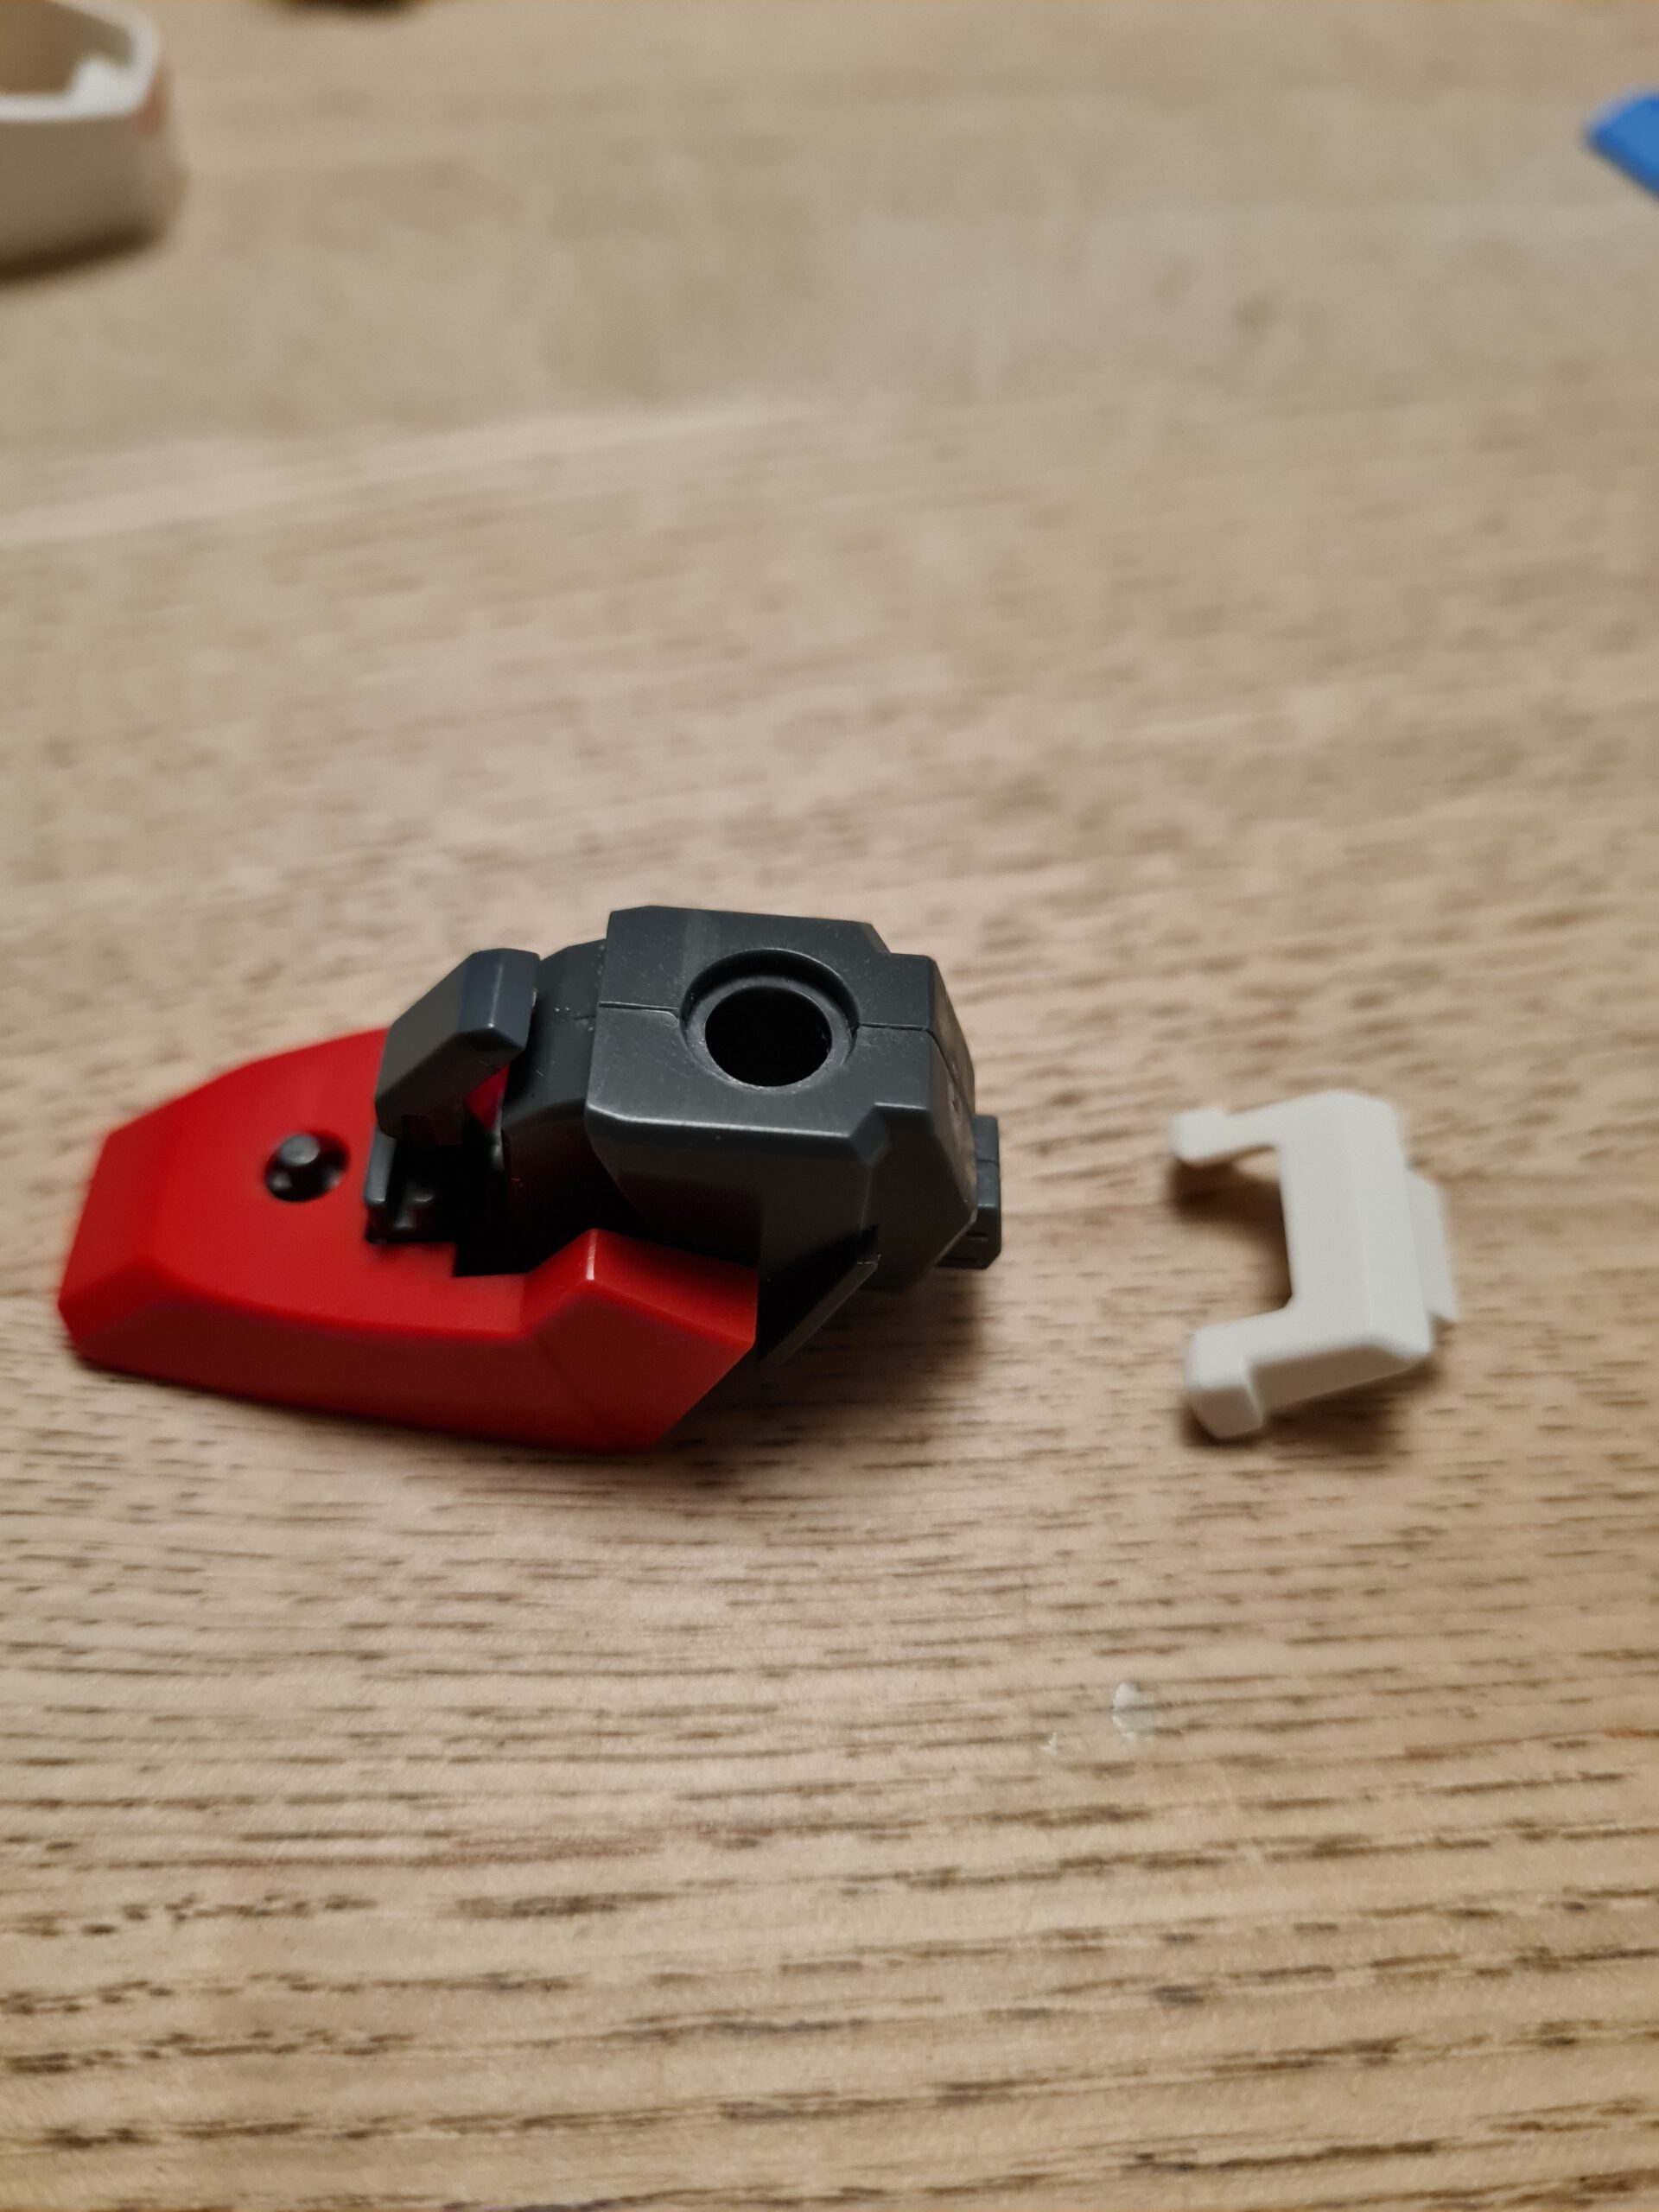
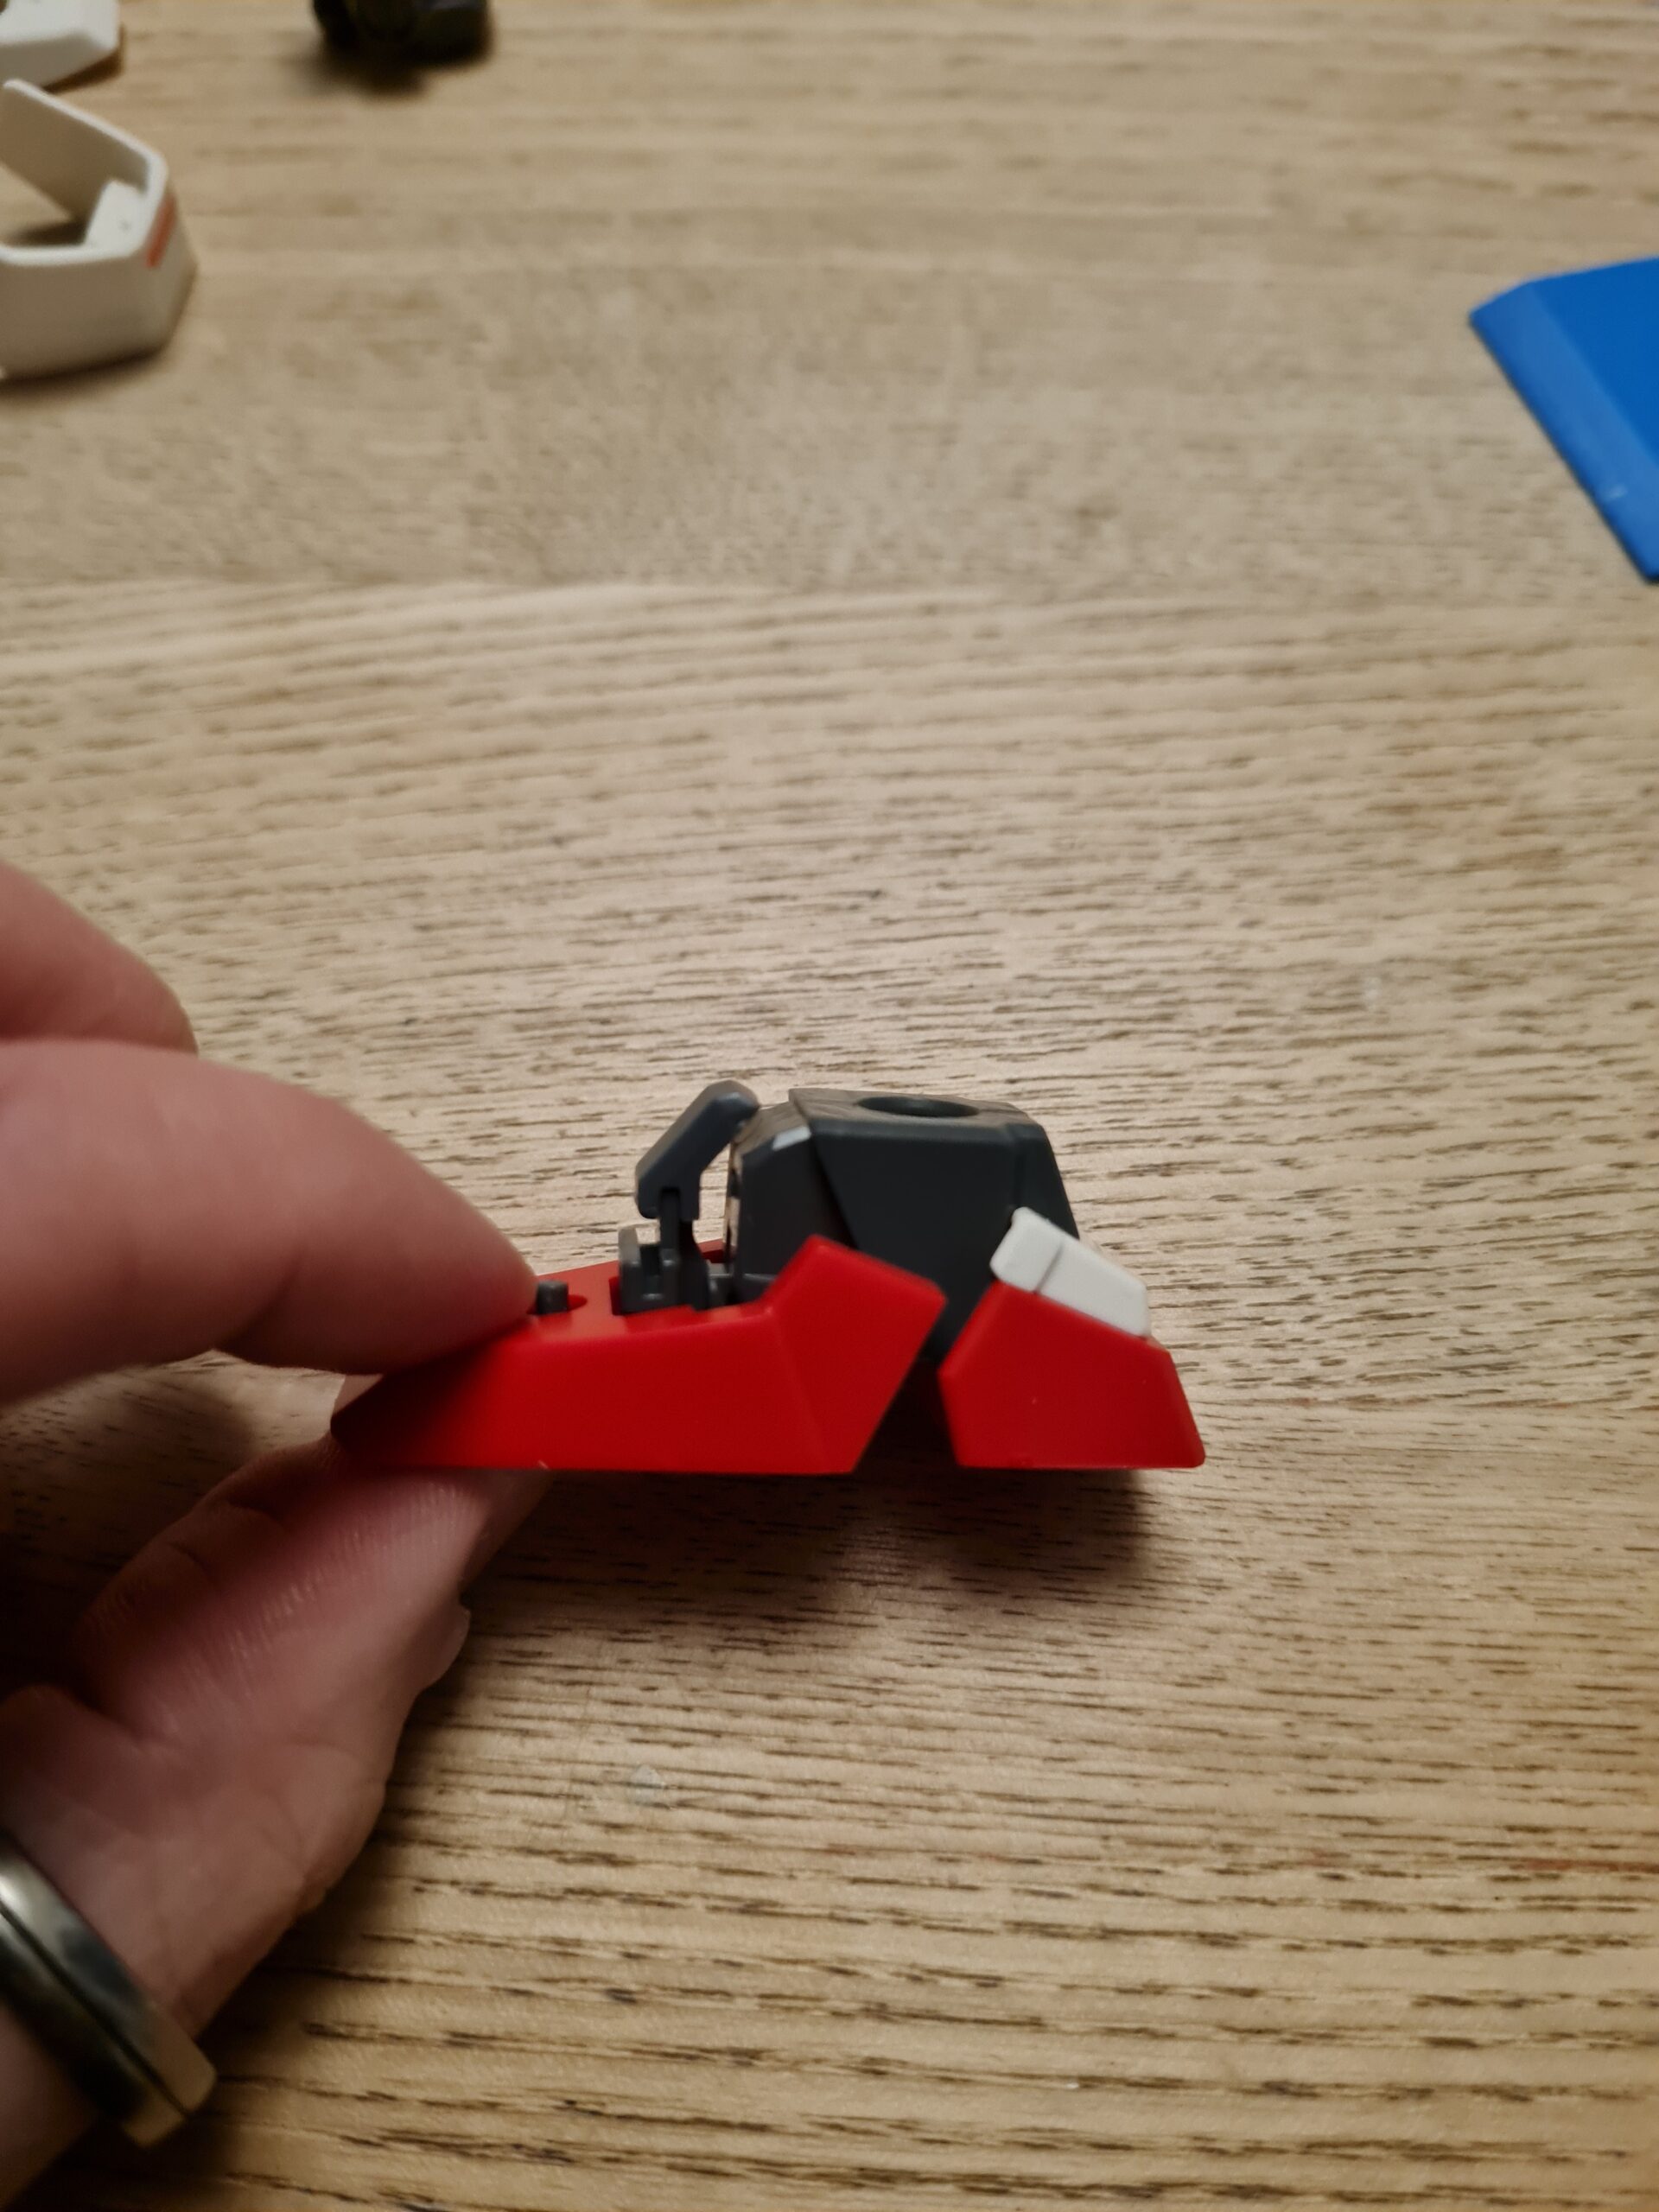
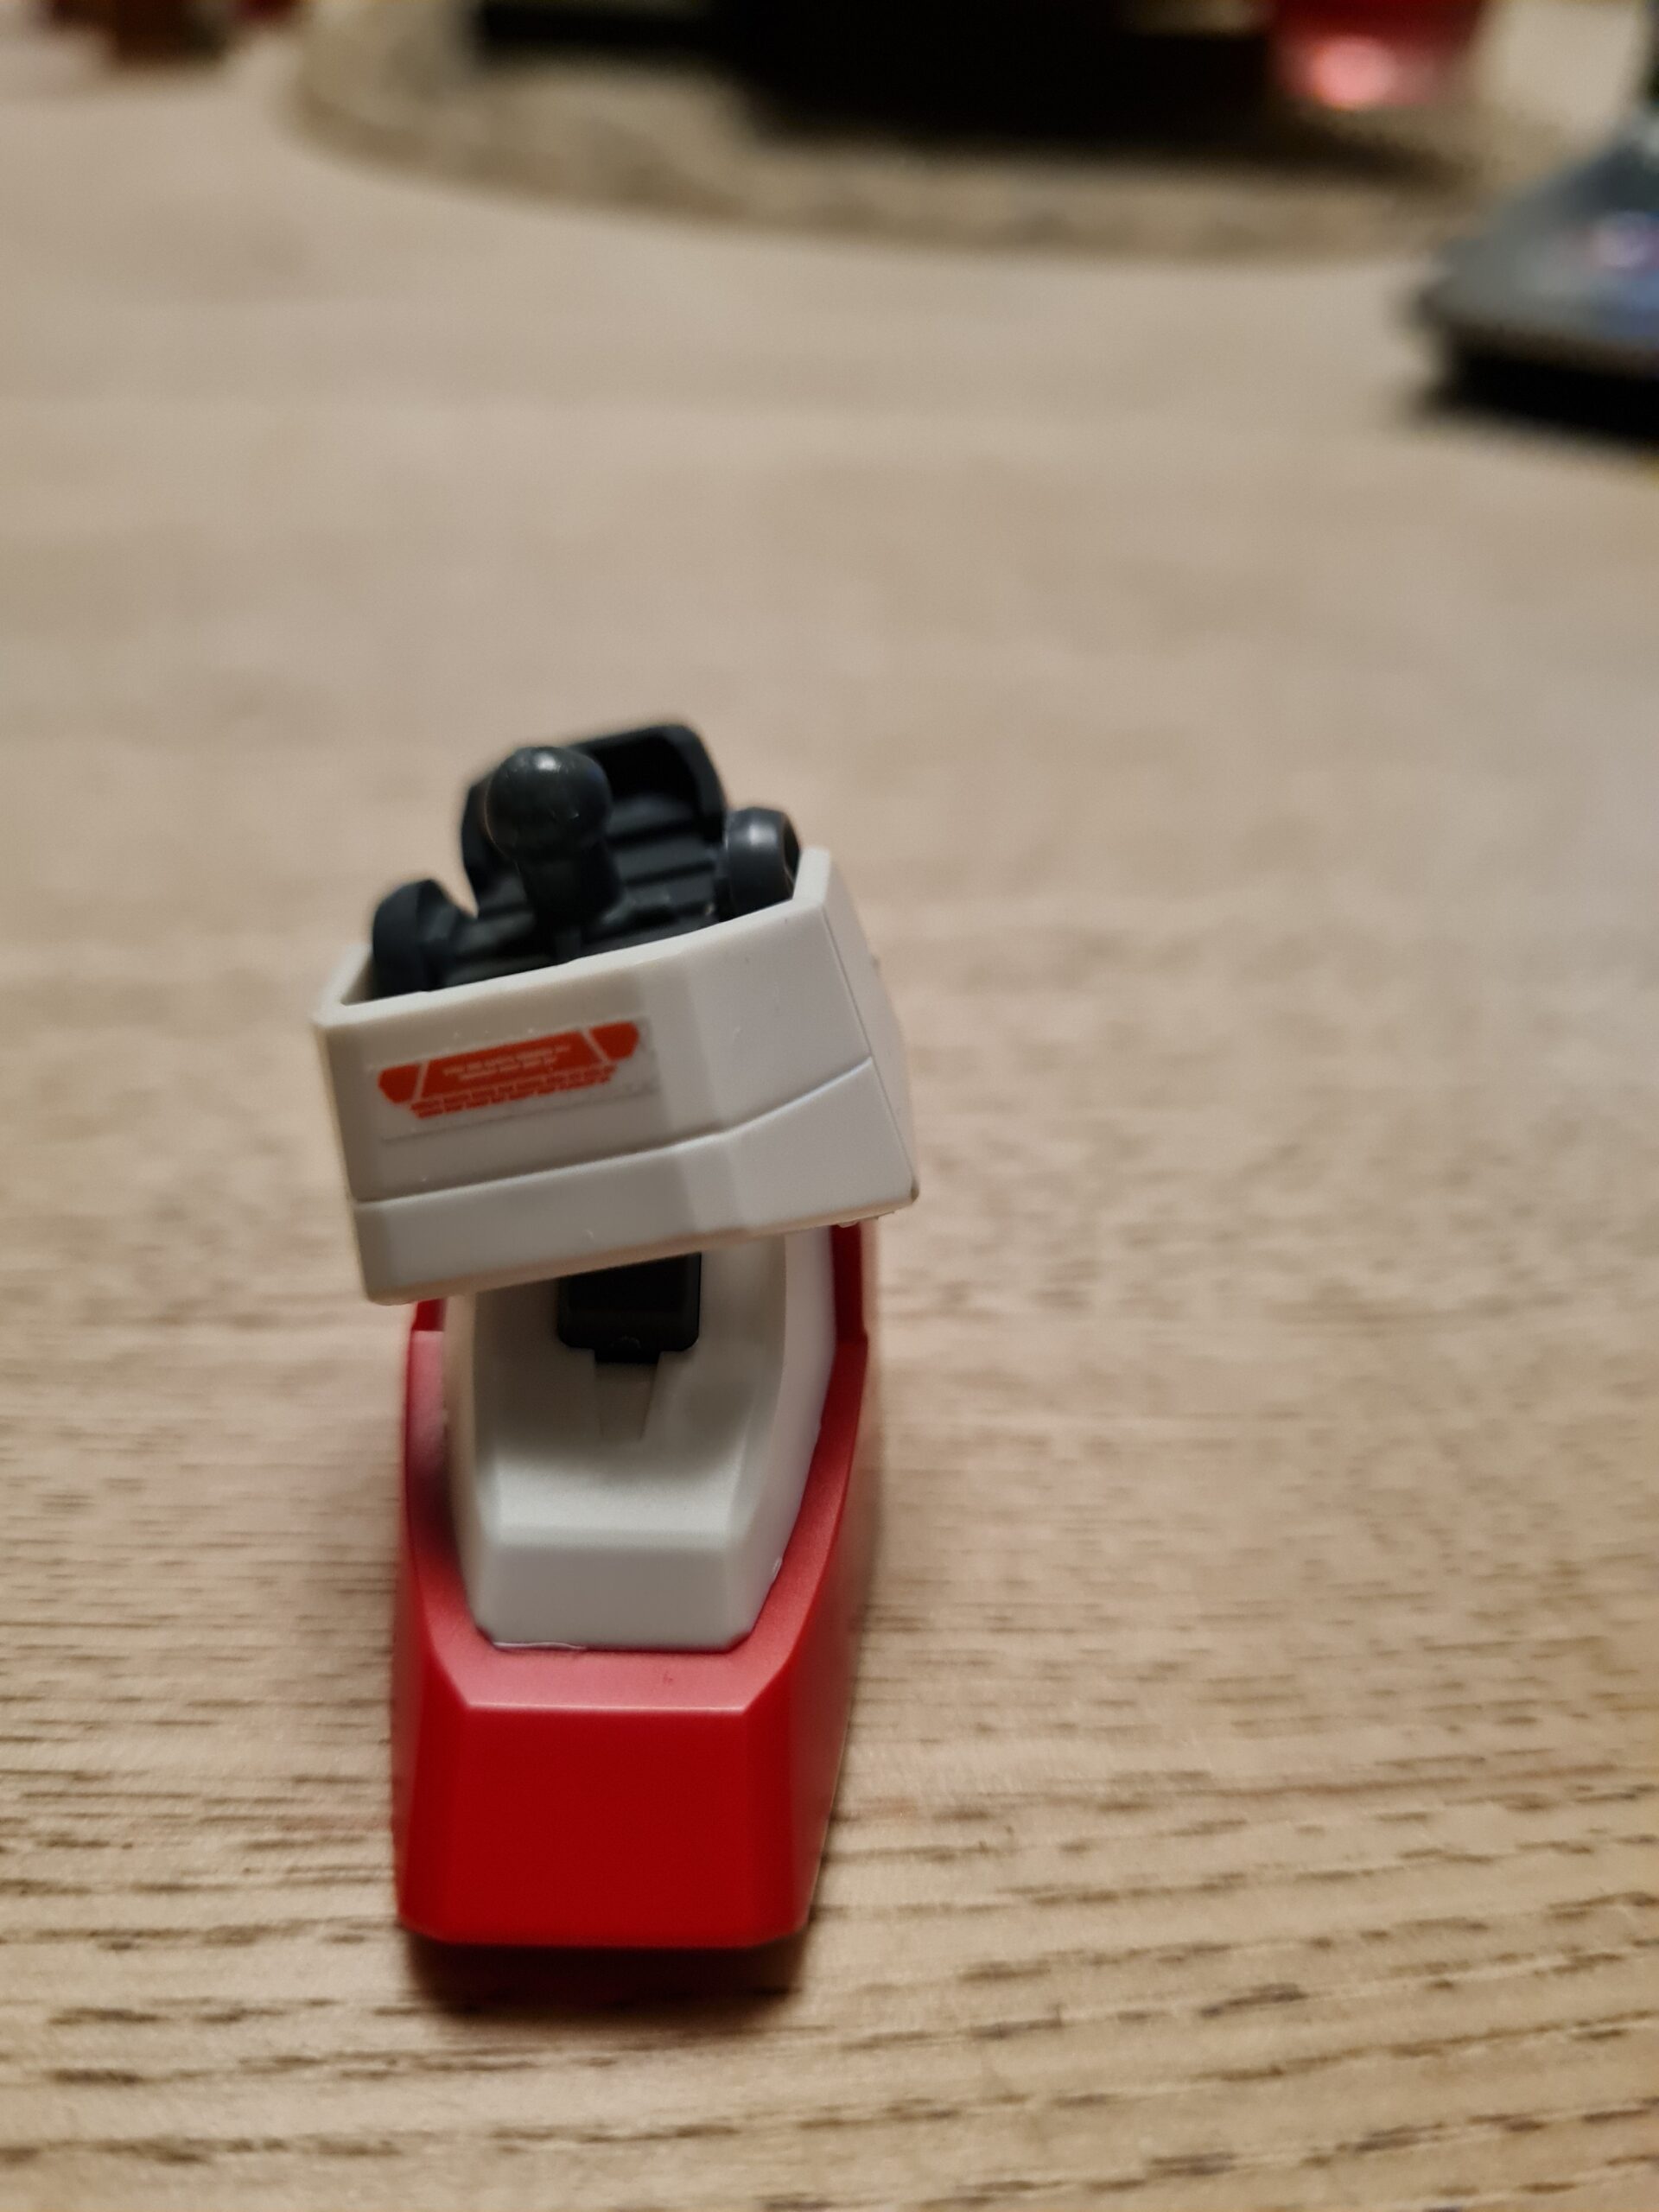
First Step
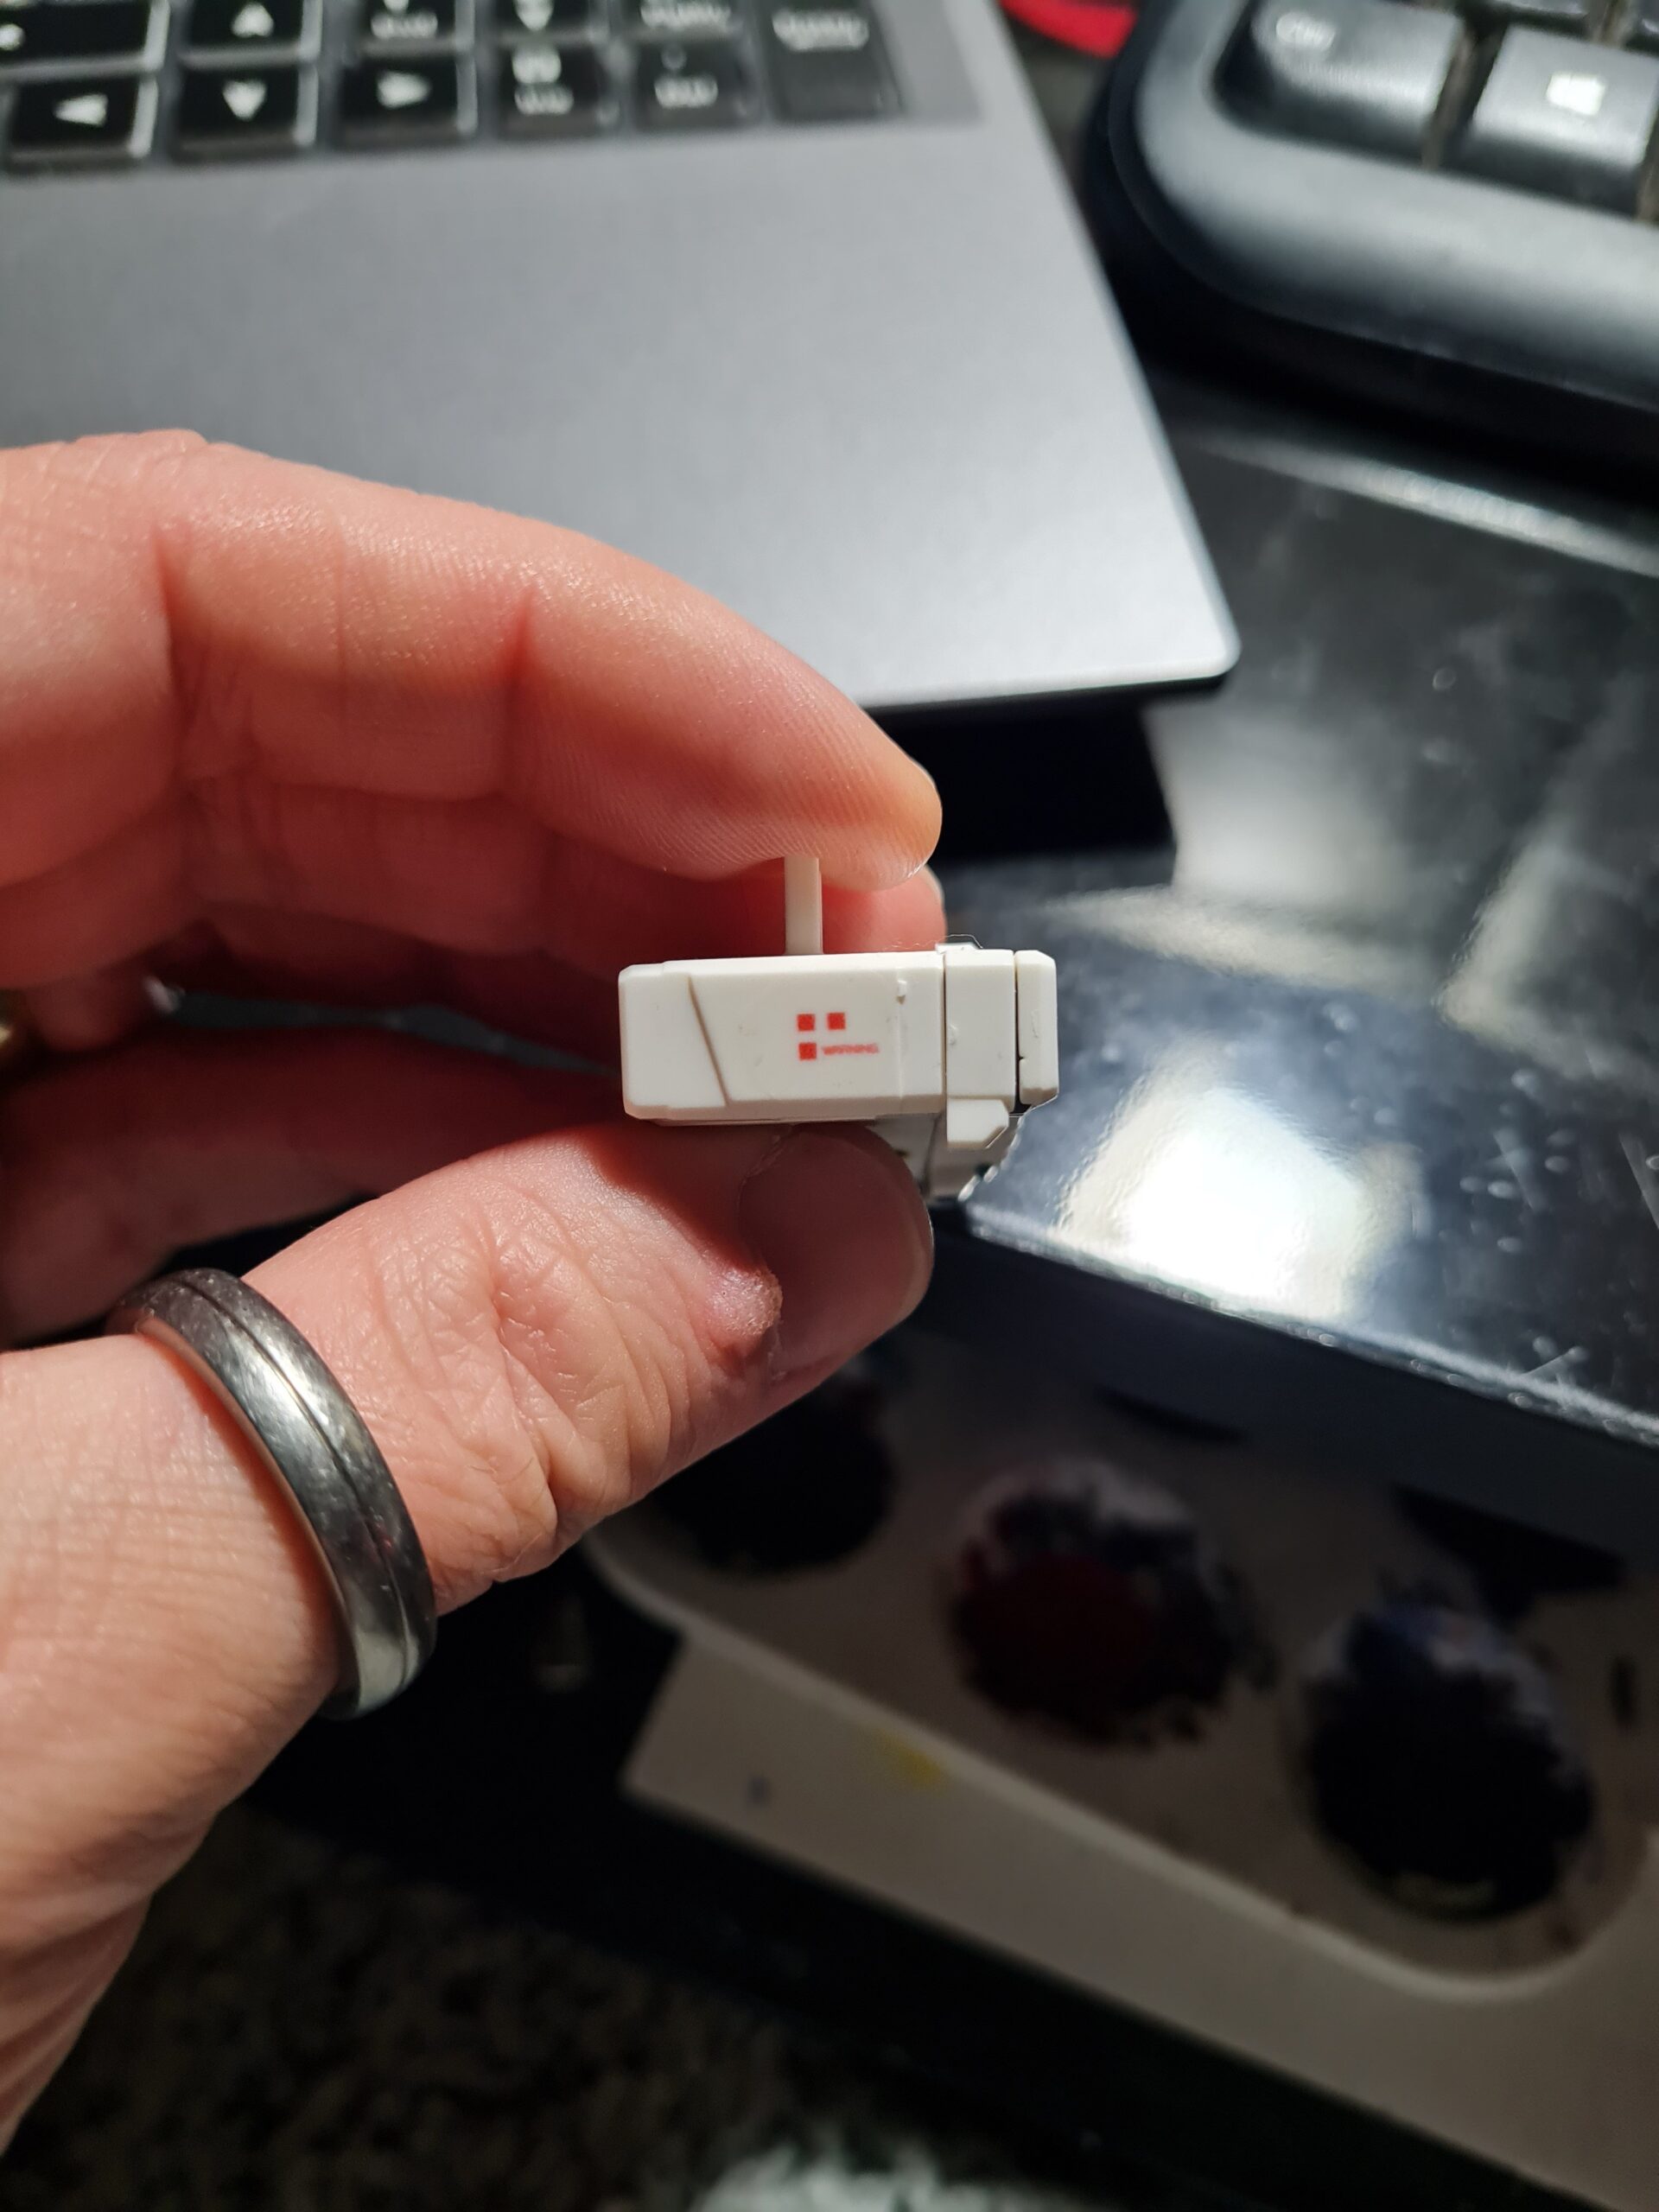
Foot Body and top coverHow The foot will lookBody attached to base plate
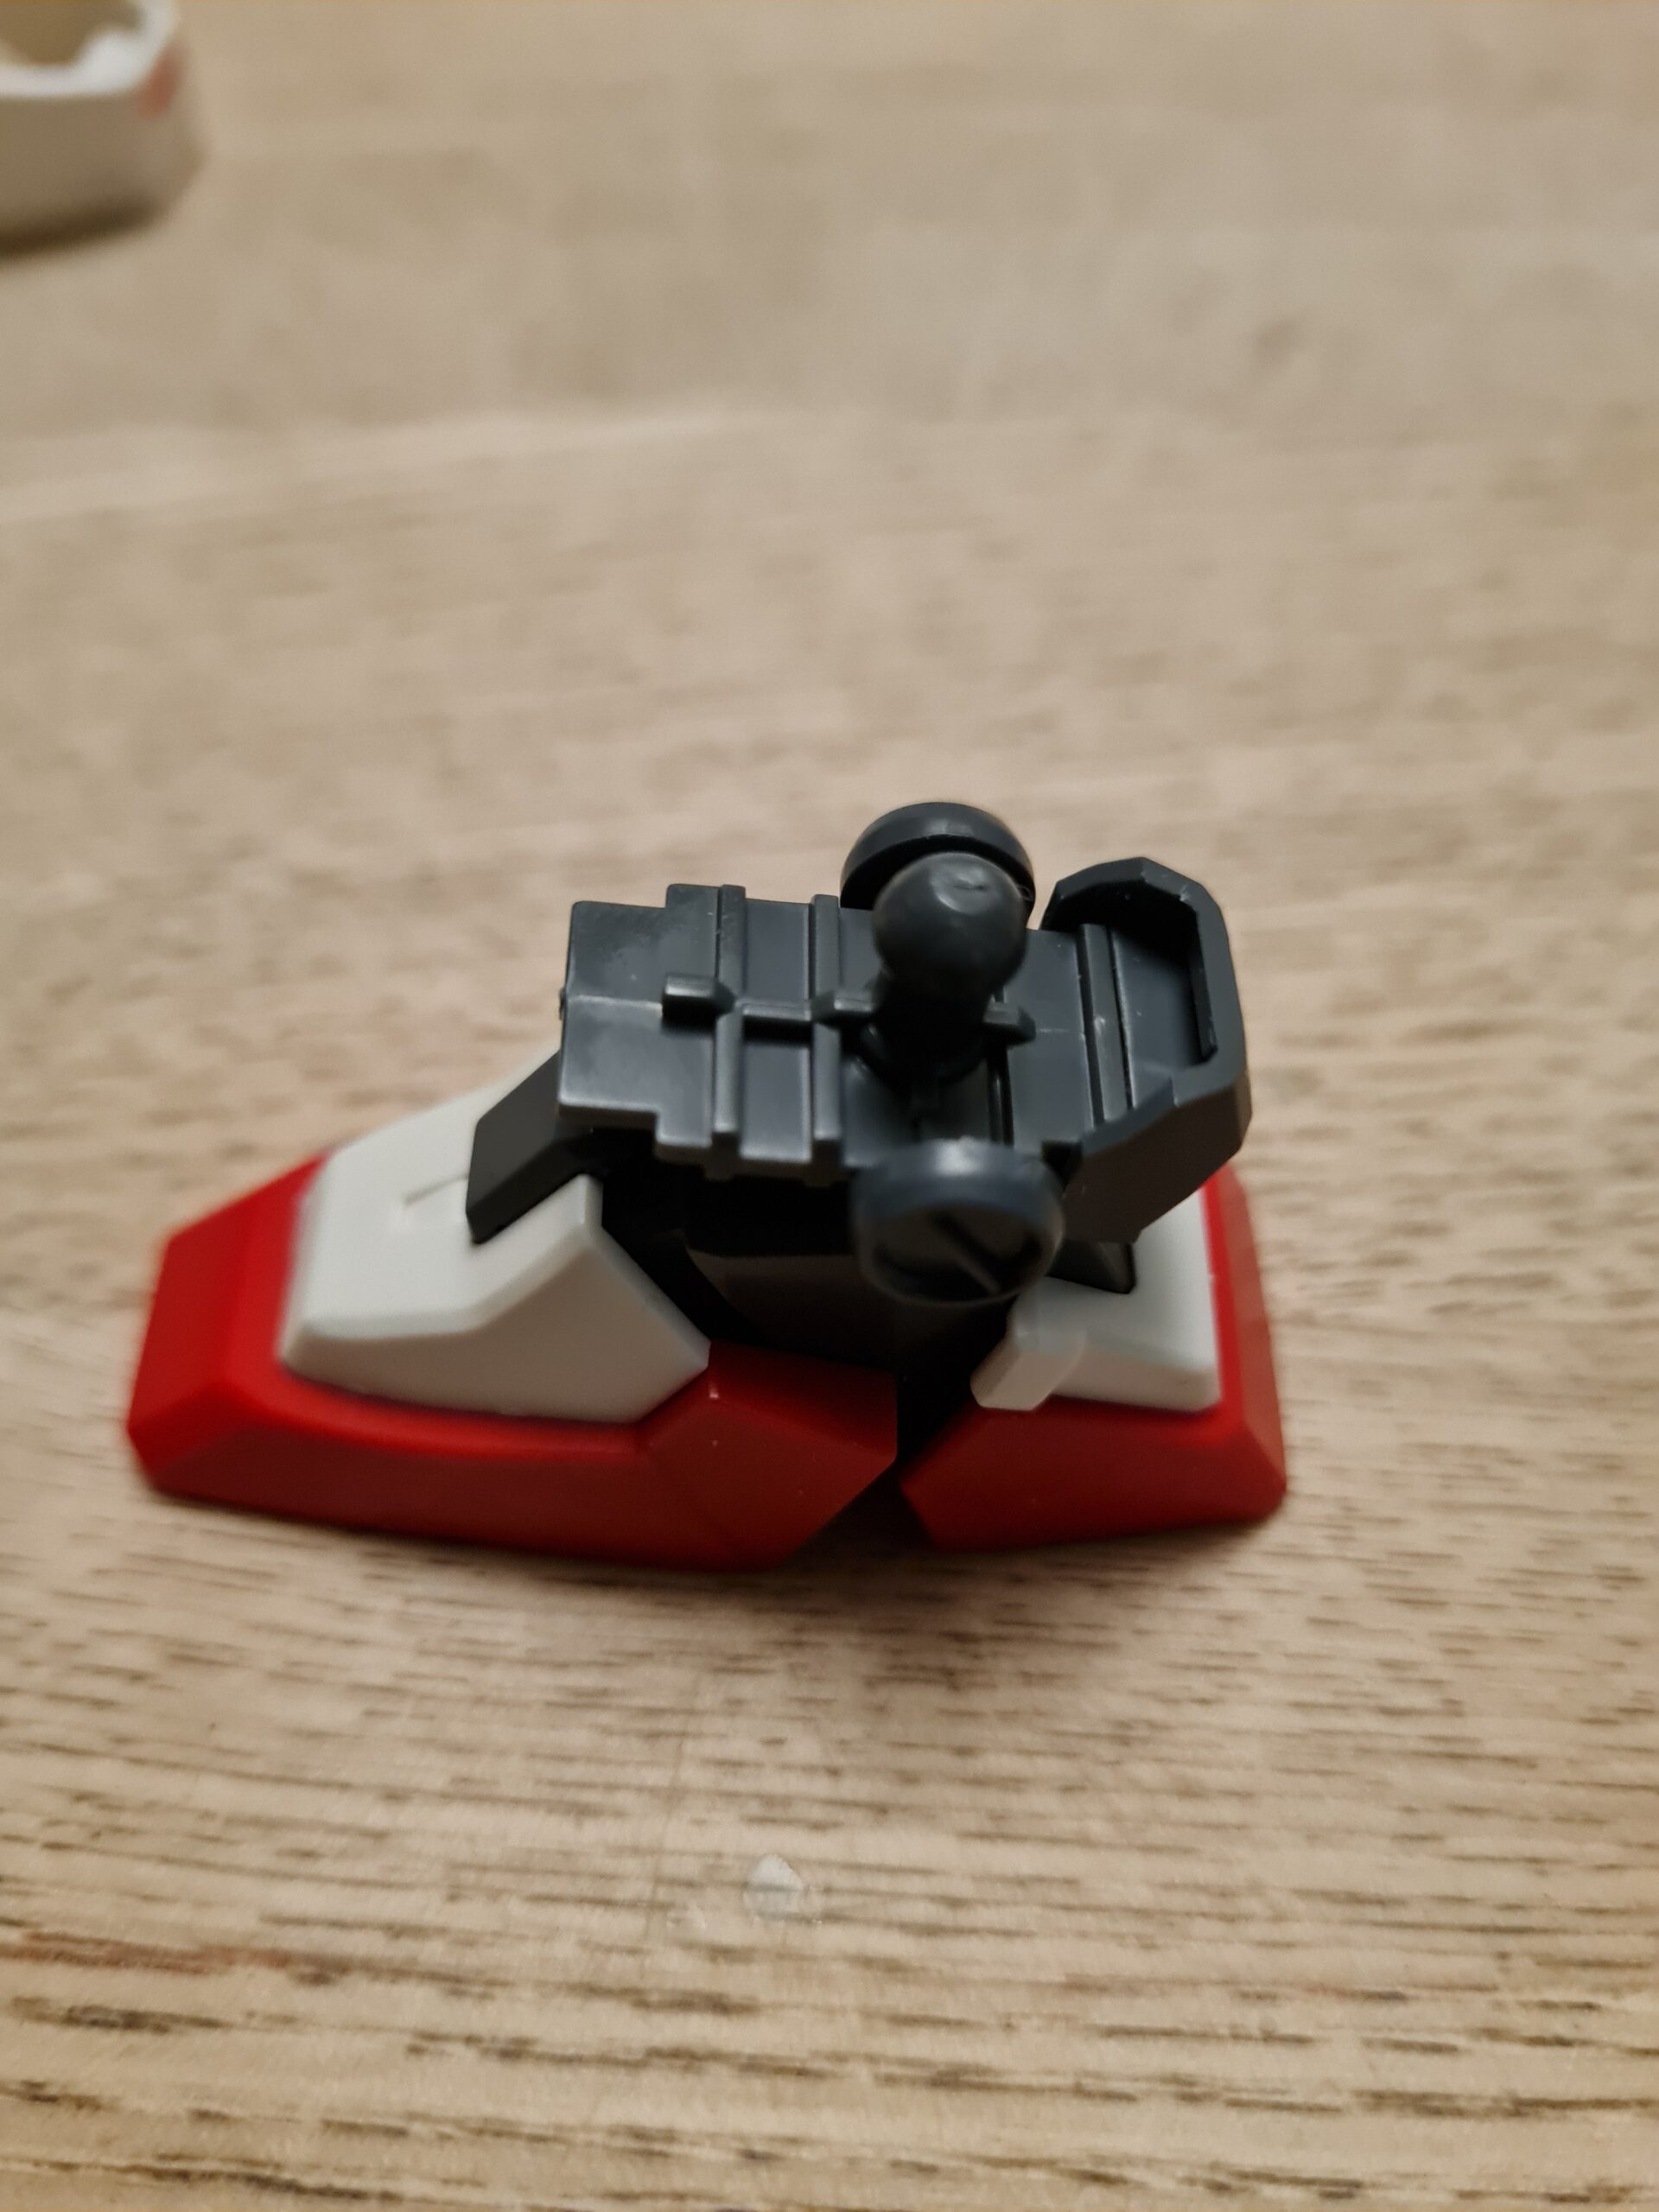
I decided to show you the first two images to show what is happening. When the main foot bod (the big solid grey piece) is in place you will get a small “nub” style post sticking up through the hole of the red top cover. The first step is to attach the main body to the flat bottom of the foot.
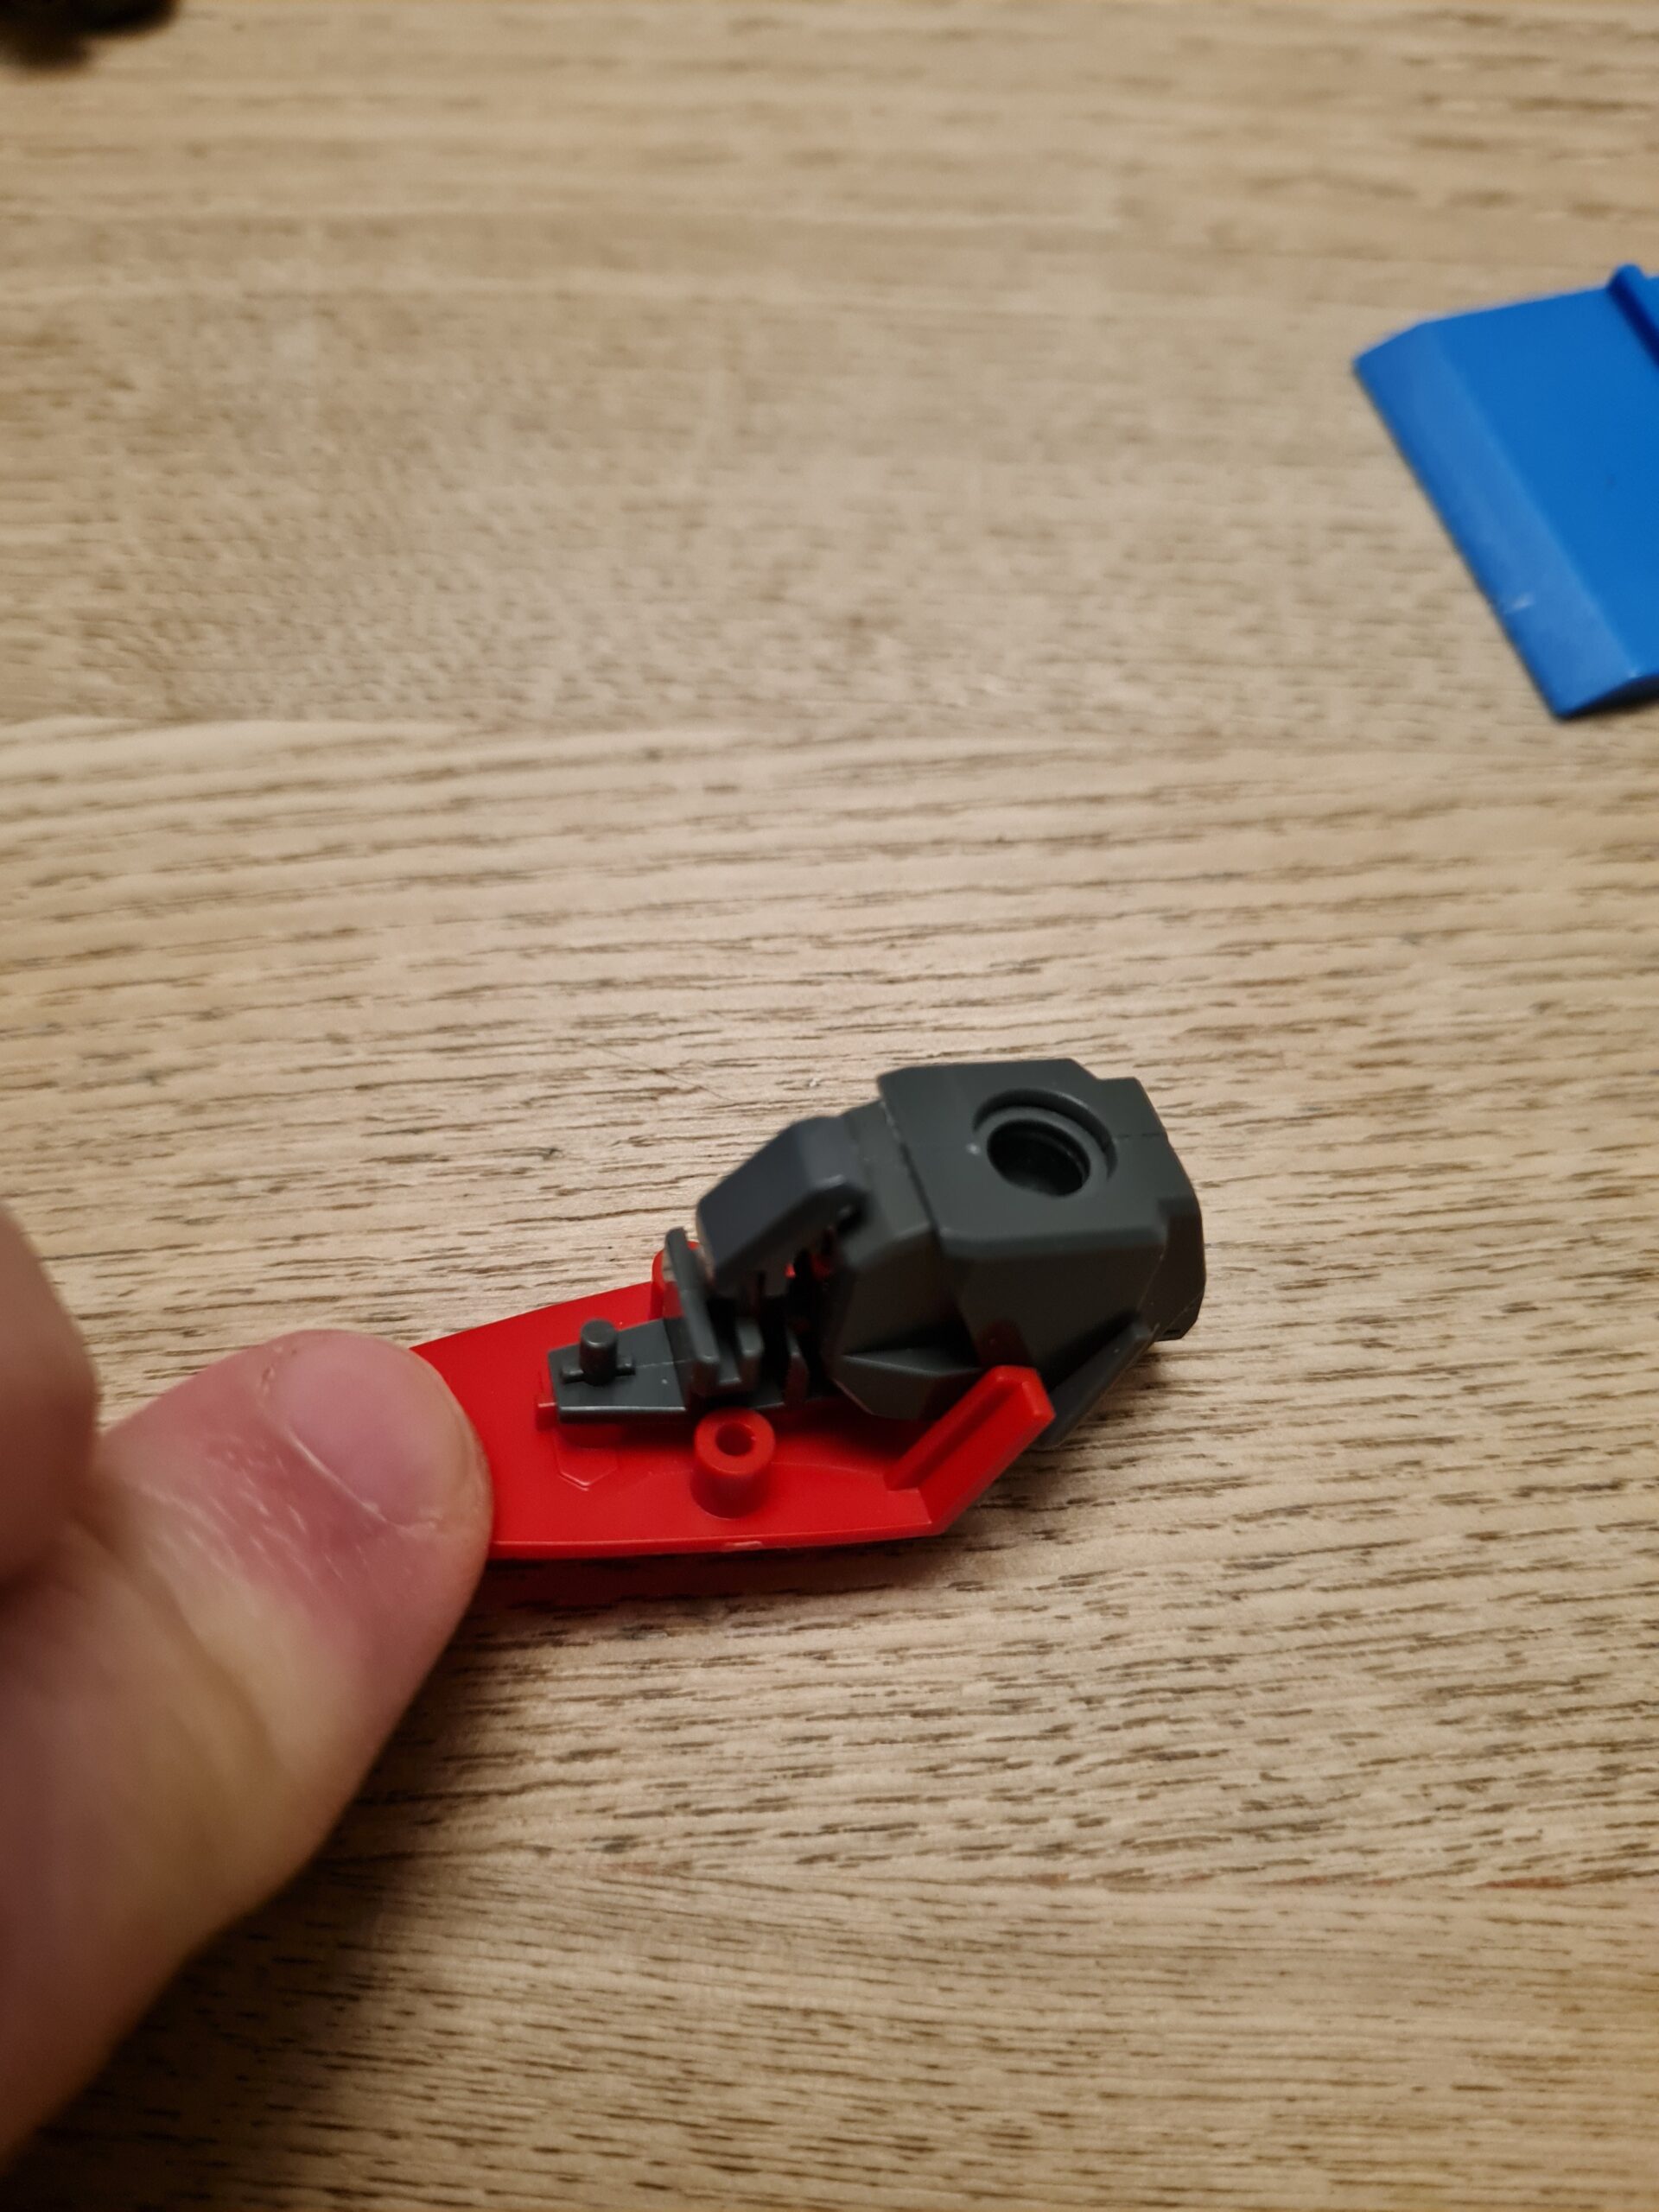
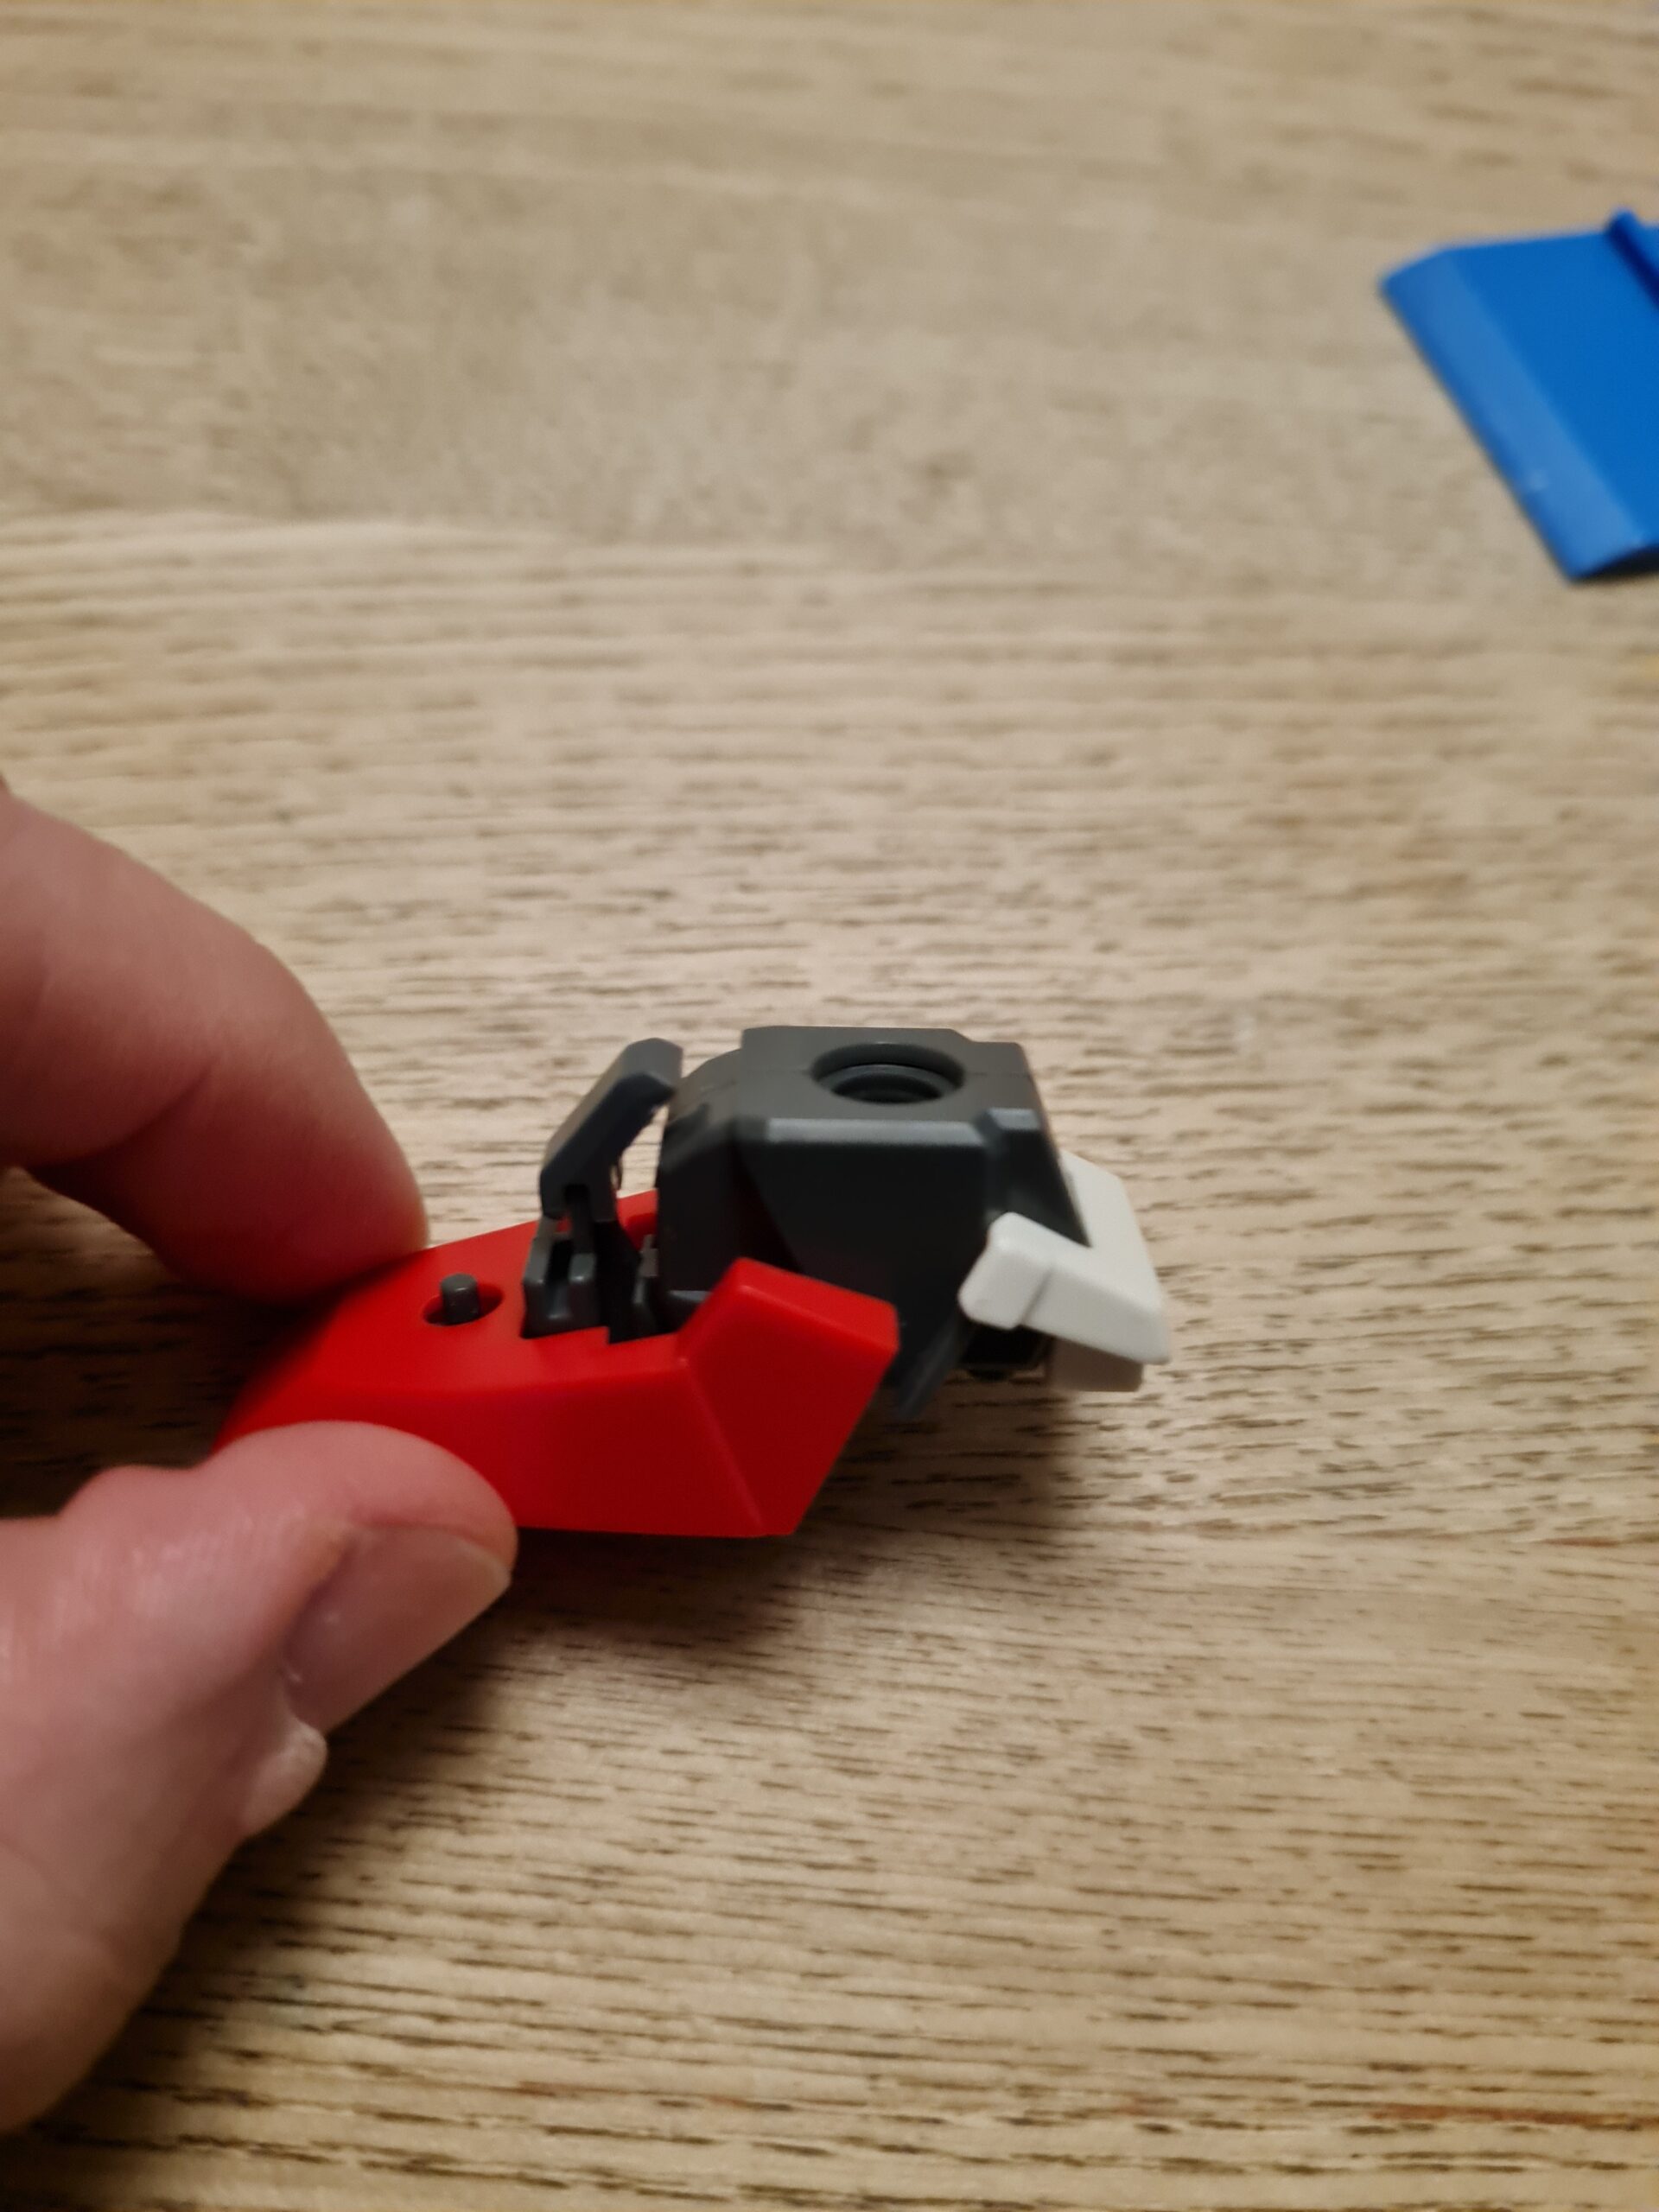
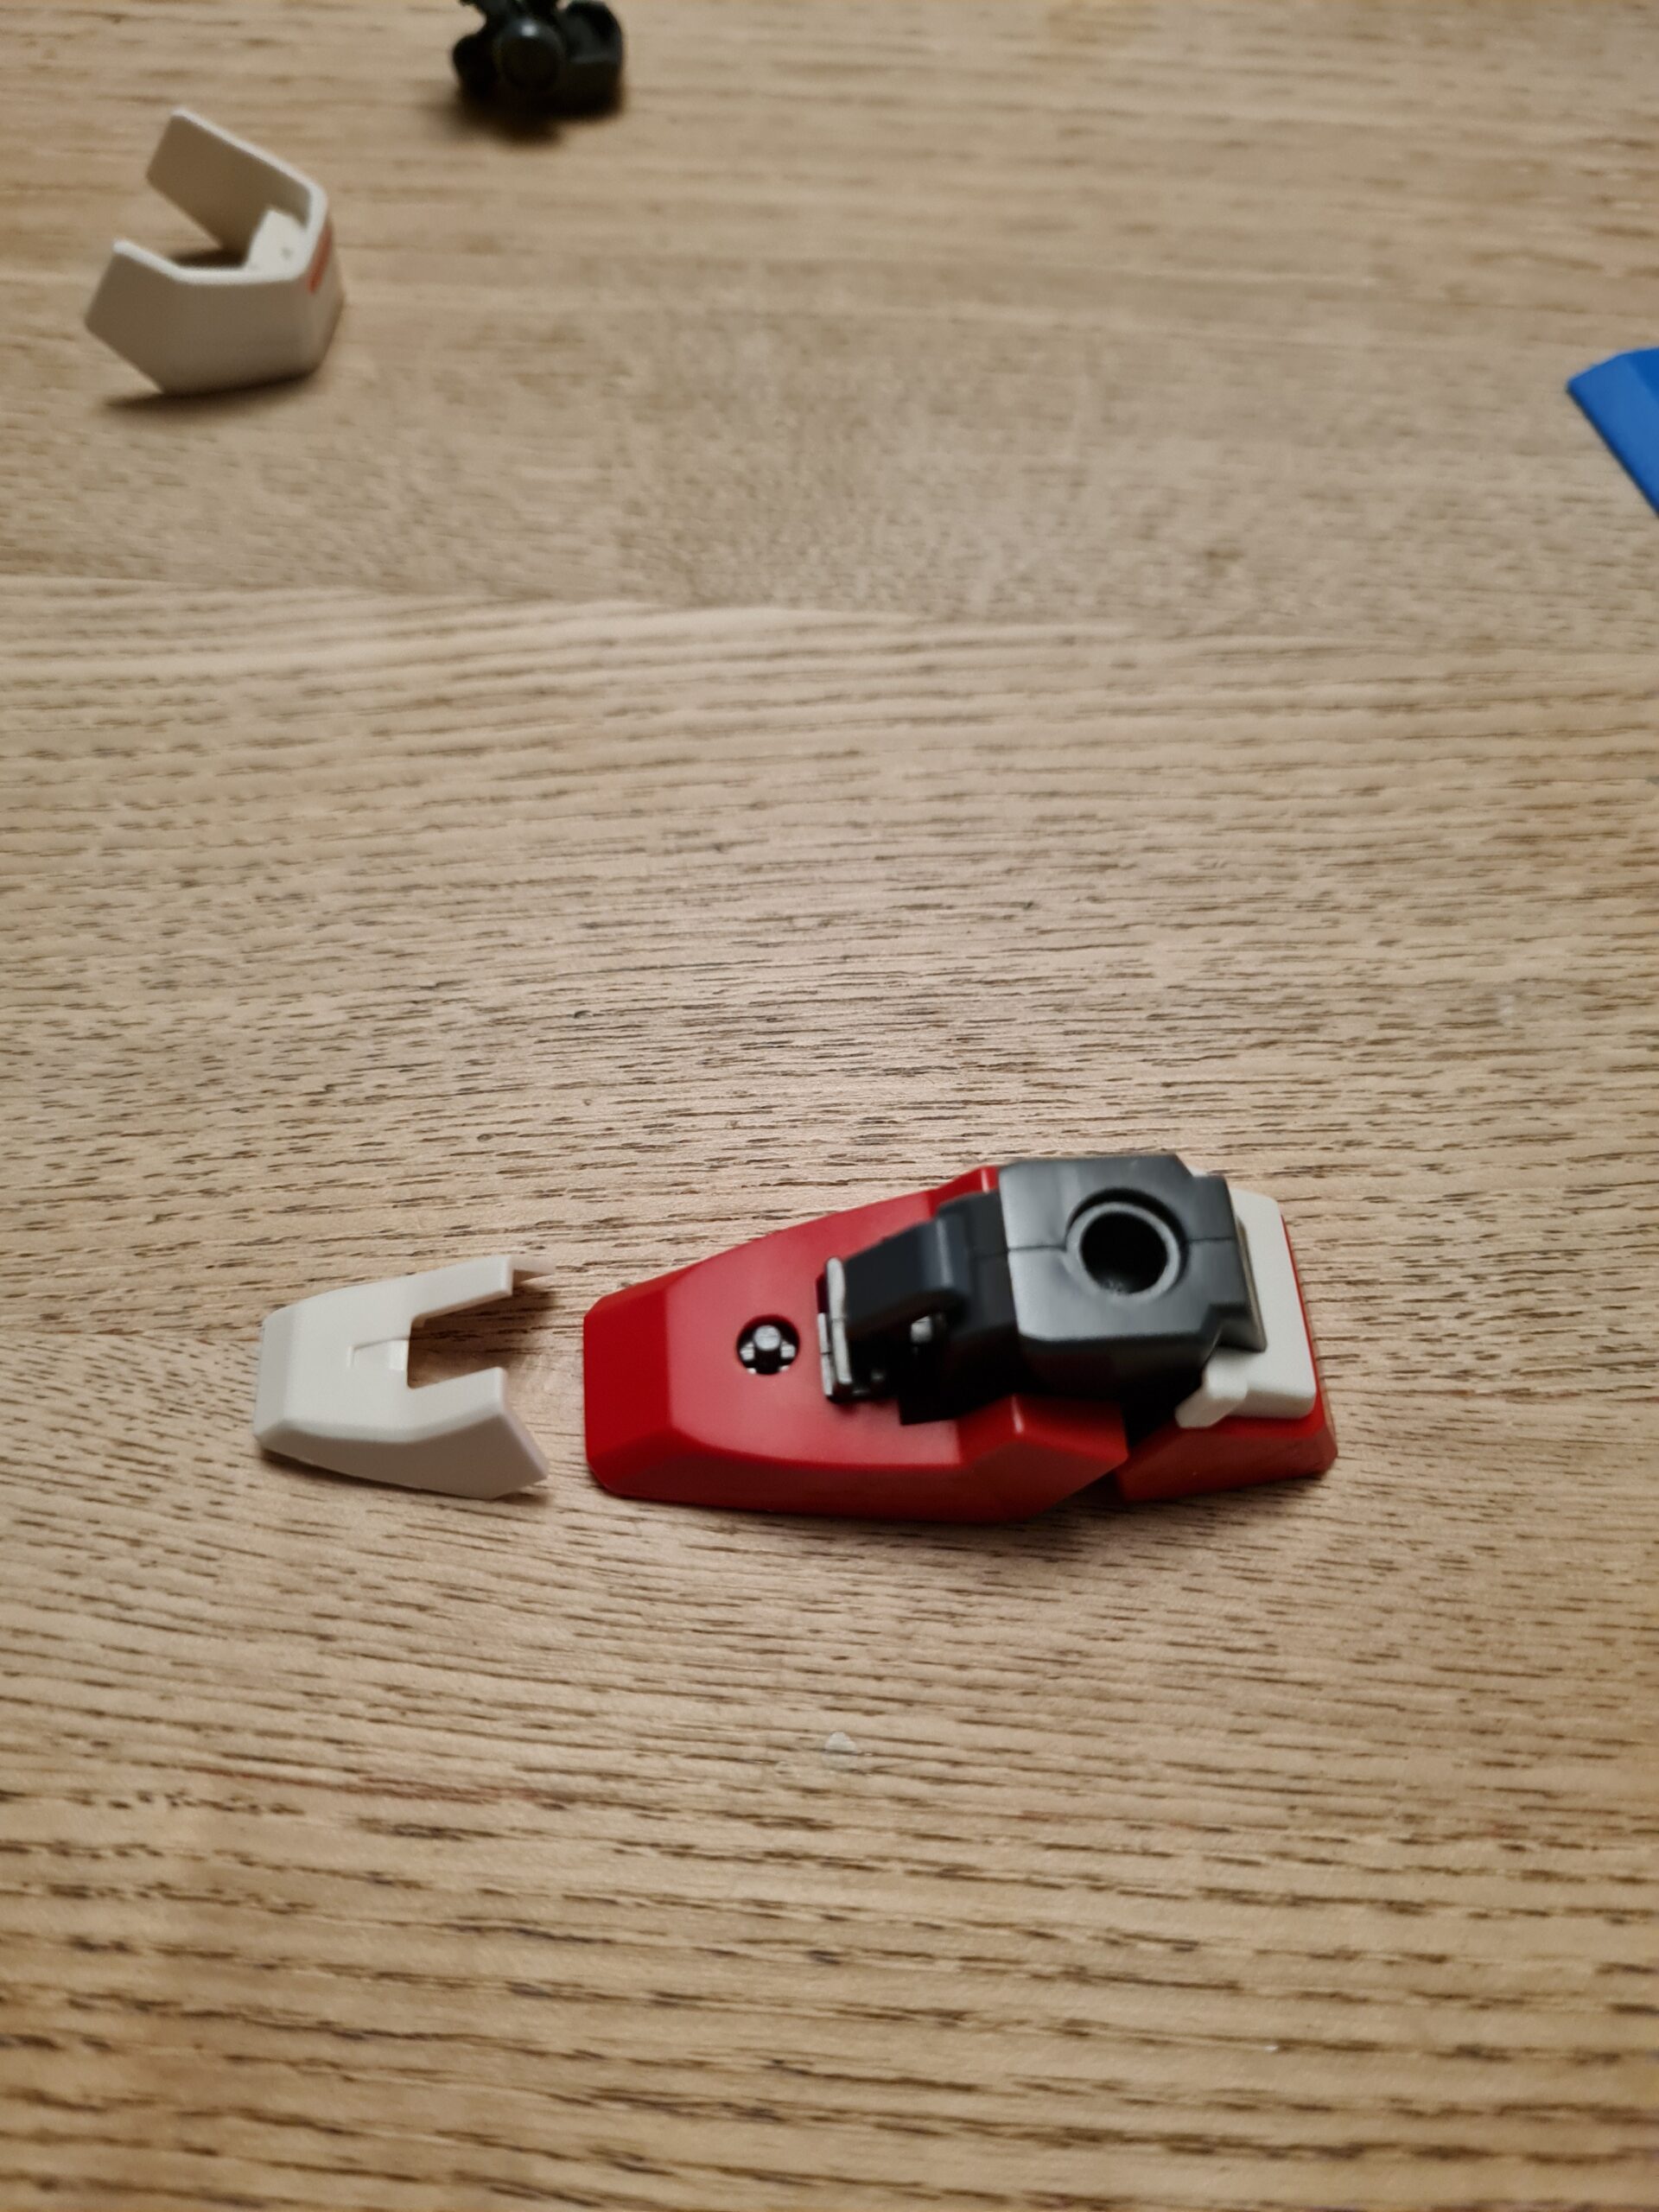
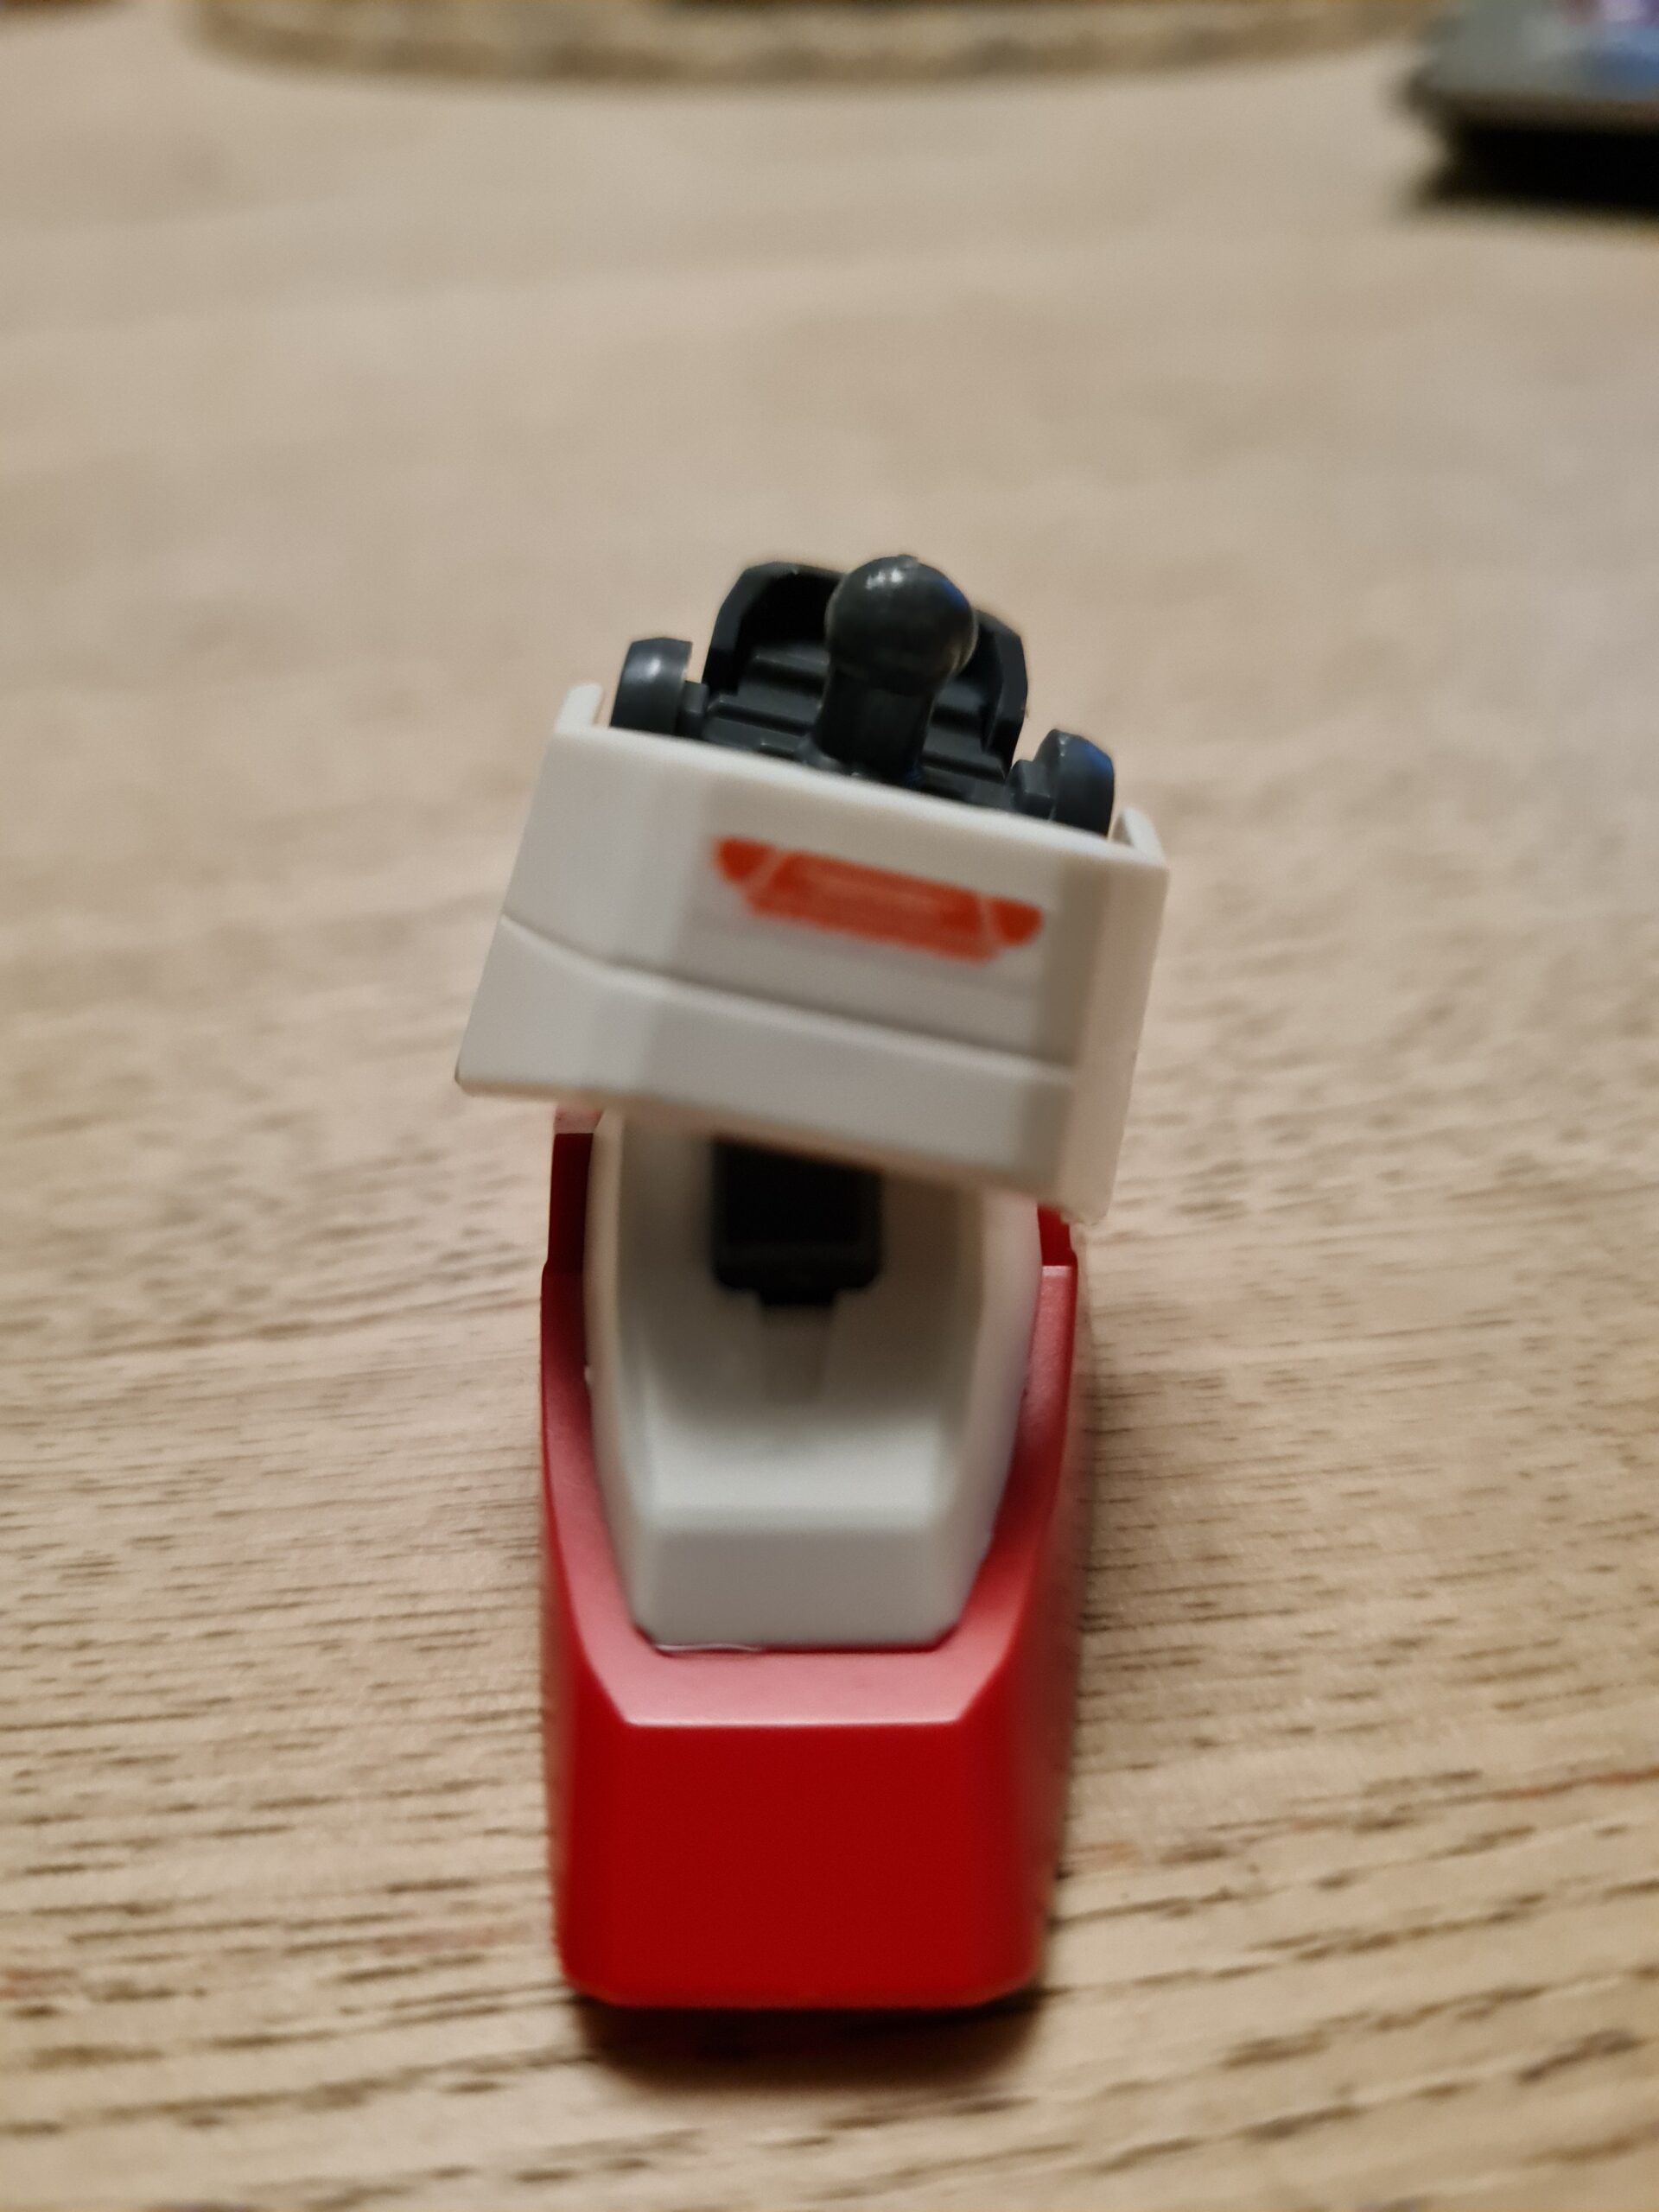
Step 2
Foot bottom and top coverBottom of foot together
Next you need to attach the top red cover over the top. As you can see the small post sticks out of the hole. Everything should fit snugly. Any problems and the likelihood is nubs that need to be sanded back / removed.
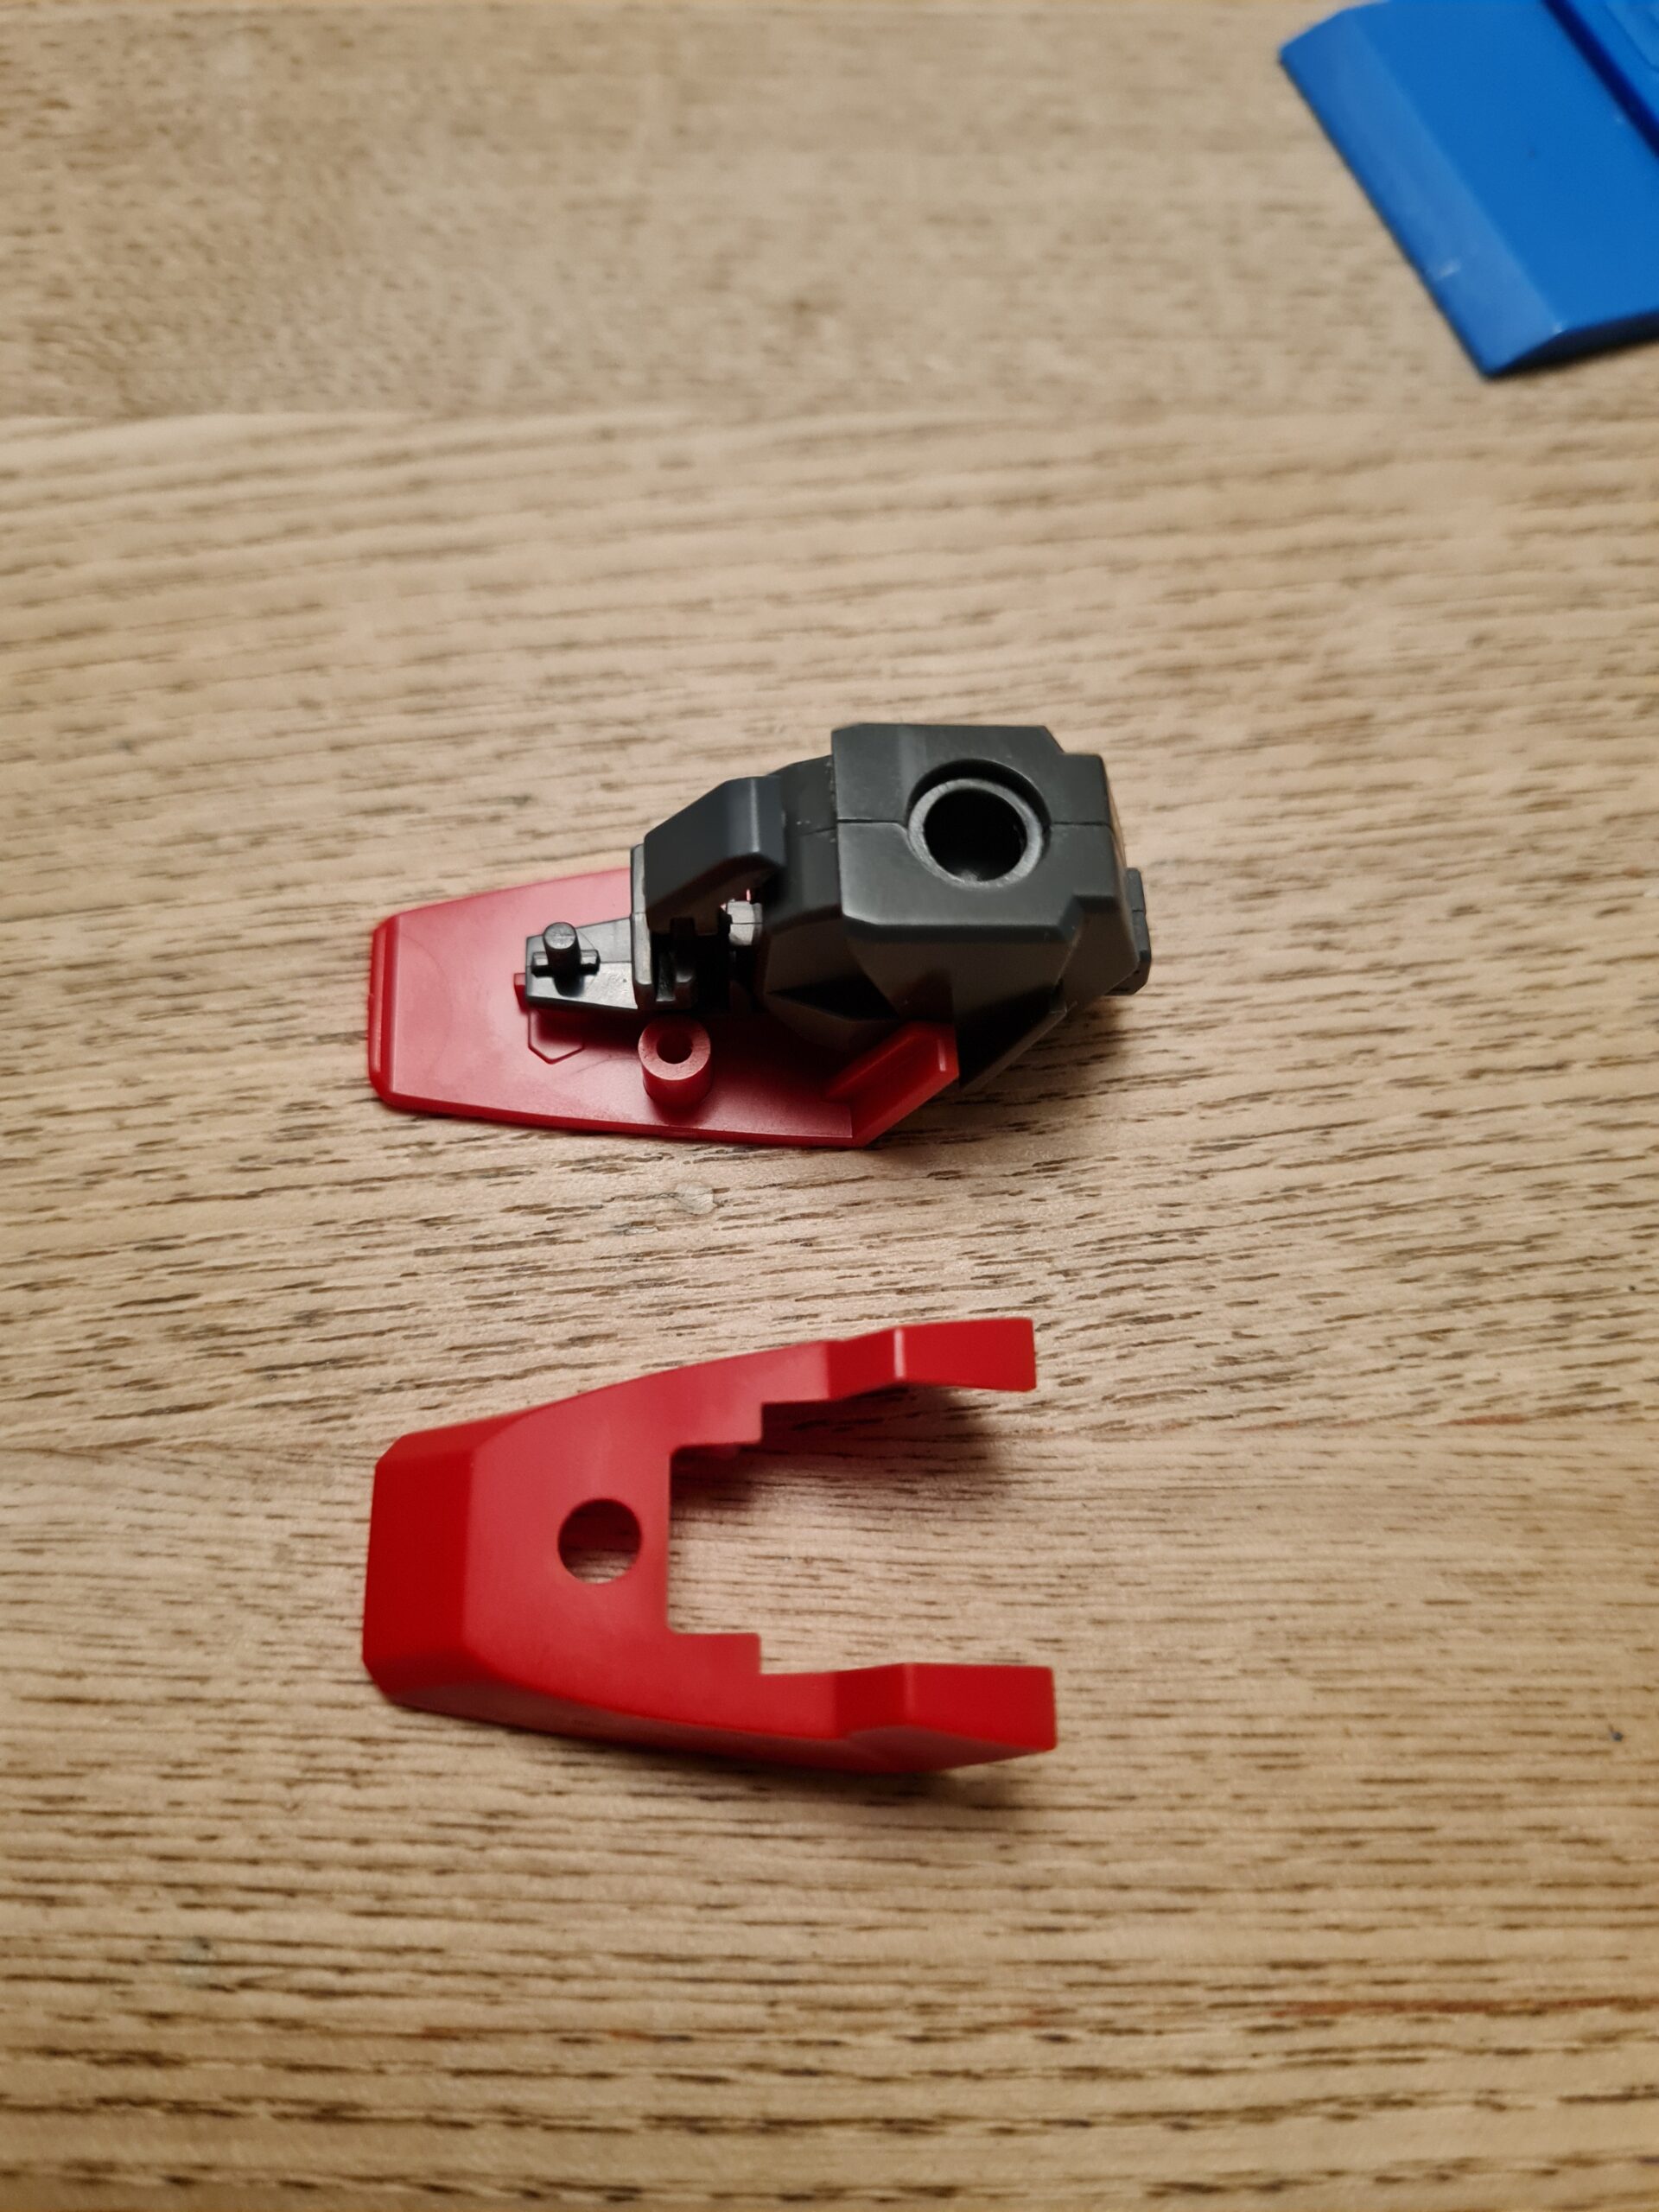
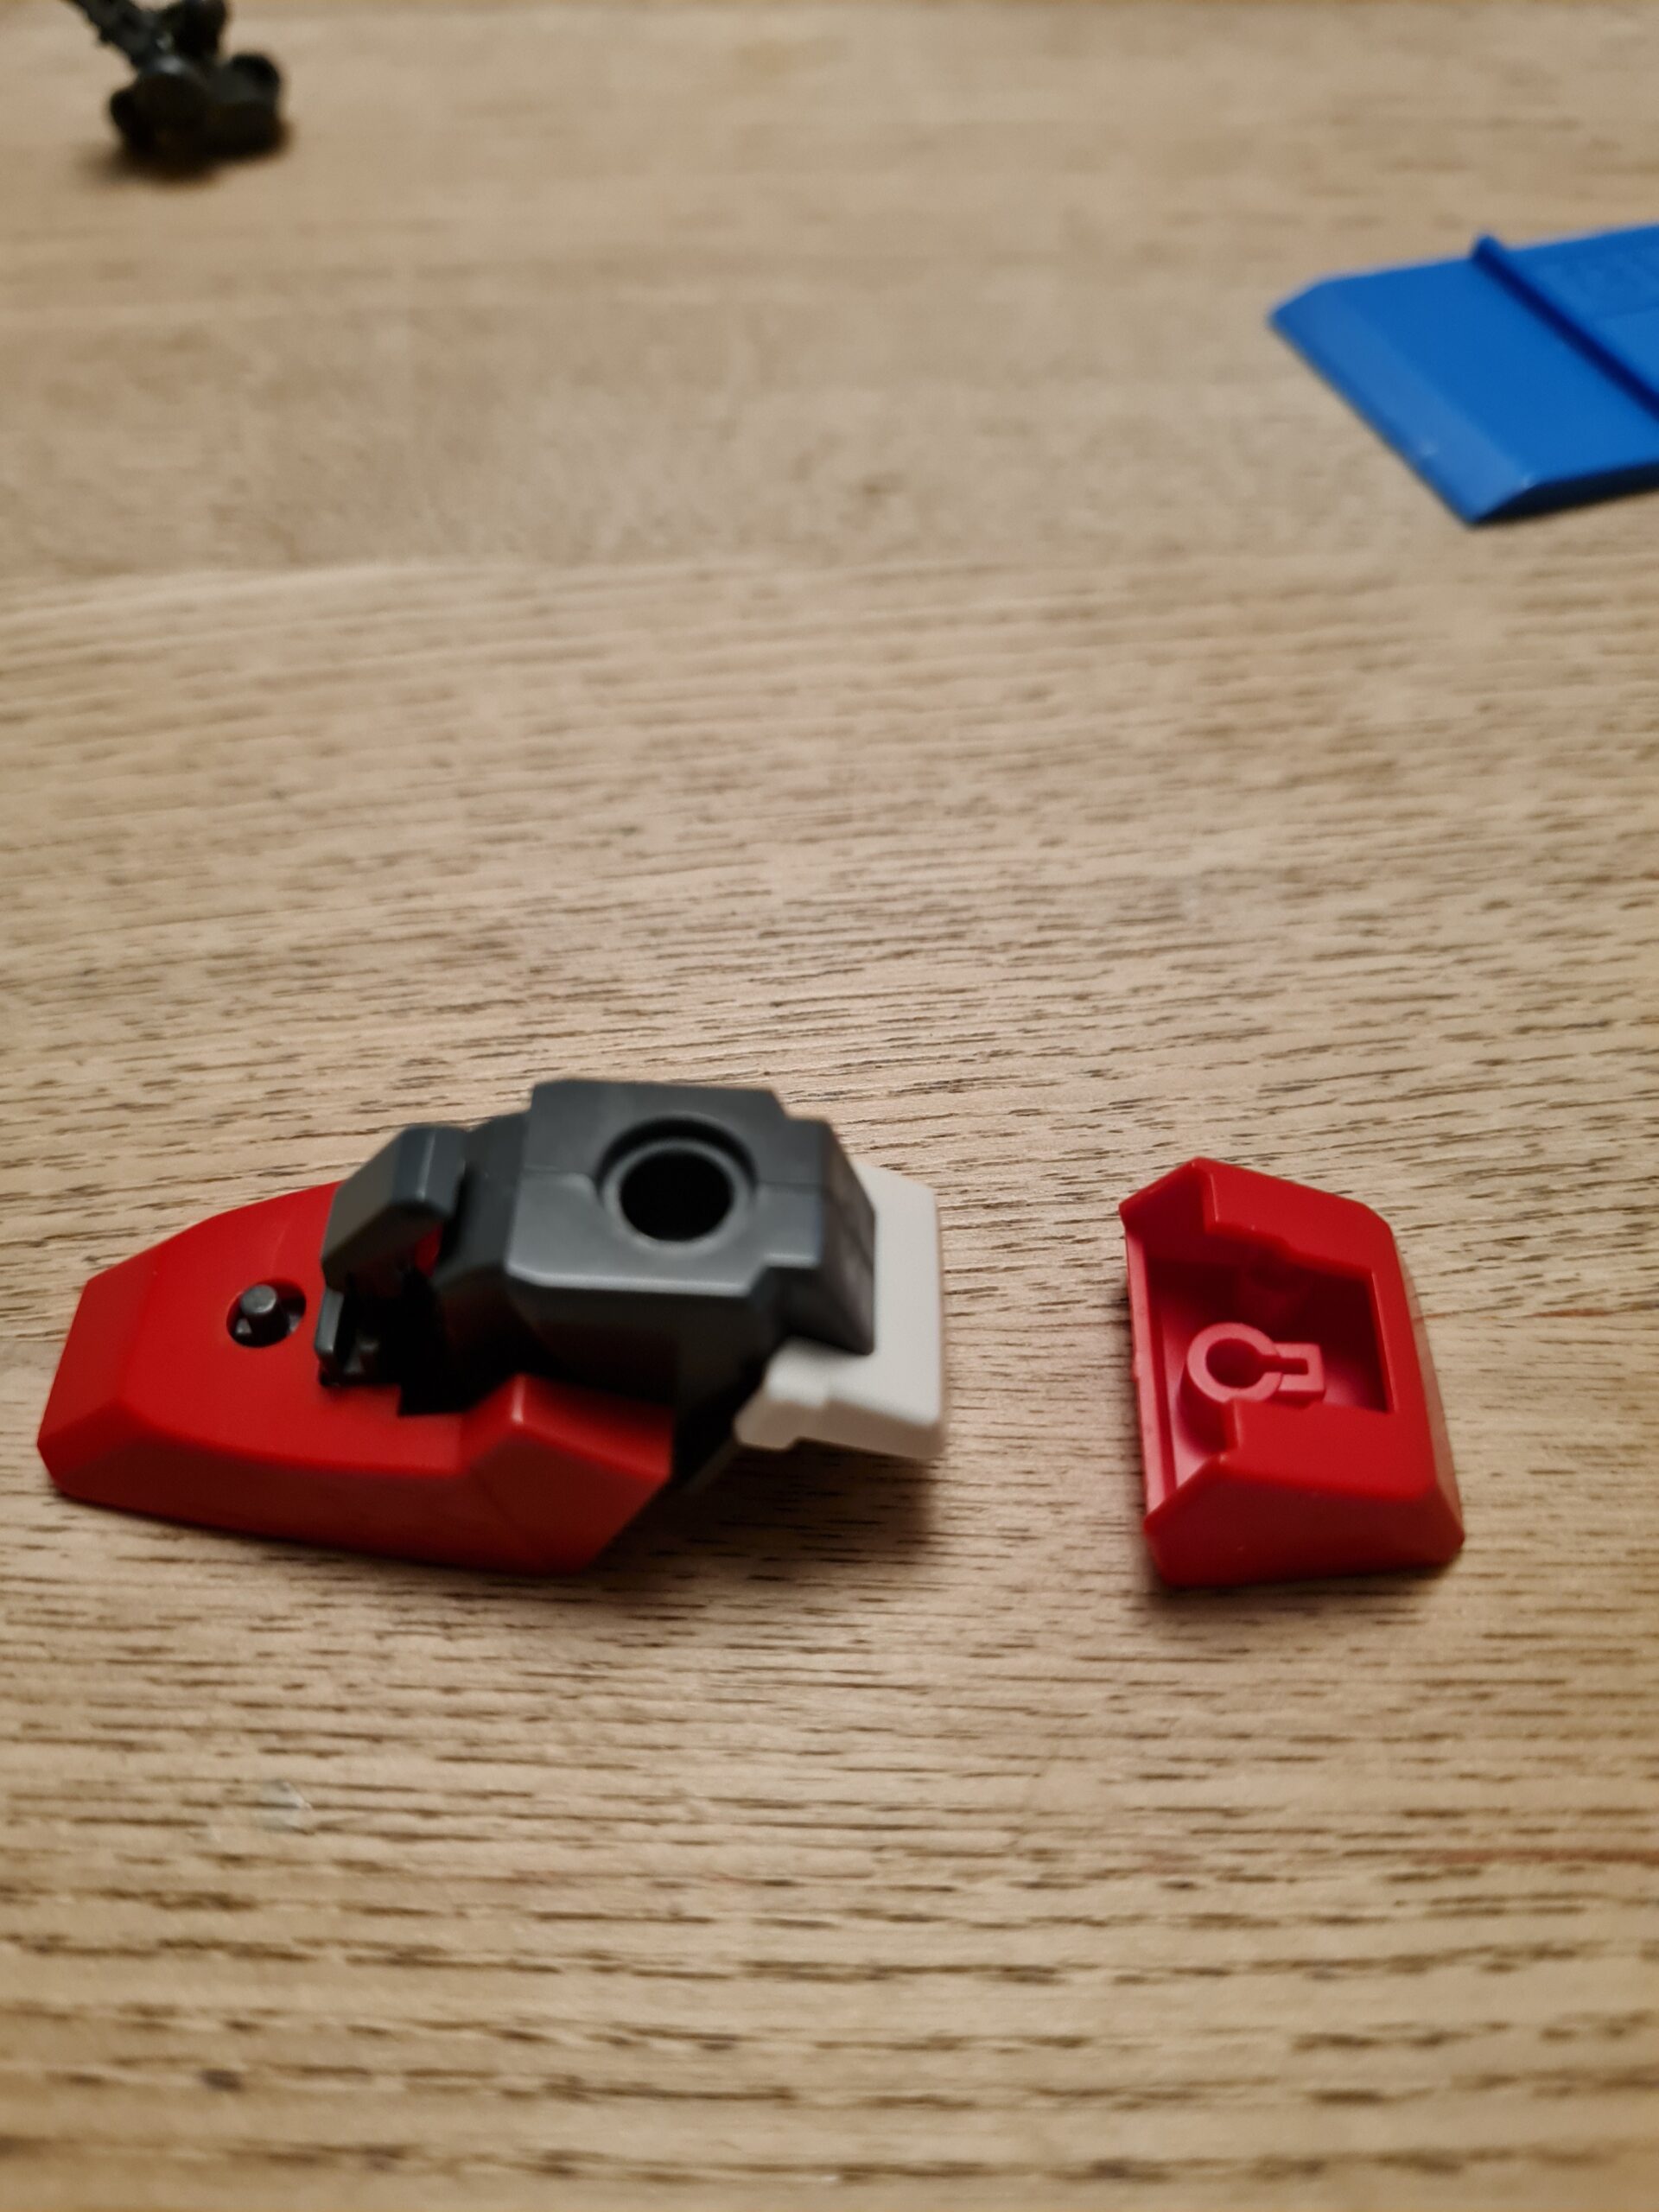
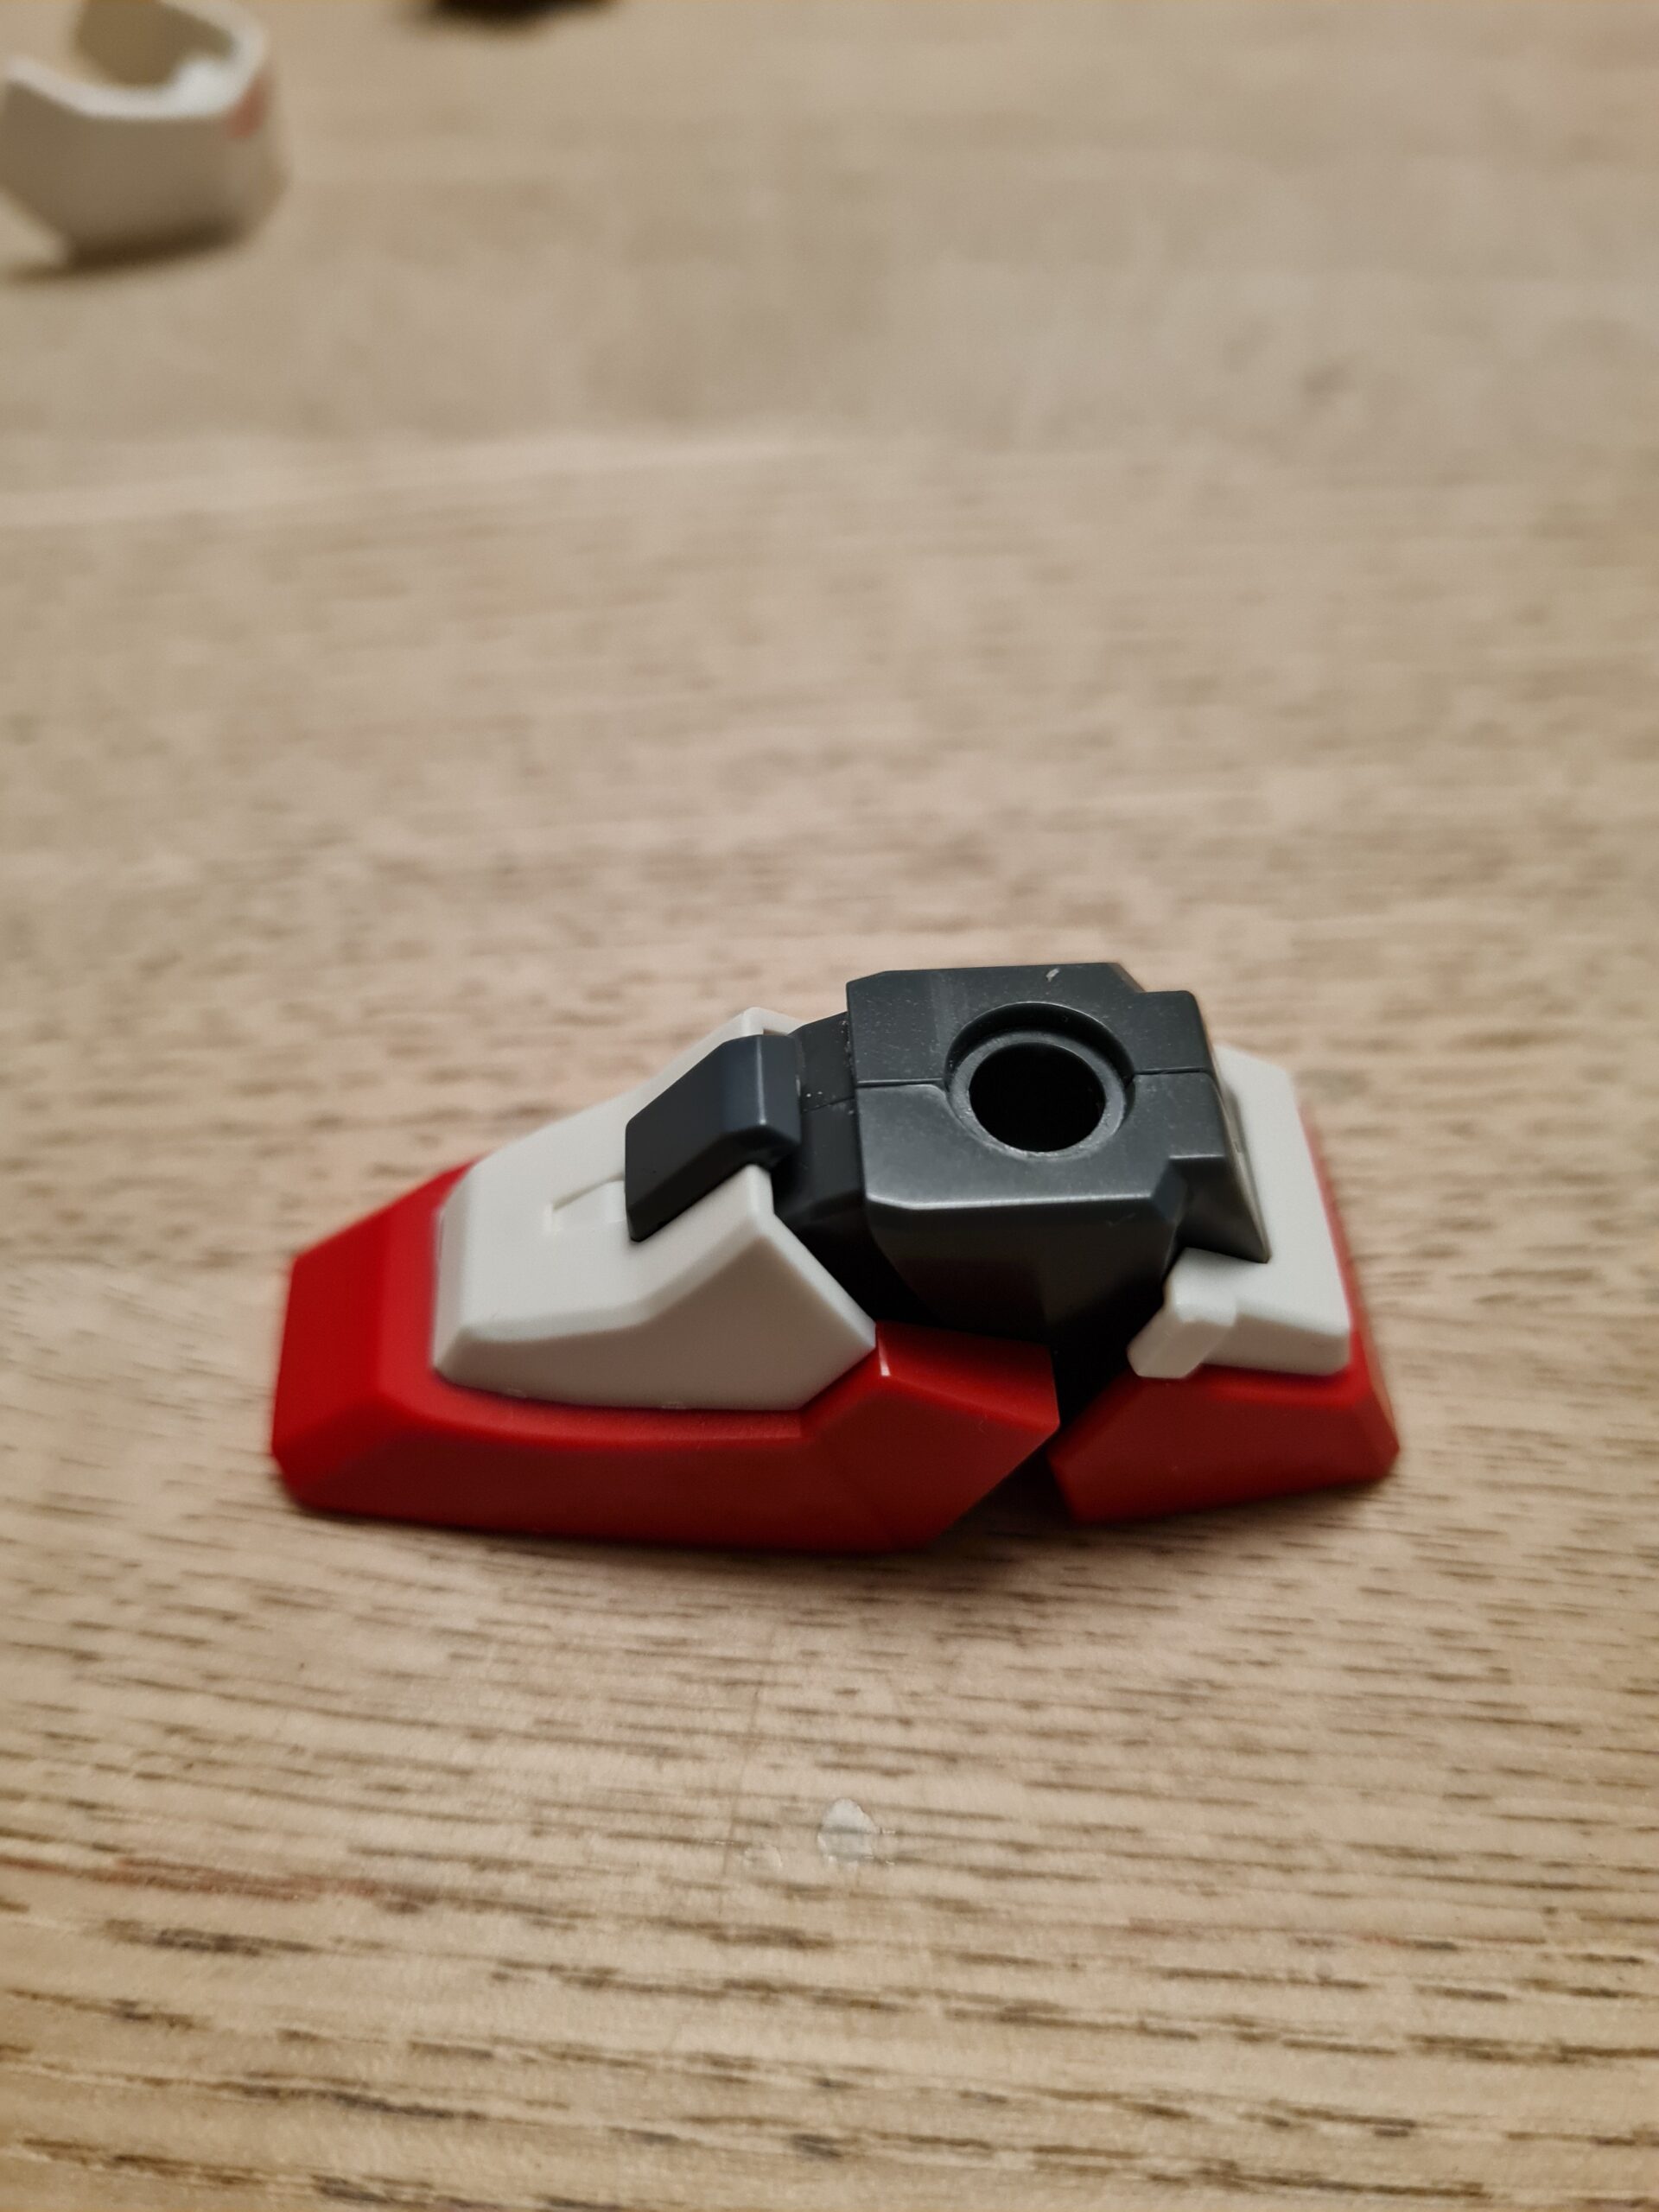
Step 3
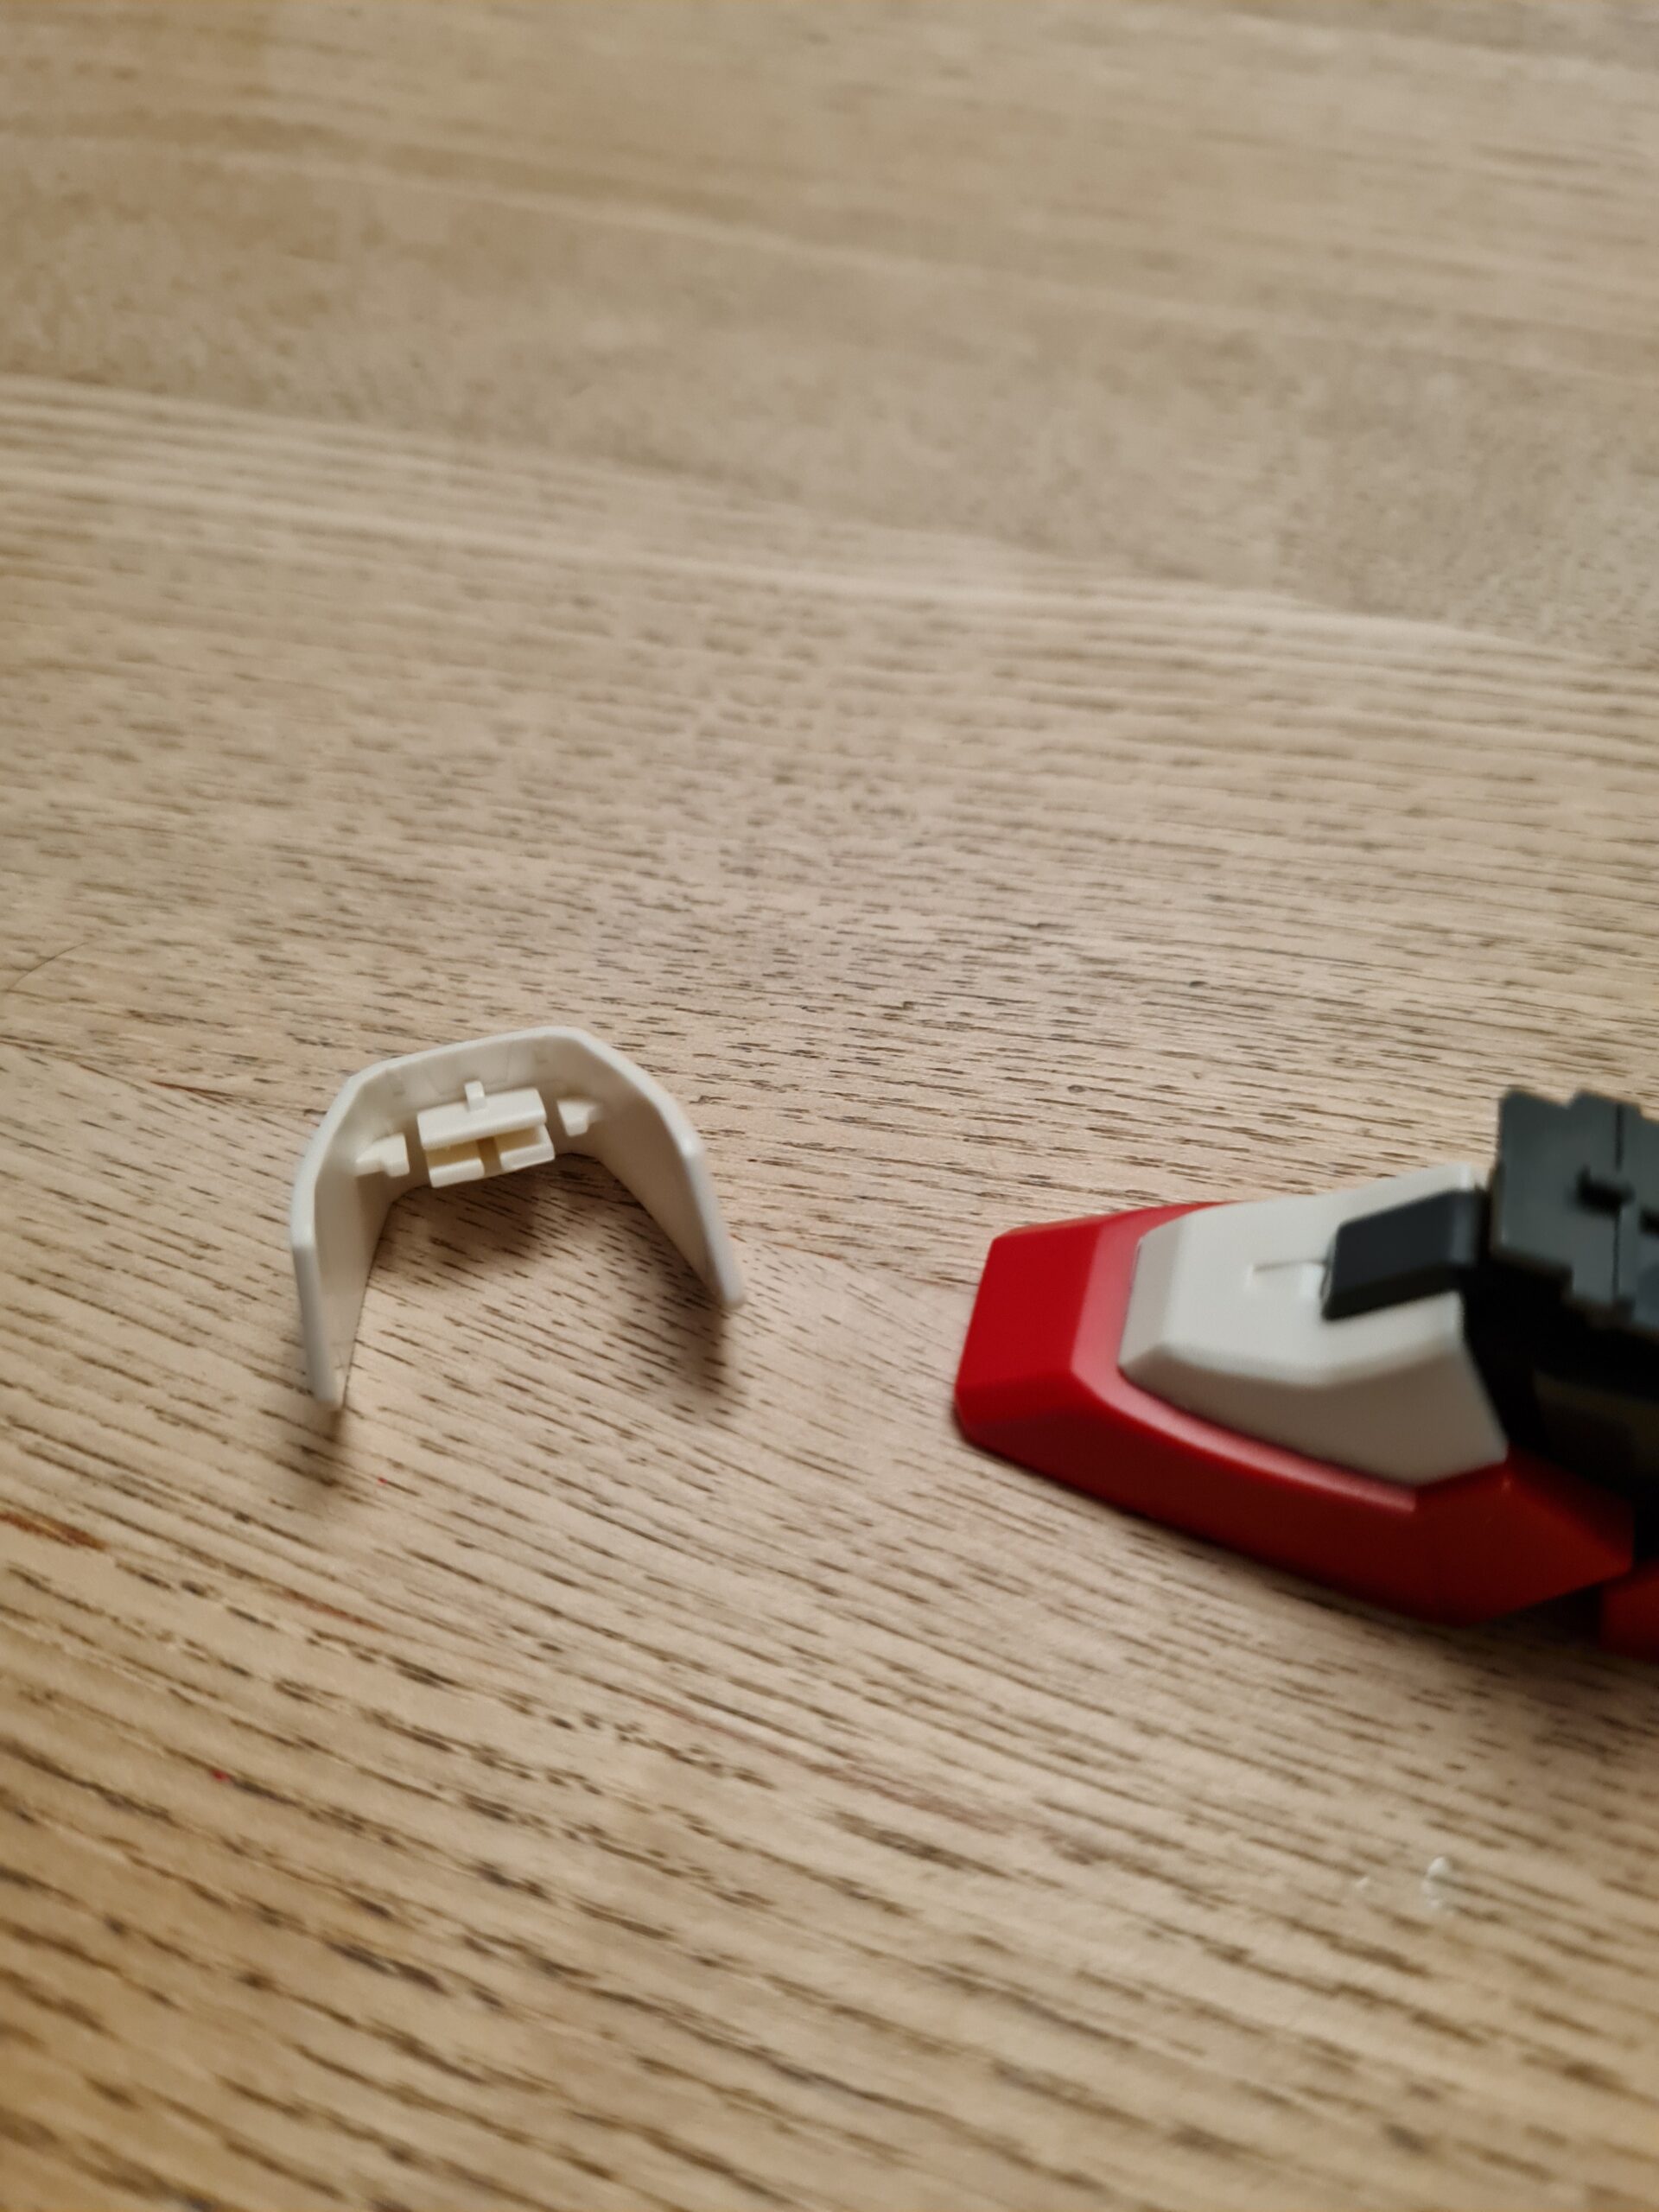
First Rear PieceWhite part attached
The next piece that needs to be attached is the white section of the heel. This slides into place and is quite snug. I found that it fits perfectly though.
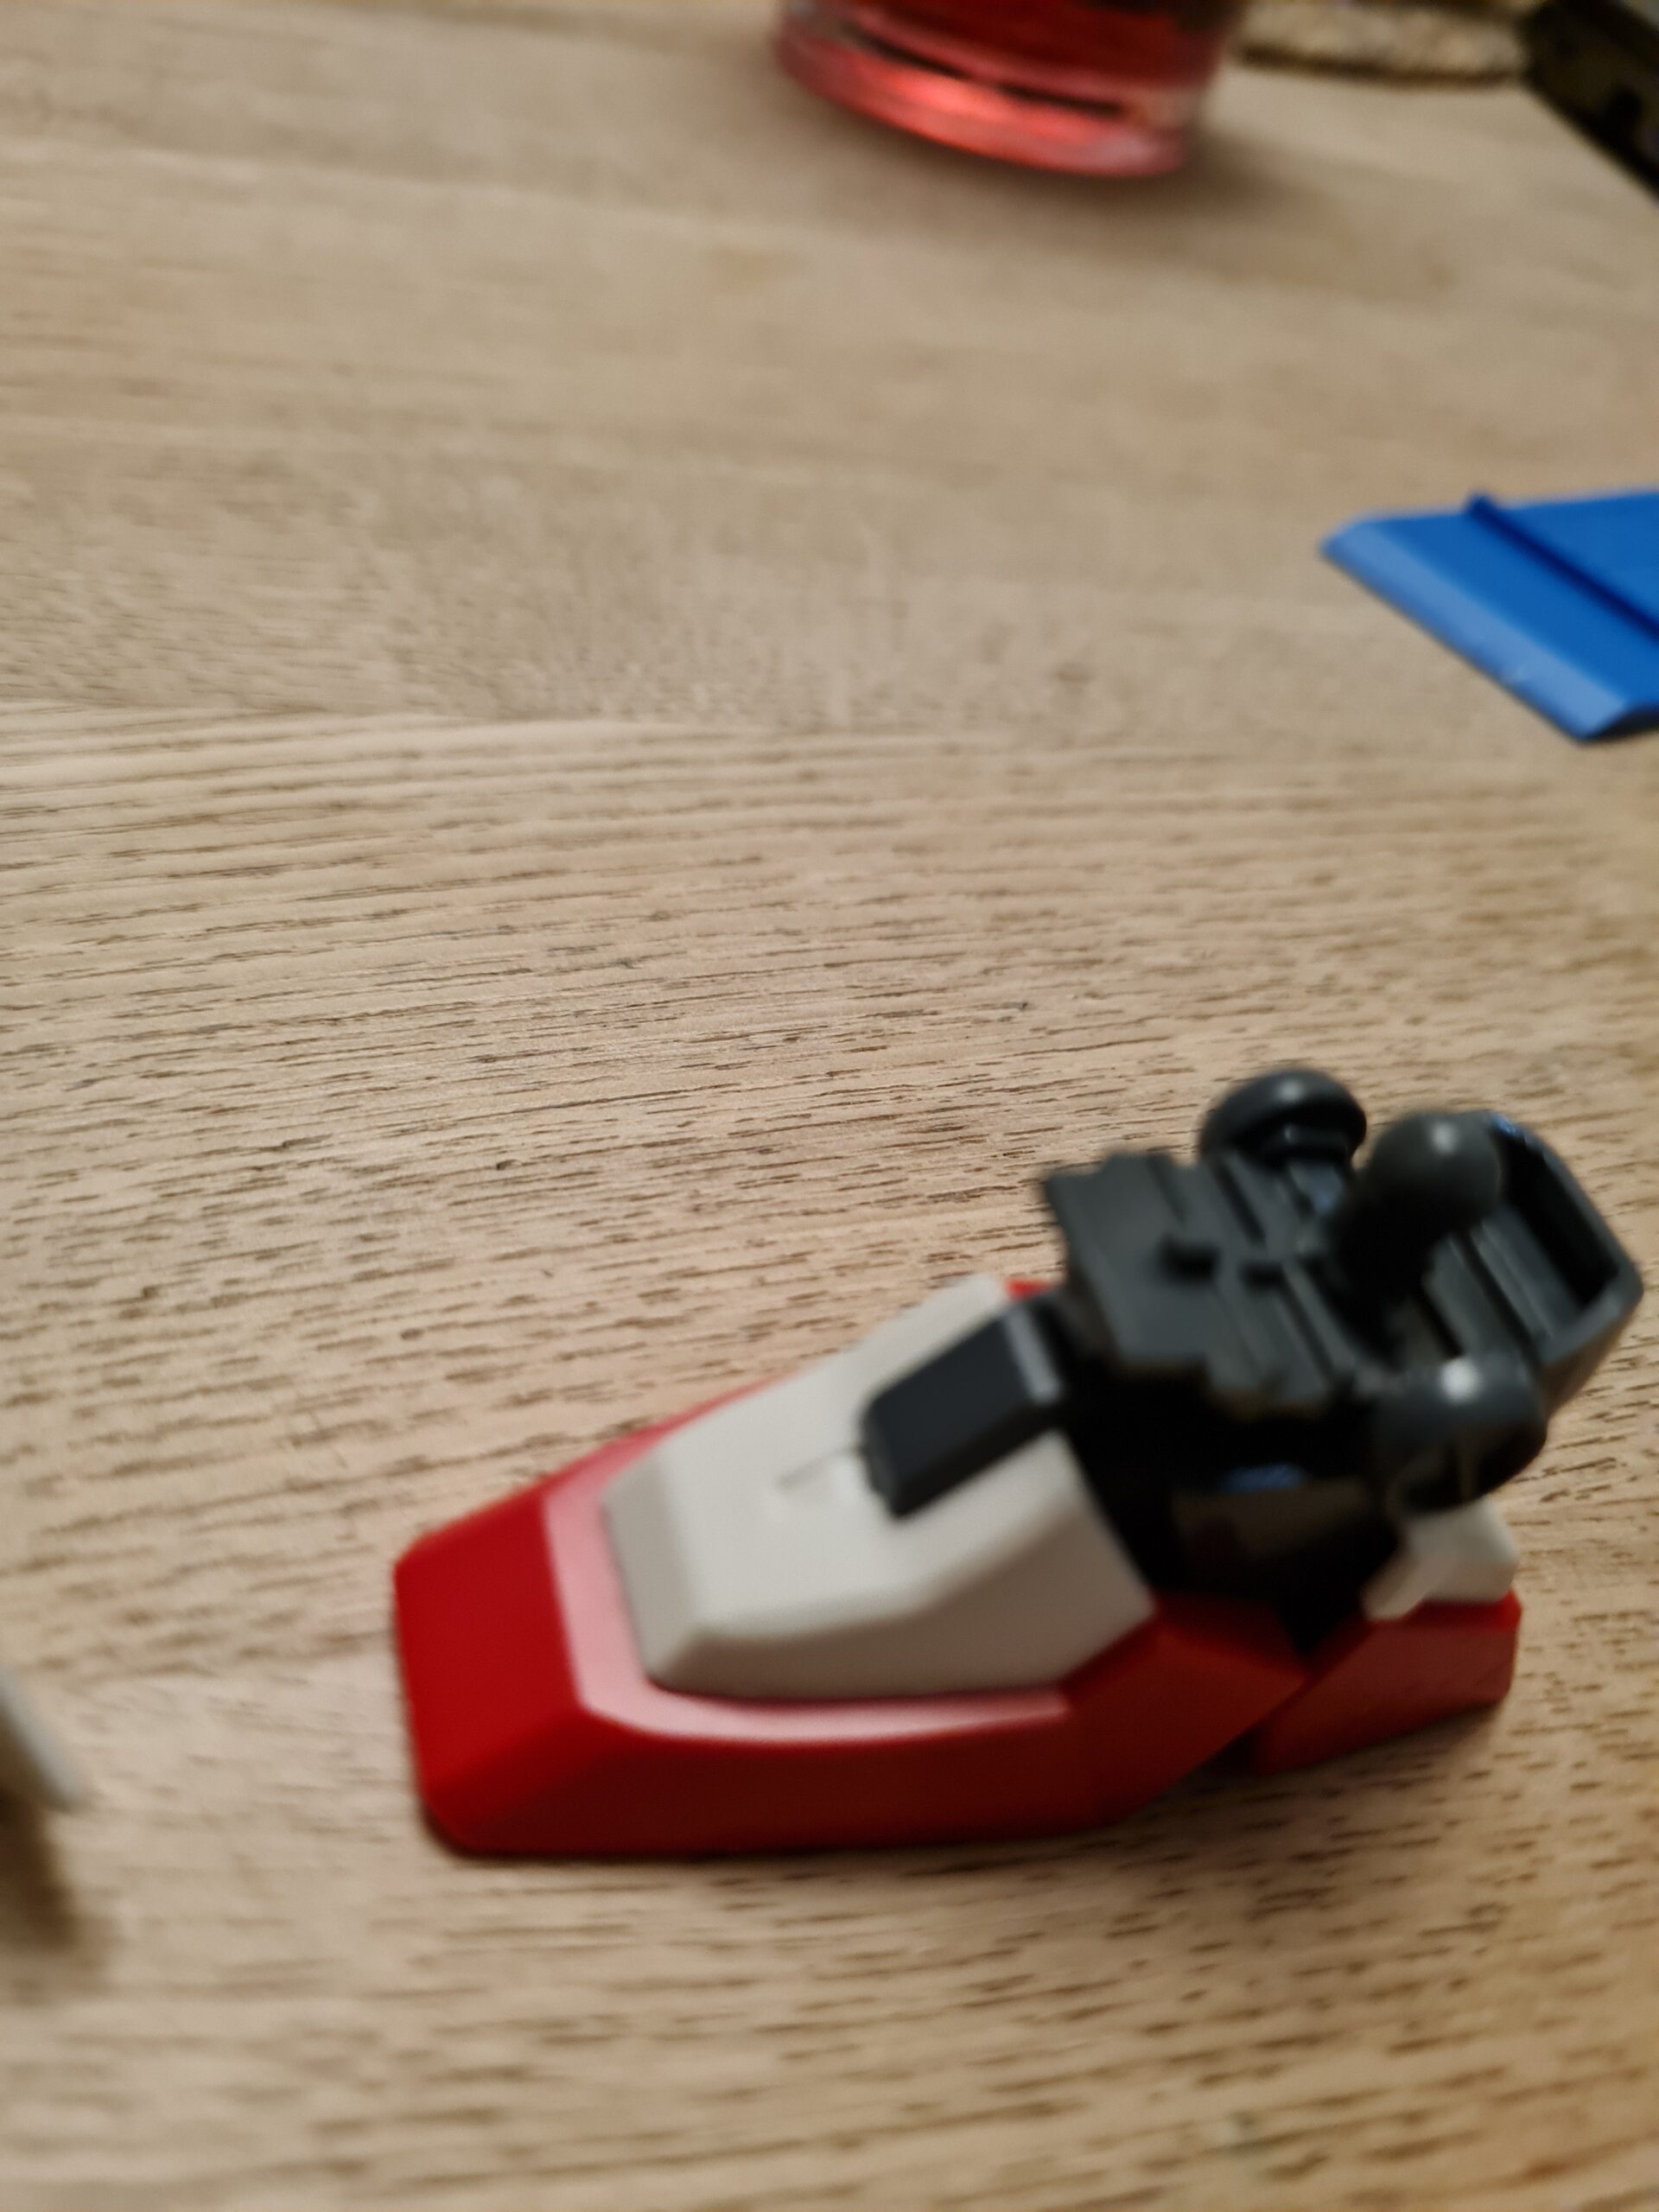
Step 4
Heel sectionAttached Heel
Next is the heel piece. Again this fits in snugly and isn’t a problem. I found that all the pieces clipped together in a really satisfying way.
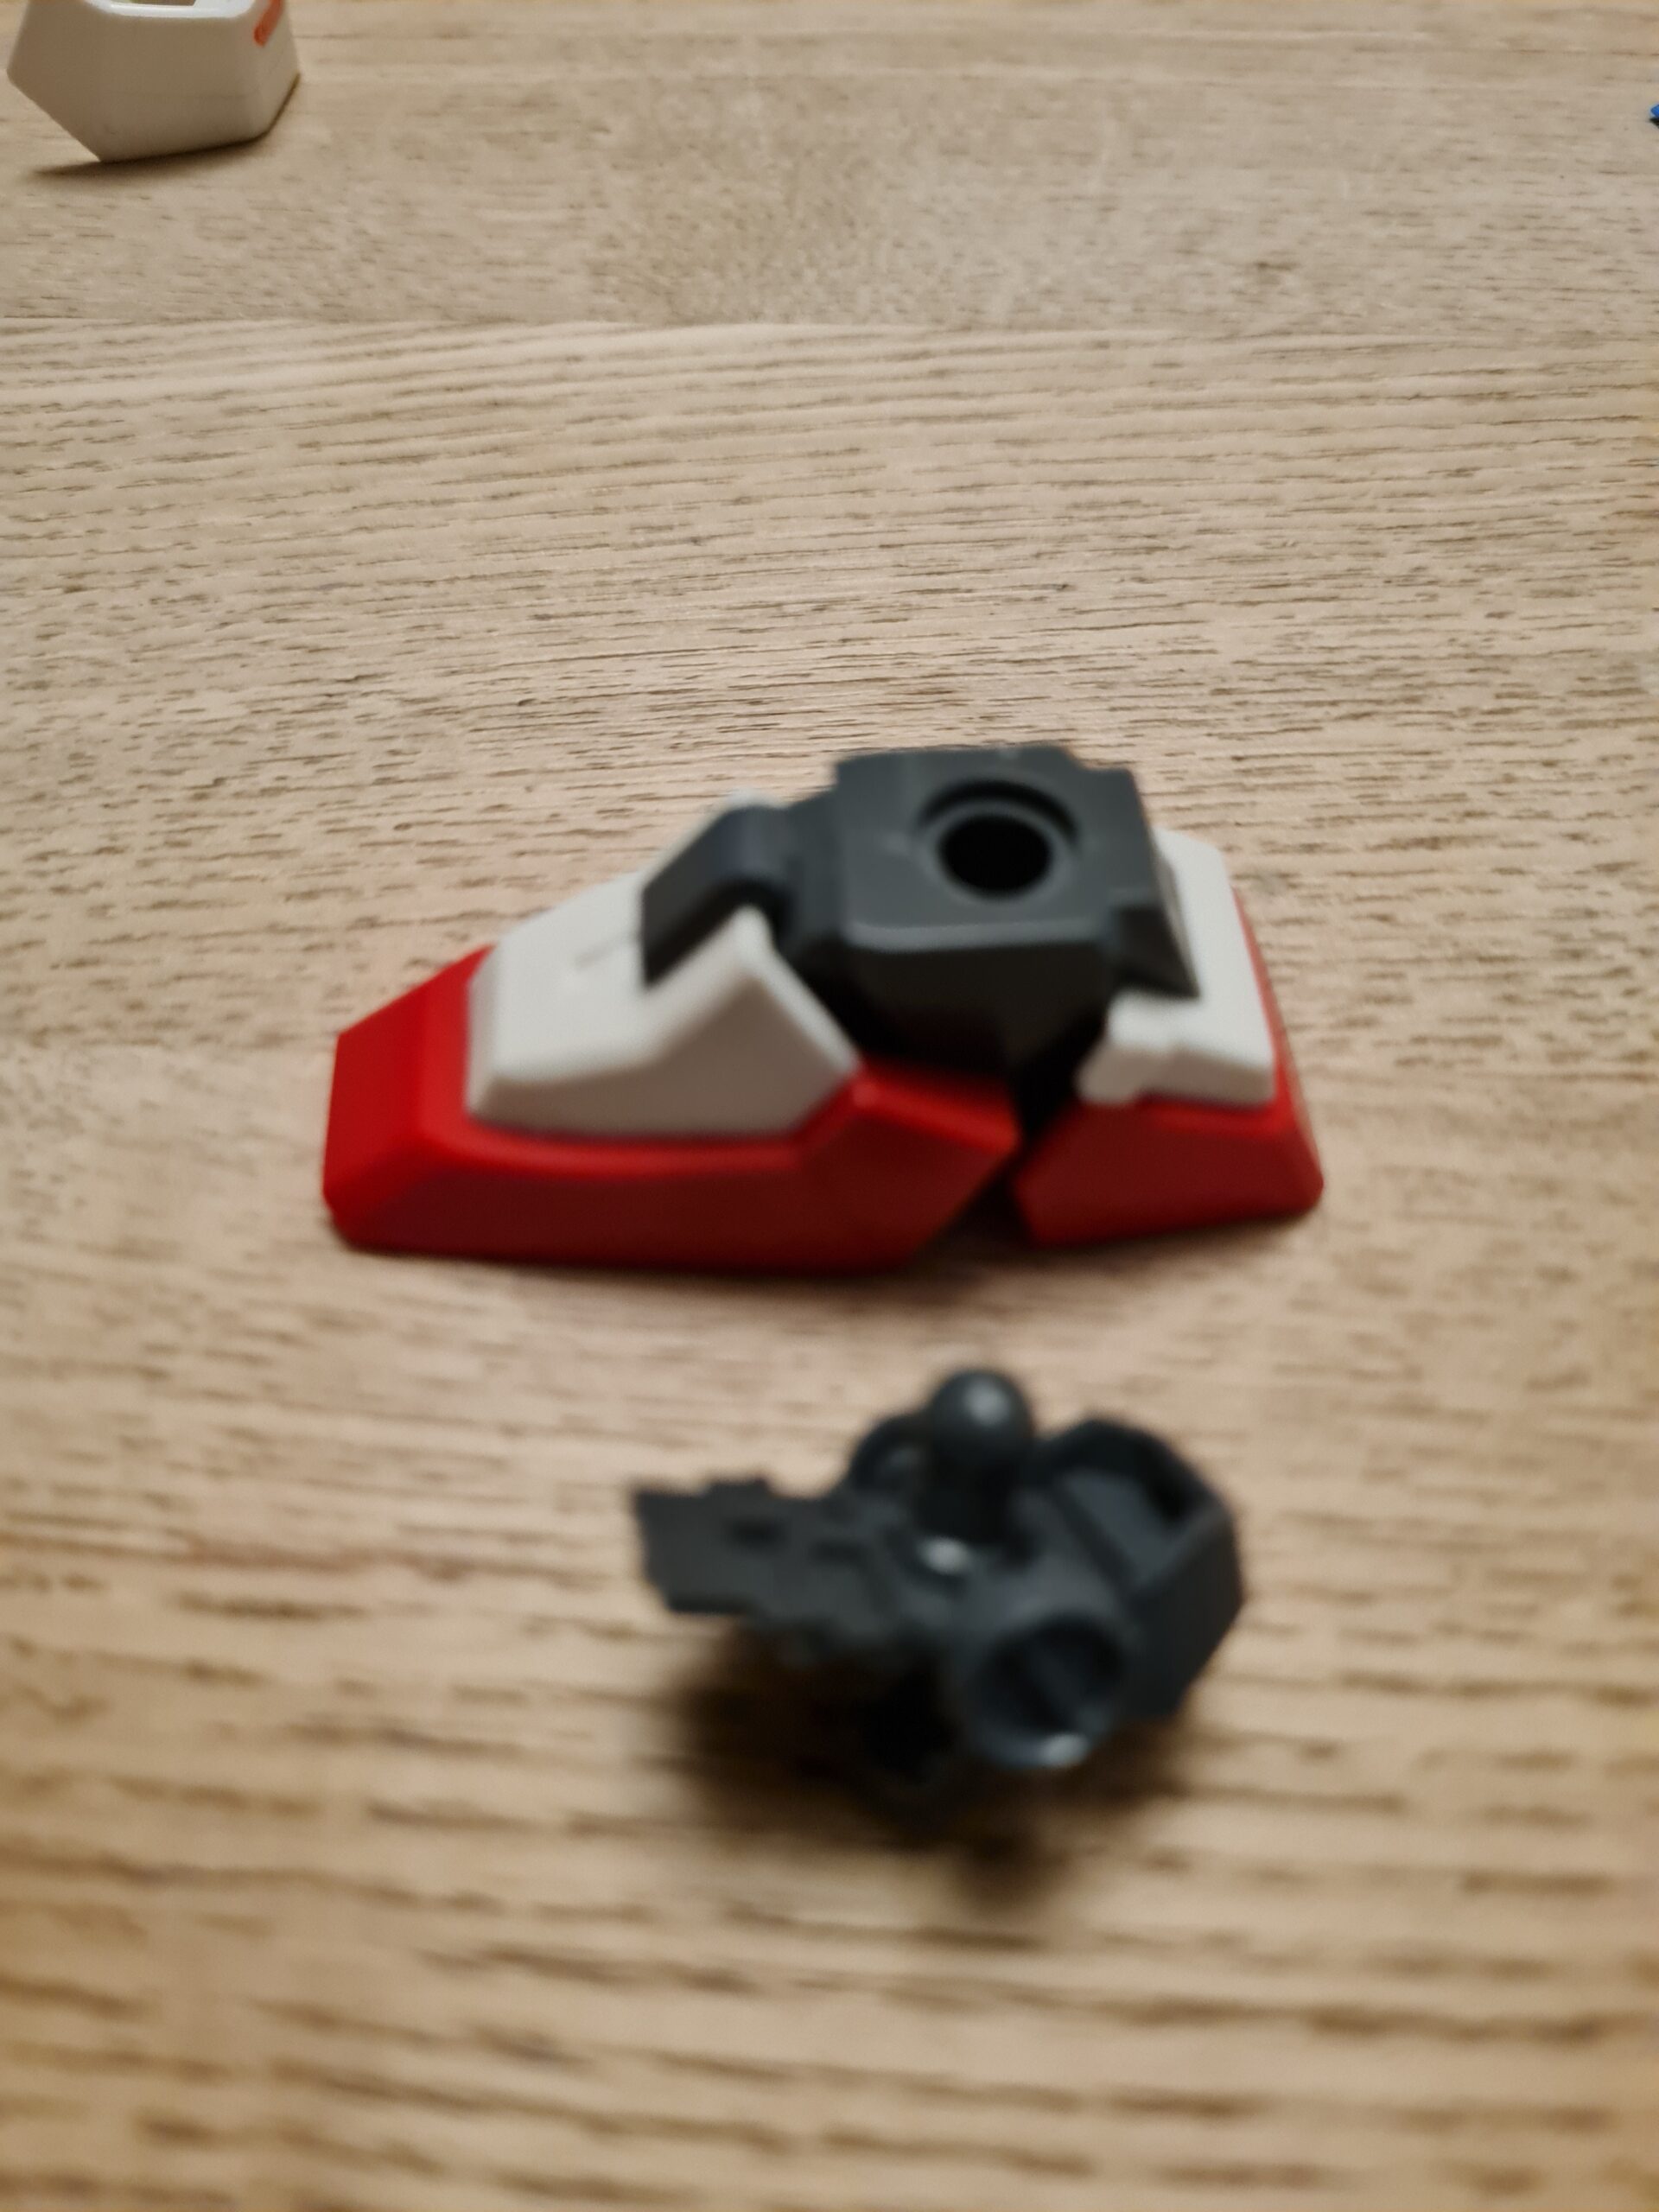
Step 5
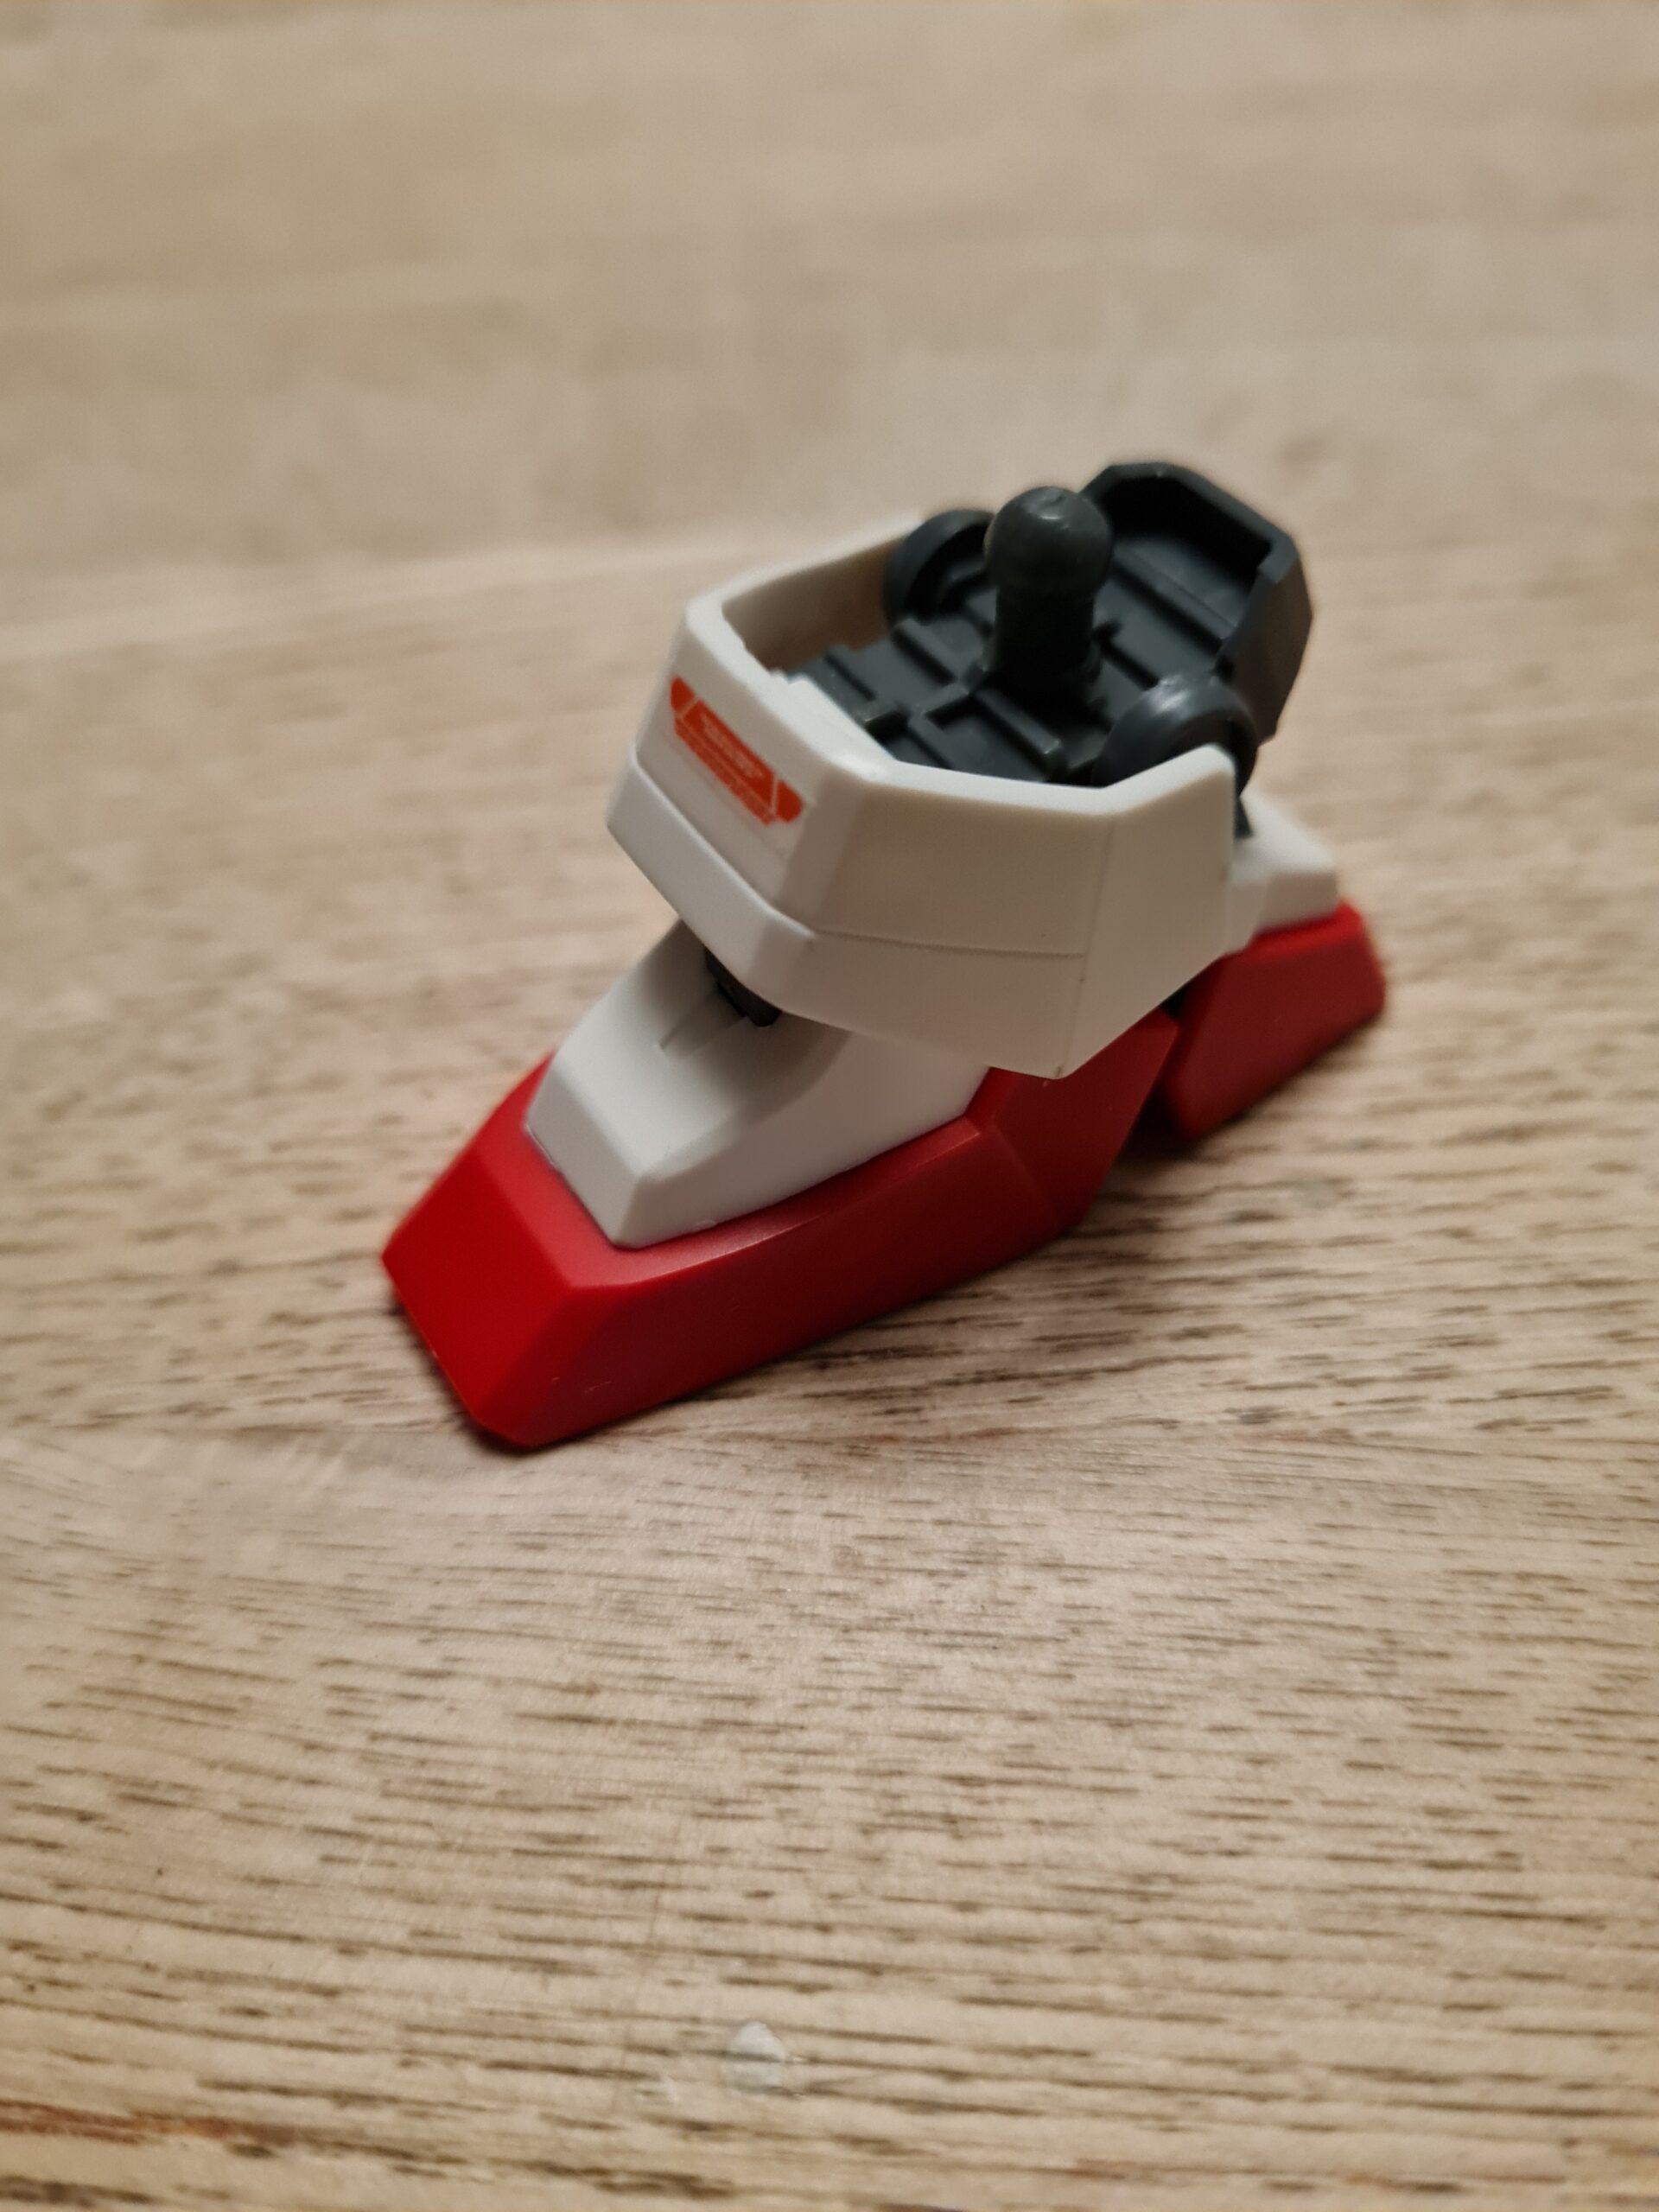
White Front PieceAttached Front White Piece
After the heel I started to build up for the rest of the foot. The white section fits down into the post that sticks up from the hole in the middle of the large red part.
Step 6
Ankle Joint and FootConnected Ankle Joint
Now the main body of the foot is attached it is time to connect the ankle joint. The top of this part has a small ball joint to go into the bottom of the leg, and a larger ball joint that goes into the socket in the foot. This clicks in really snuggly, and I found, gives a good combination of friction and articulation.
Step 7
Front White PieceFront ConnectorAdded front section
The front section of the foot has a clip/connector that slots onto the front grey section of the ankle joint. Again I feel Bandai have done a great job as the pieces slide together and hold really nicely. That concludes the build up of the foot. A simple part of the build, but for me I always find them really satisfying due to the way the pieces go together, and the speed with which you see that model part take shape.
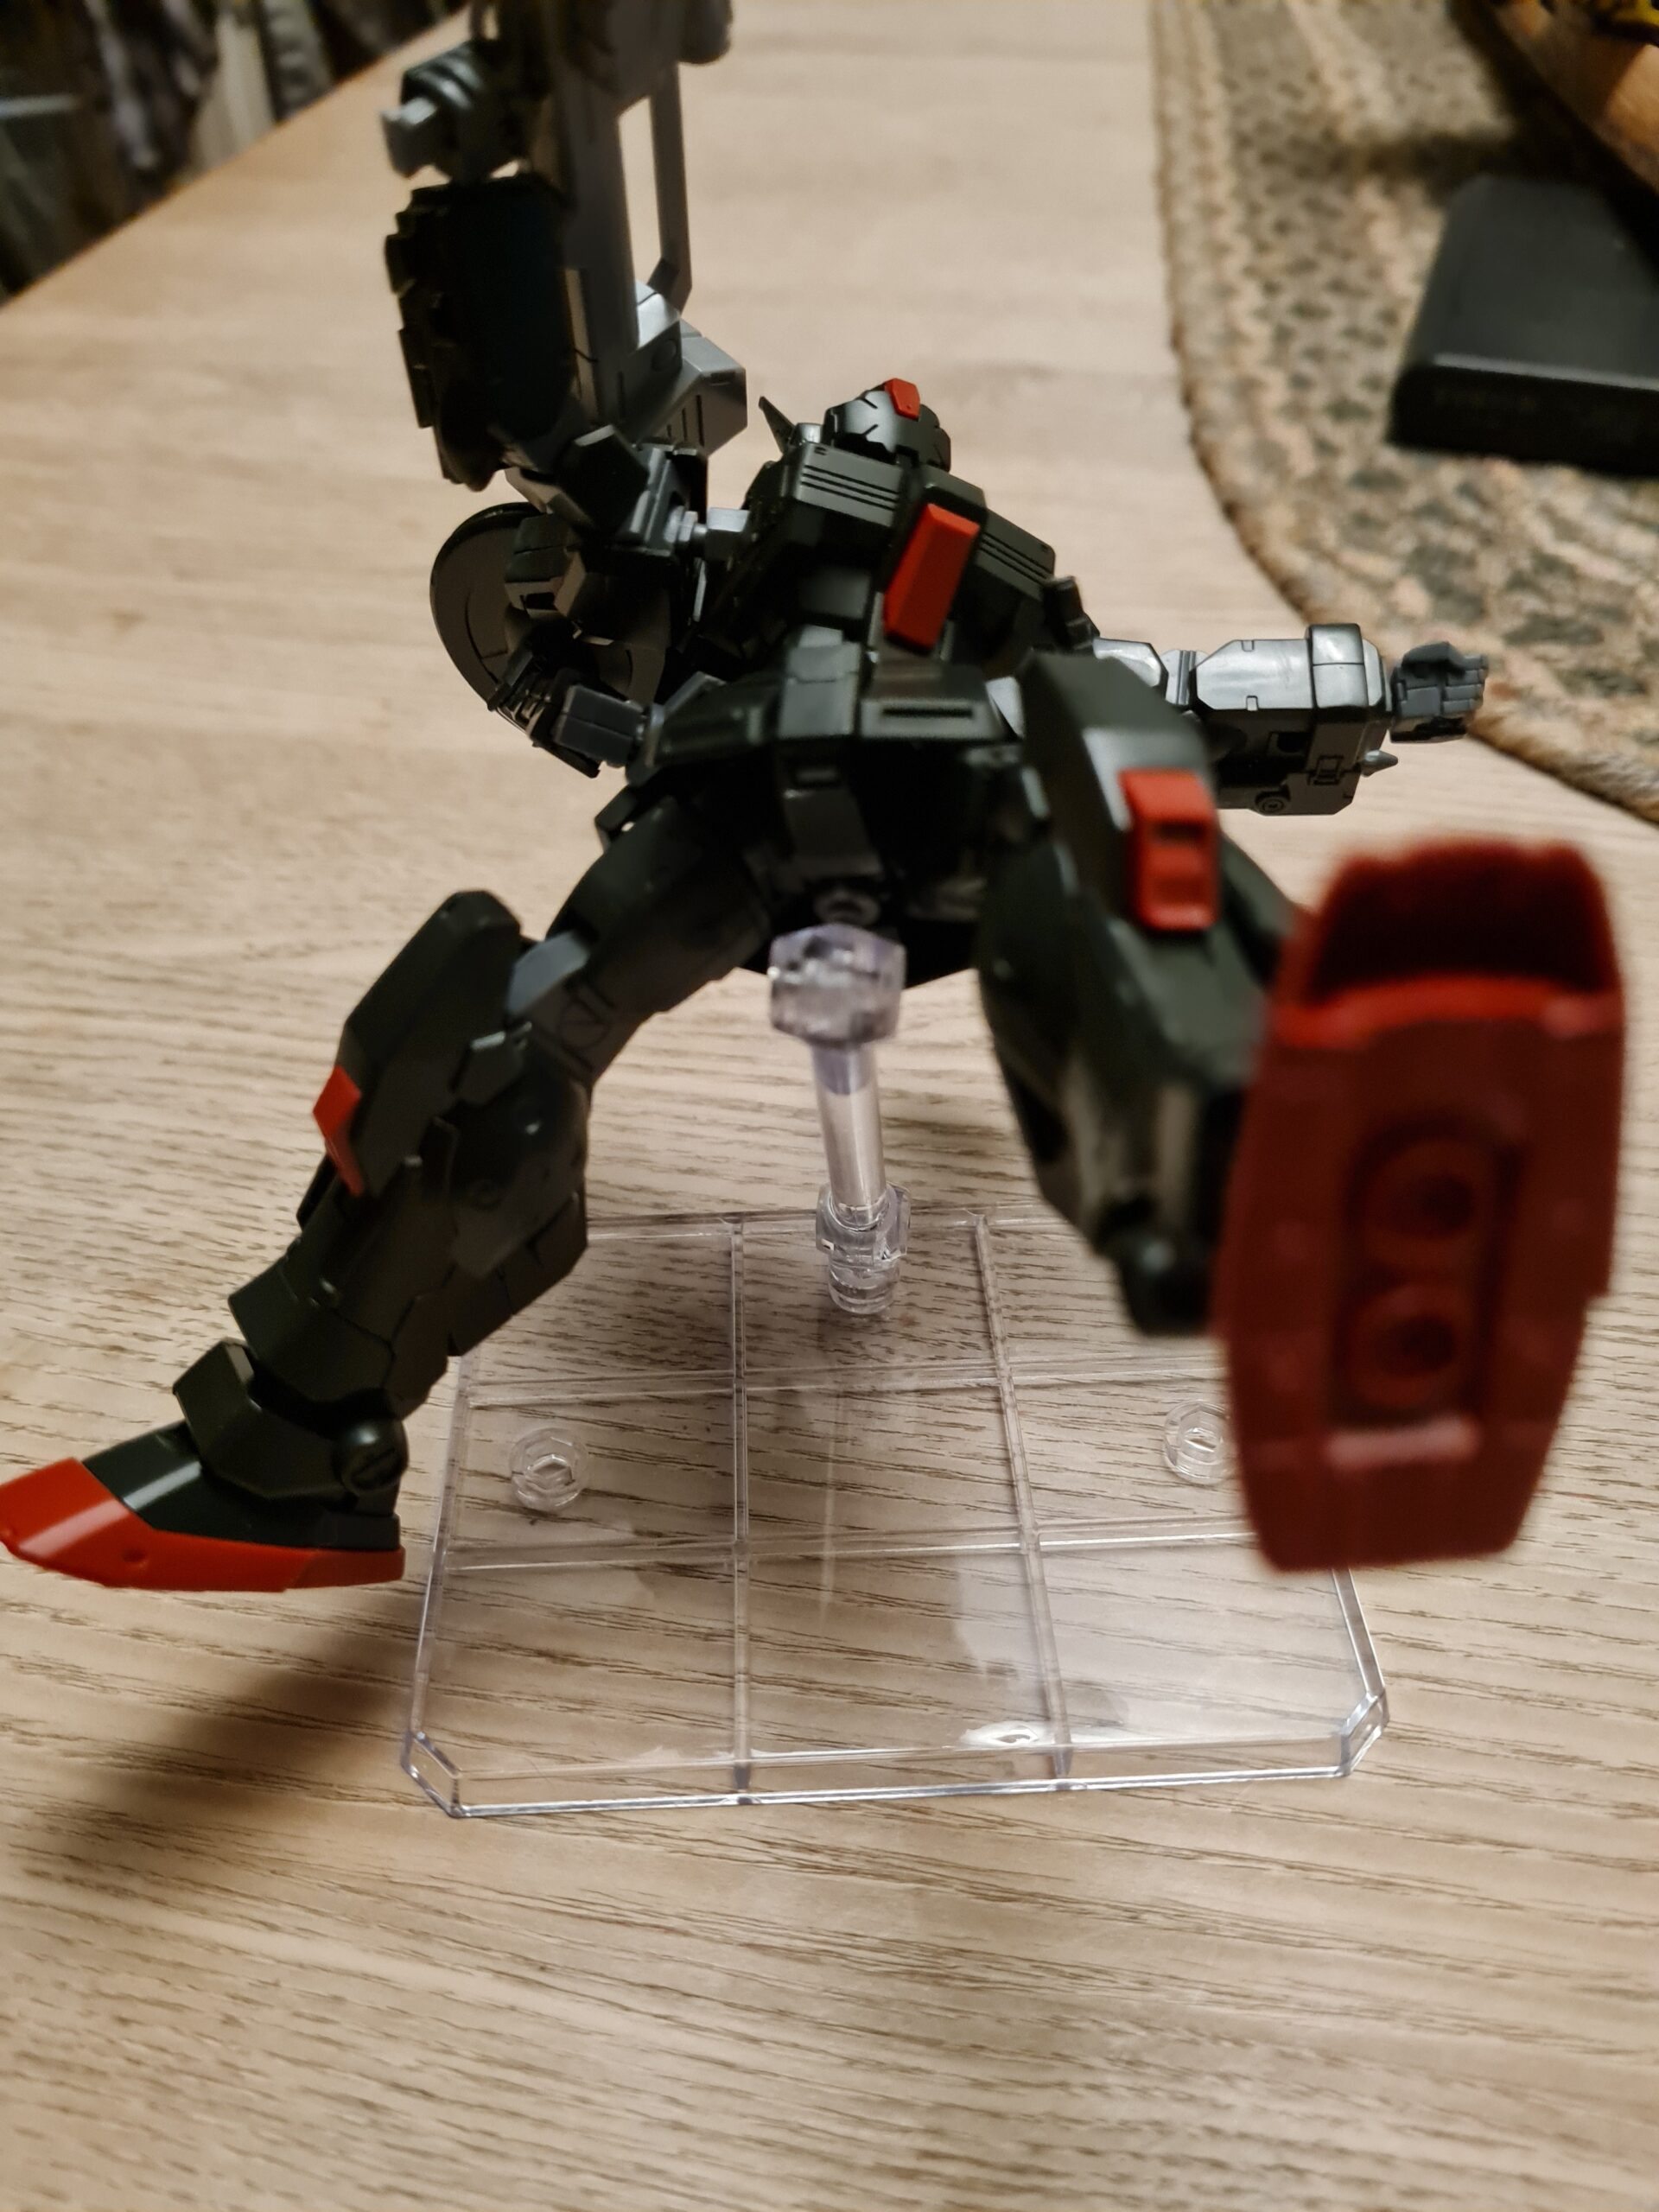
Articulation
Arched FootRight articulationLeft Articulation
As you can see in the images above the articulation is pretty good. I don’t think it is “the best” but it is certainly good enough for Heavyarms! Lets be honest, with all that weaponry the suit is likely to spend most of its time in some form of standing position. The left and right articulation on the ankle is adequate, and the arching on the foot is about the same, in my opinion.
Conclusion
There we have a mini tear down and rebuild of the foot on the MG Heavyarms. I found taking it apart and rebuilding it oddly therapeutic. However, as soon as I had it apart I had it back together again! As you may have noticed I haven’t panel lined this model. I may do that at some point, but first I need to put on a matt coat!
Thank you for taking the time to read this. If you haven’t already done so please like and follow us on our social media platforms and checkout our website!
Recently I got asked about the cheap stands or bases, and whether they were a real viable alternative to the more standard bases. You can often, if you shop around, get 3 or 4 of the cheaper bases for the price of one of the standard ones.
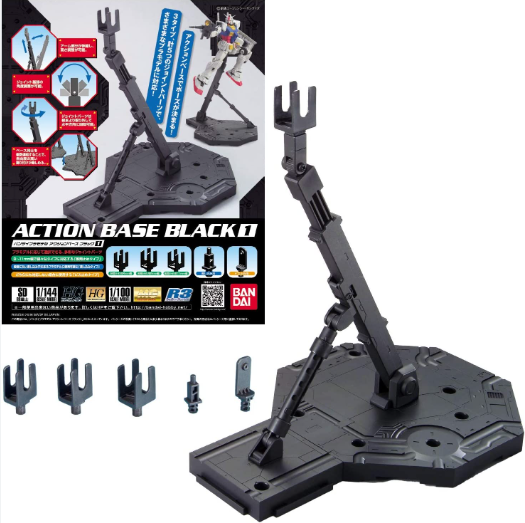
The standard ones look like this (or some variation on this):
Standard Action Base
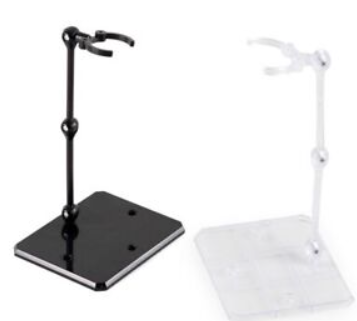
The cheaper options normally look something like this:
Unbranded Stand
Both sets of bases can be purchased in a variety of colours. I’ll admit I favour clear bases as I can always paint them if I want them a different colour.
The “Standard” base
There are loads of reasons to get one of these bases. They have a nice aesthetic to them, and if you want one, they aren’t crazy expensive. They have the attachments to allow you to connect them to a variety of models with no fuss. But this isn’t an article about those!
Unbranded Base
However, despite the reasons for getting a standard base, there are other options, and they can be just as effective. The generic unbranded stands normally comes flat packed, with multiple screws and parts to put together. As in the image above these are normally assembled with the grasping arms on the end. However these can sometimes cause problems where the models like to split. The torso and upper part goes one way and the waist and legs go another. This can be a real pain when trying to post a model. So what can we do with them.
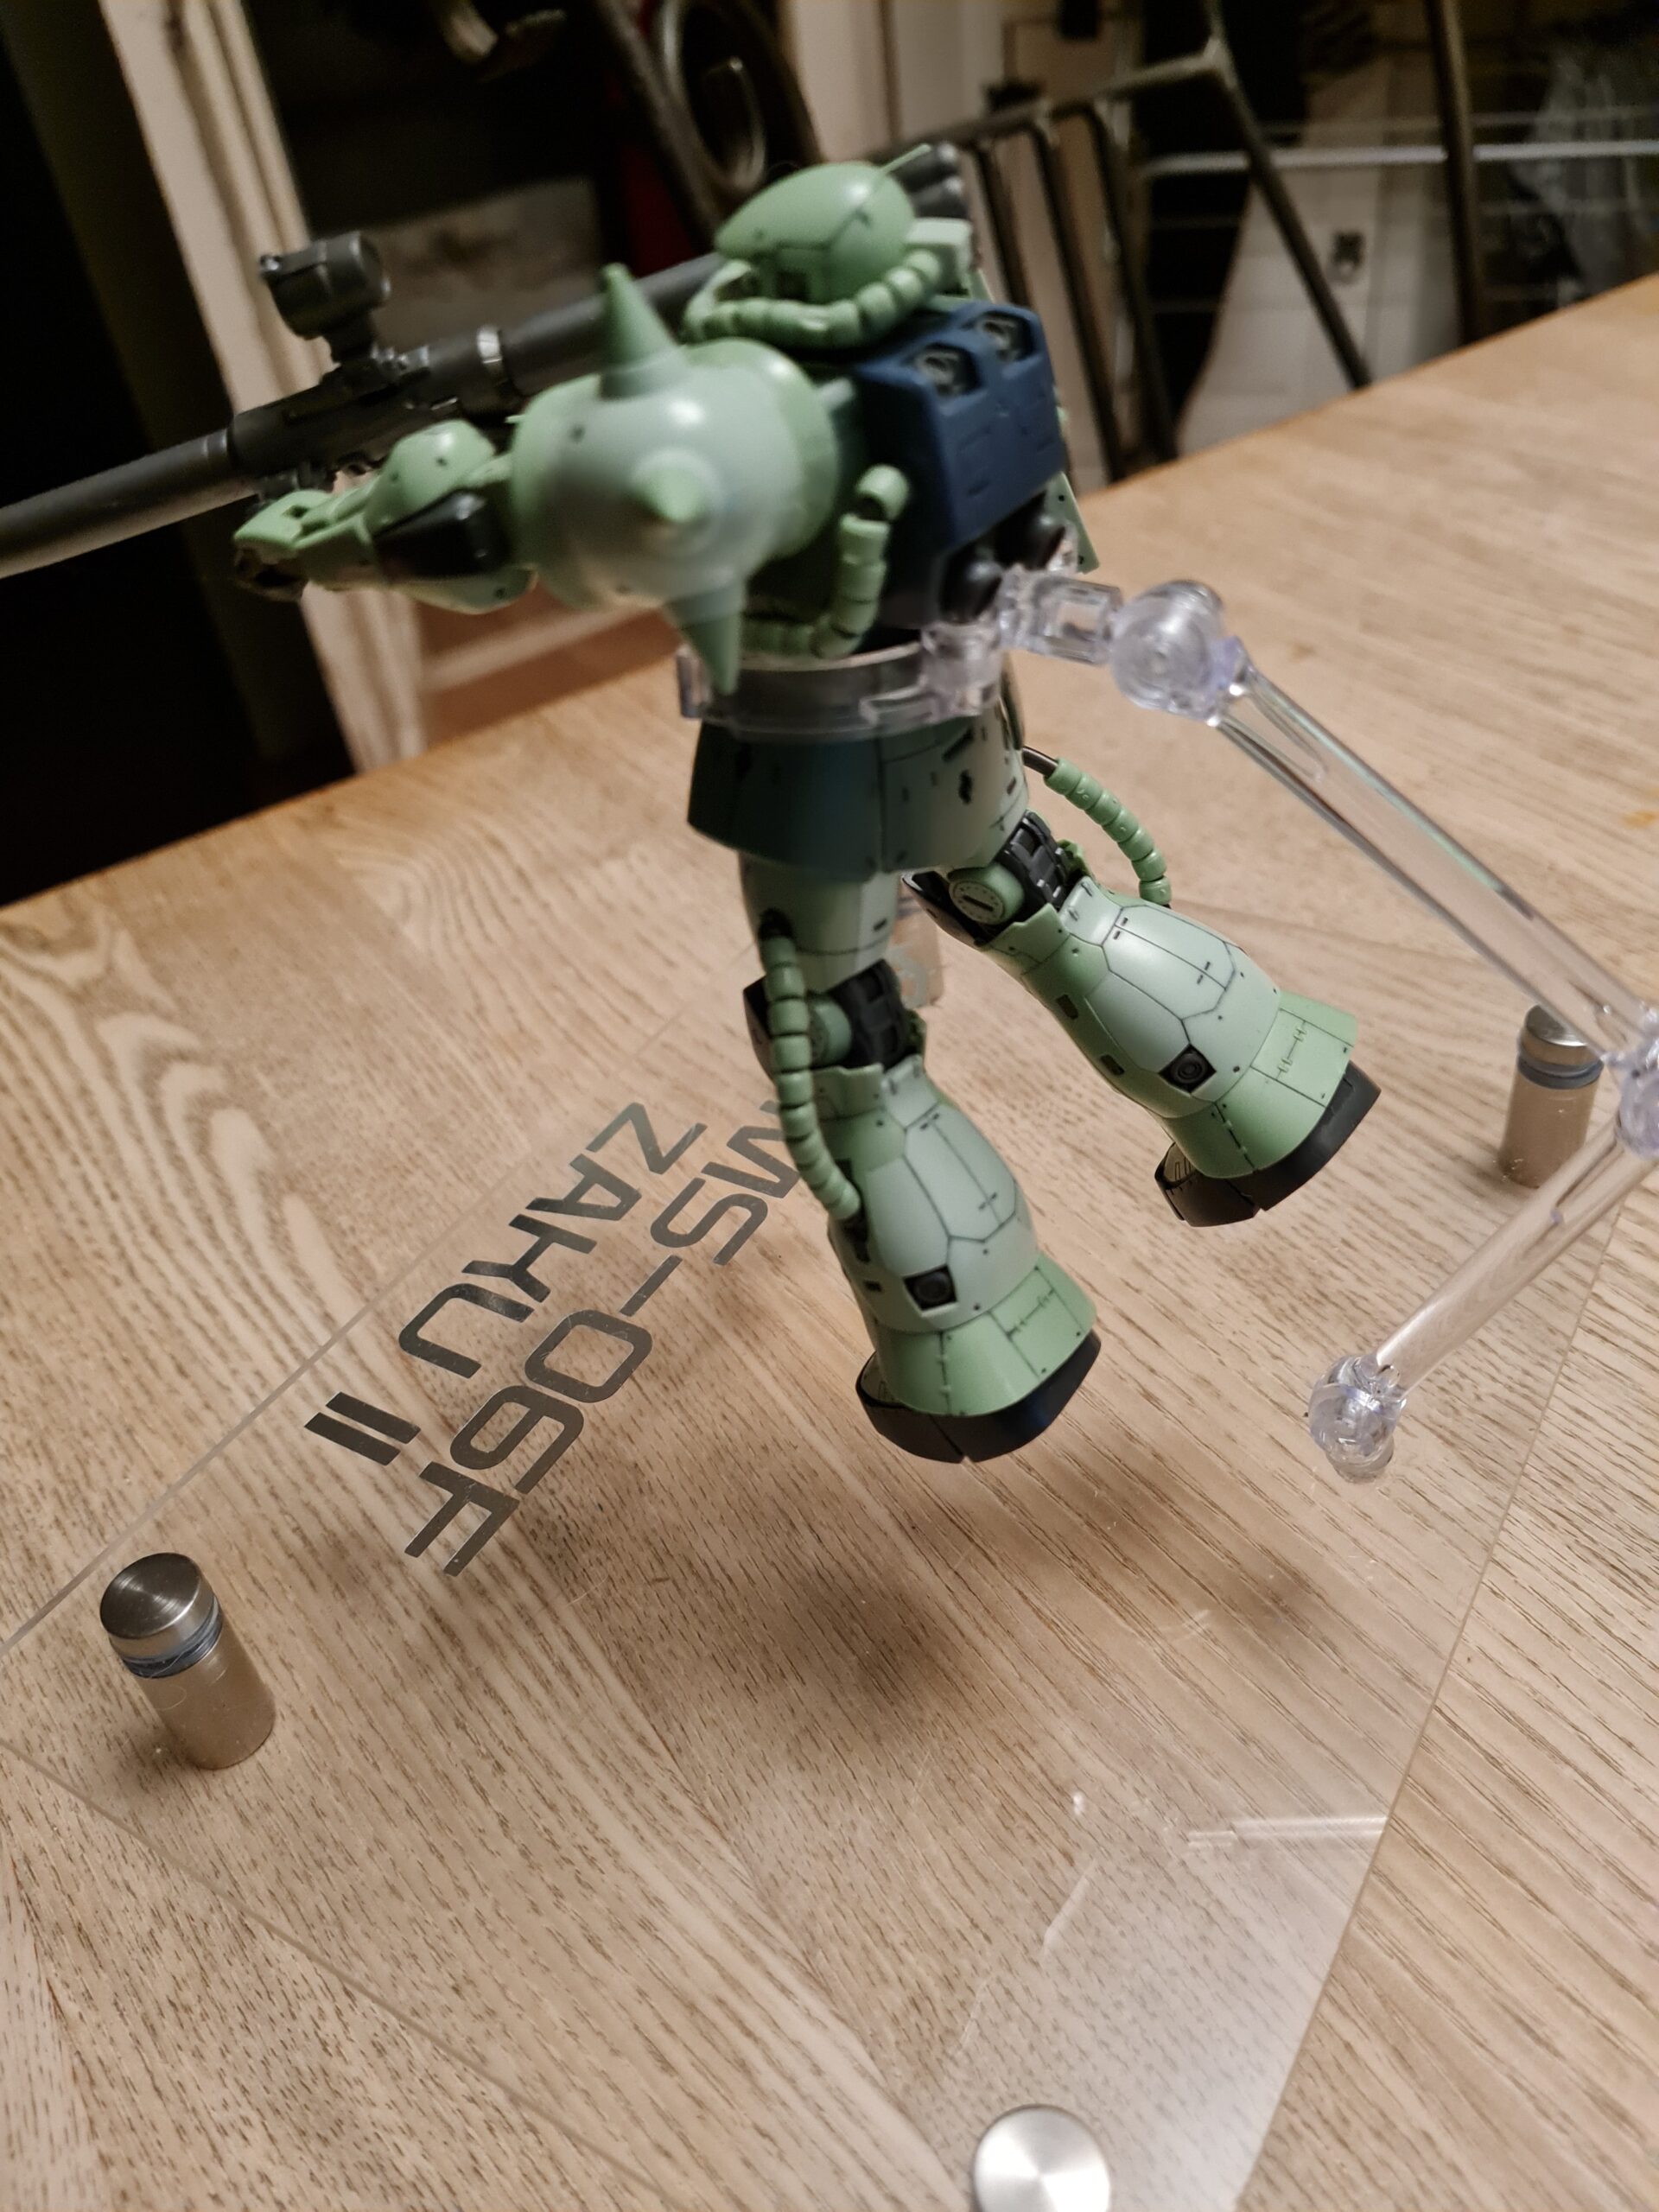
Total Custom Base
Zaku Rear StandCloseup Zaku Rear Stand
As you can see in the images above I used the arms and grabber from the cheap base to provide the hold for my Zaku. The whole process for making that base can be found here.
Use it as is
Closeup Rear BaseFront on standRear on Stand
As you can see from the images above the two pieces along with the grabbing arms allow me to elevate the model and provide a lot of options for poses. However, these still have the issue that the model will often have a tendency to come apart at the waist while tightening the arms of the stand to hold the model.
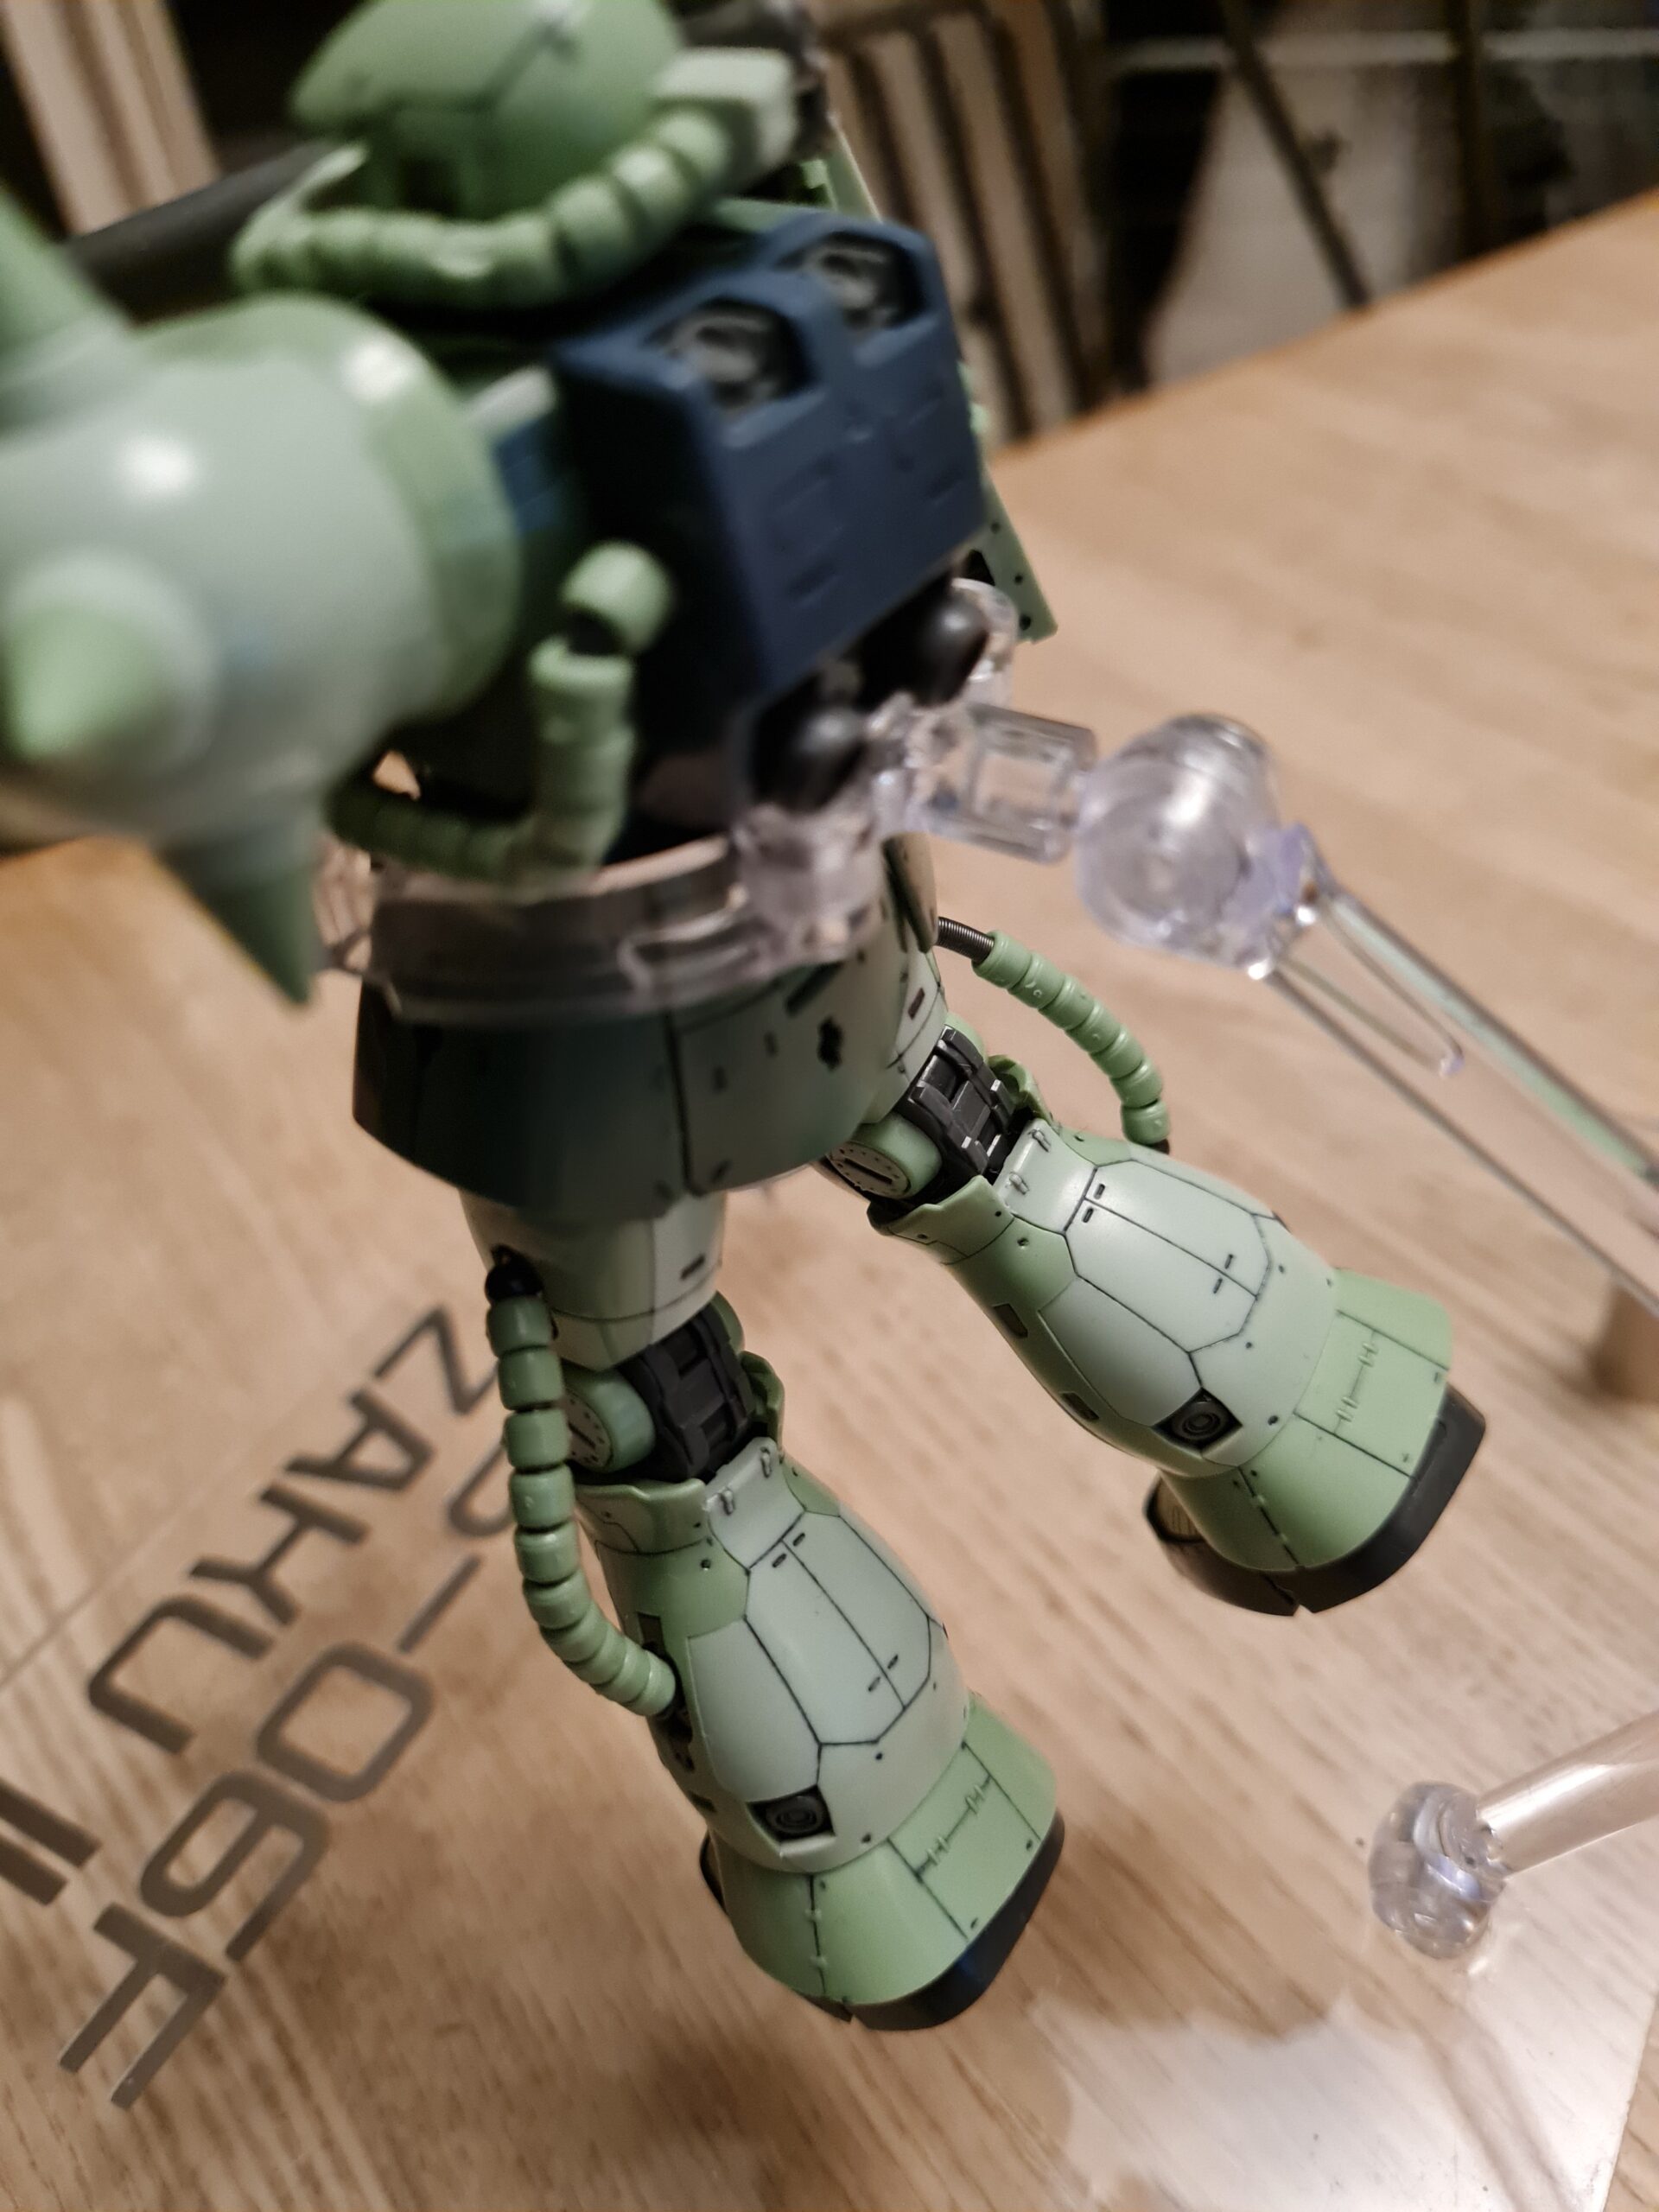
Remove the Hands / Grasper
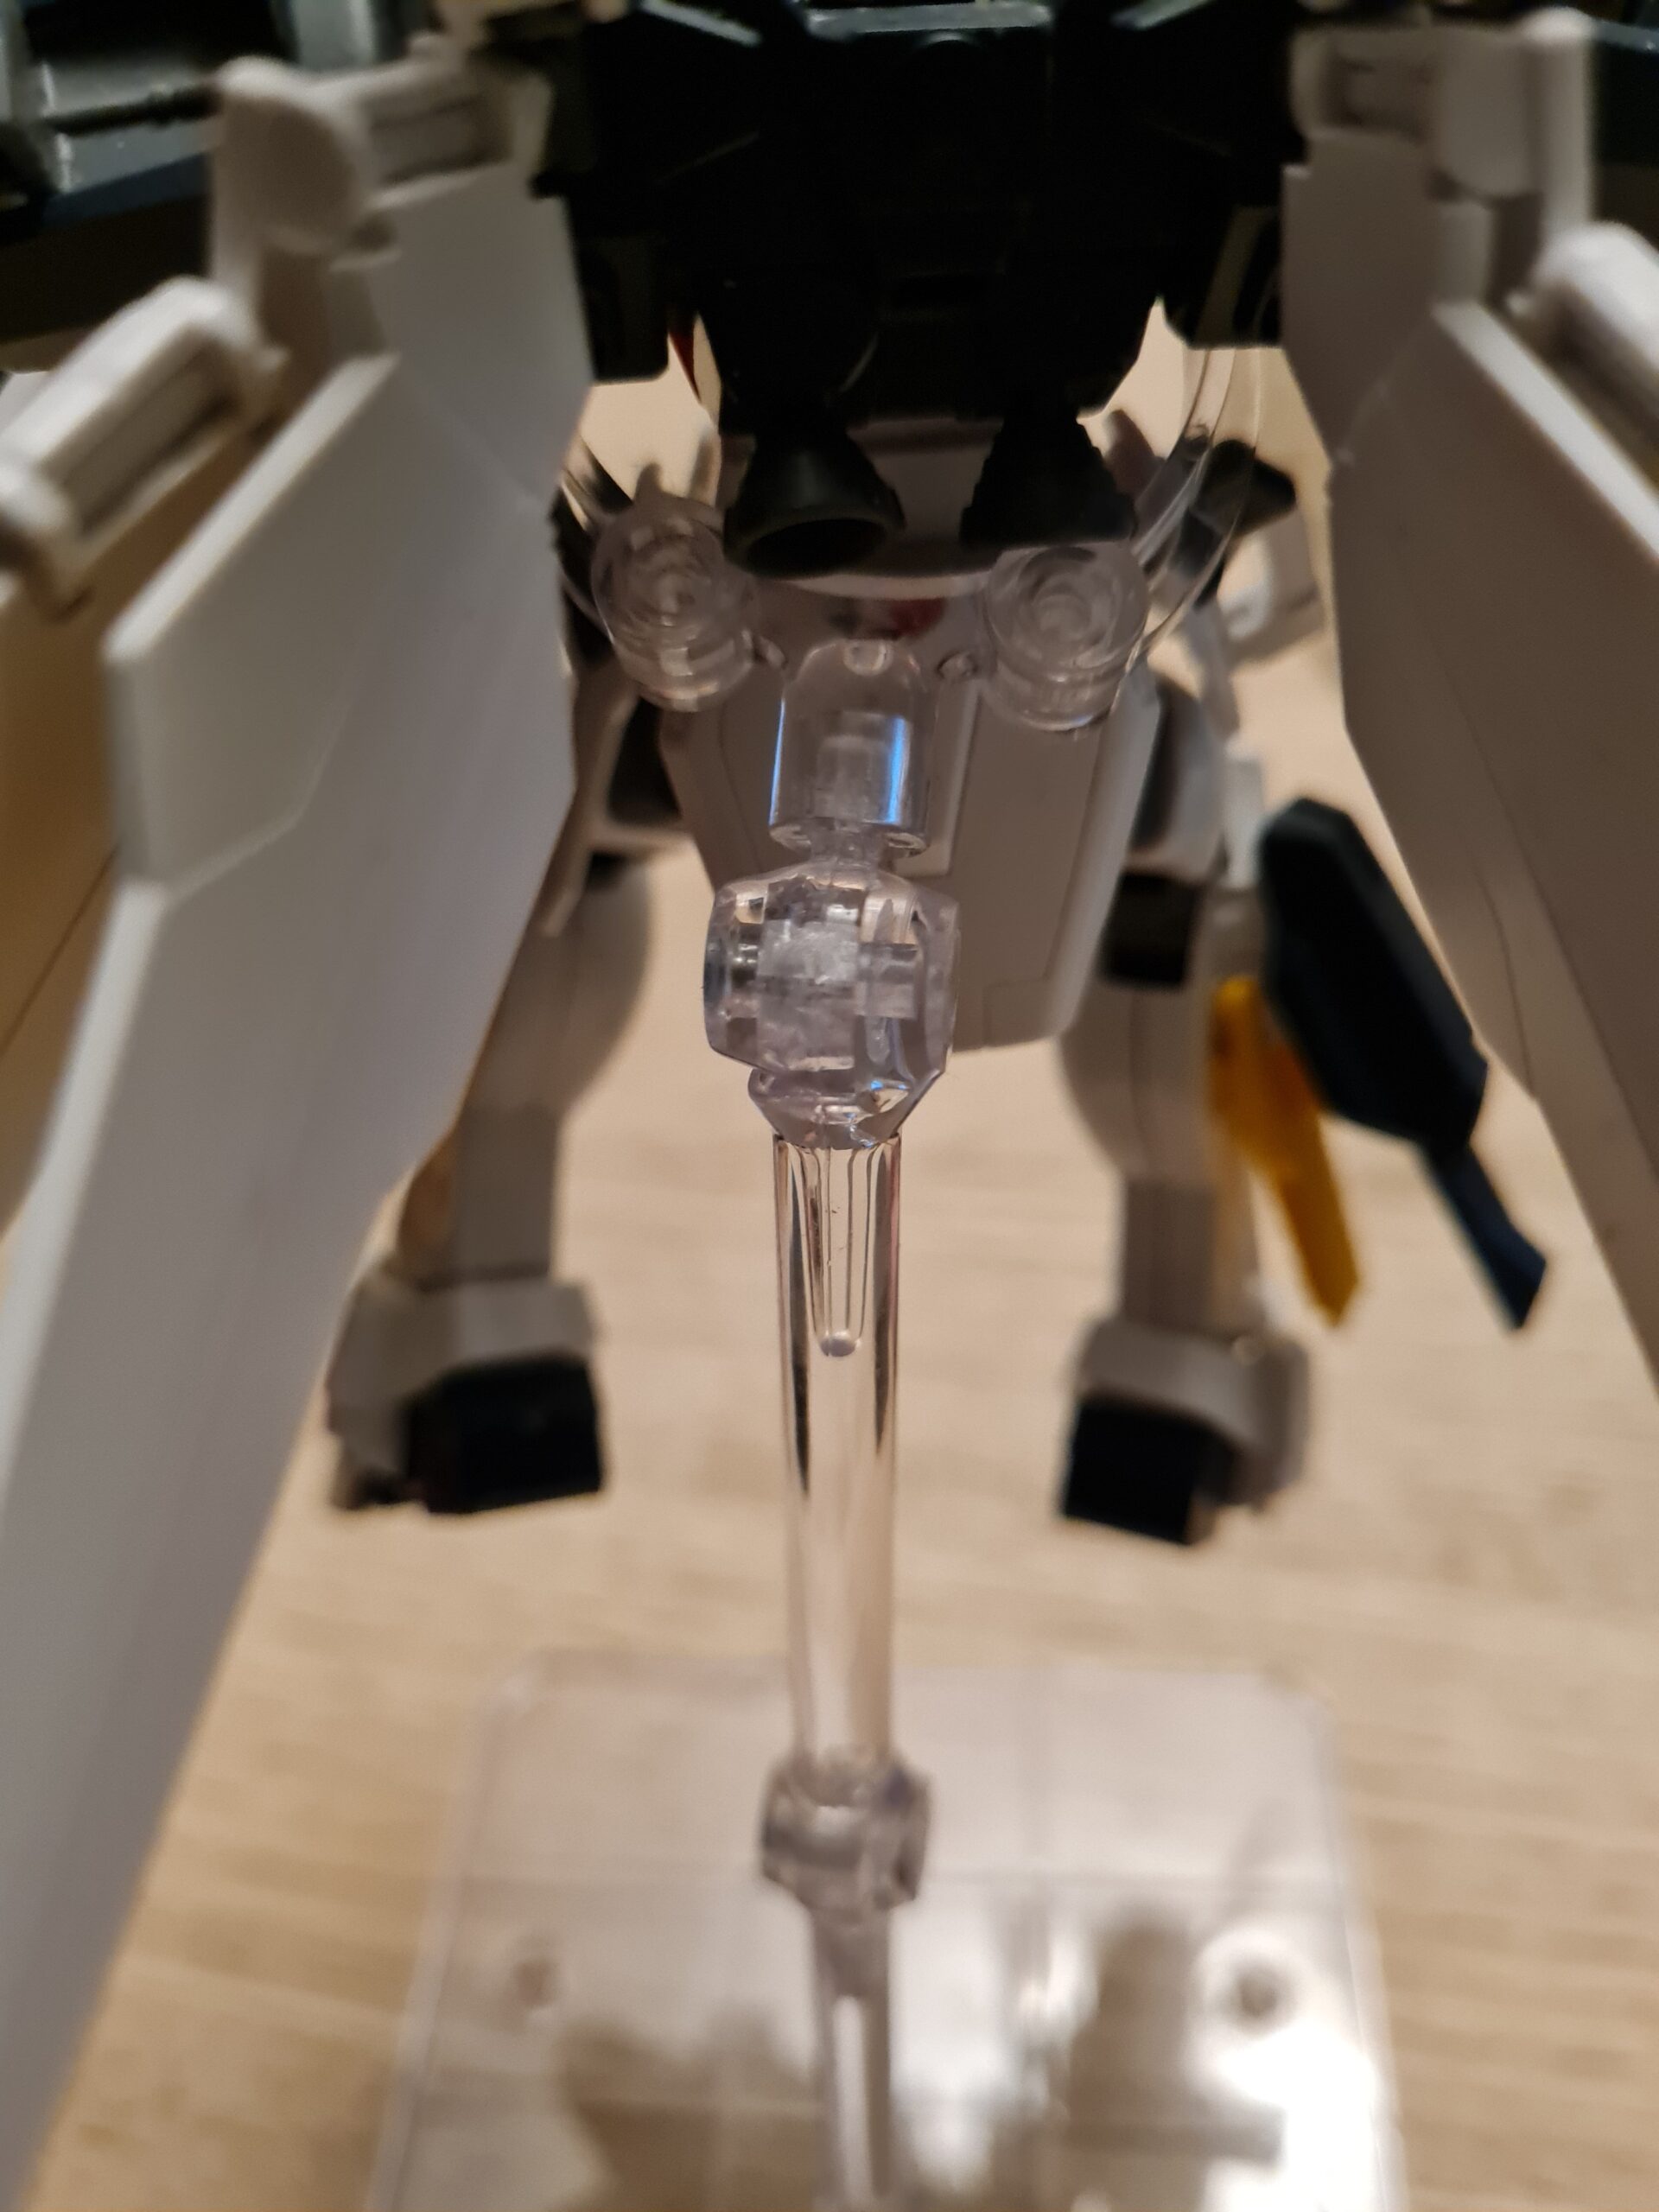
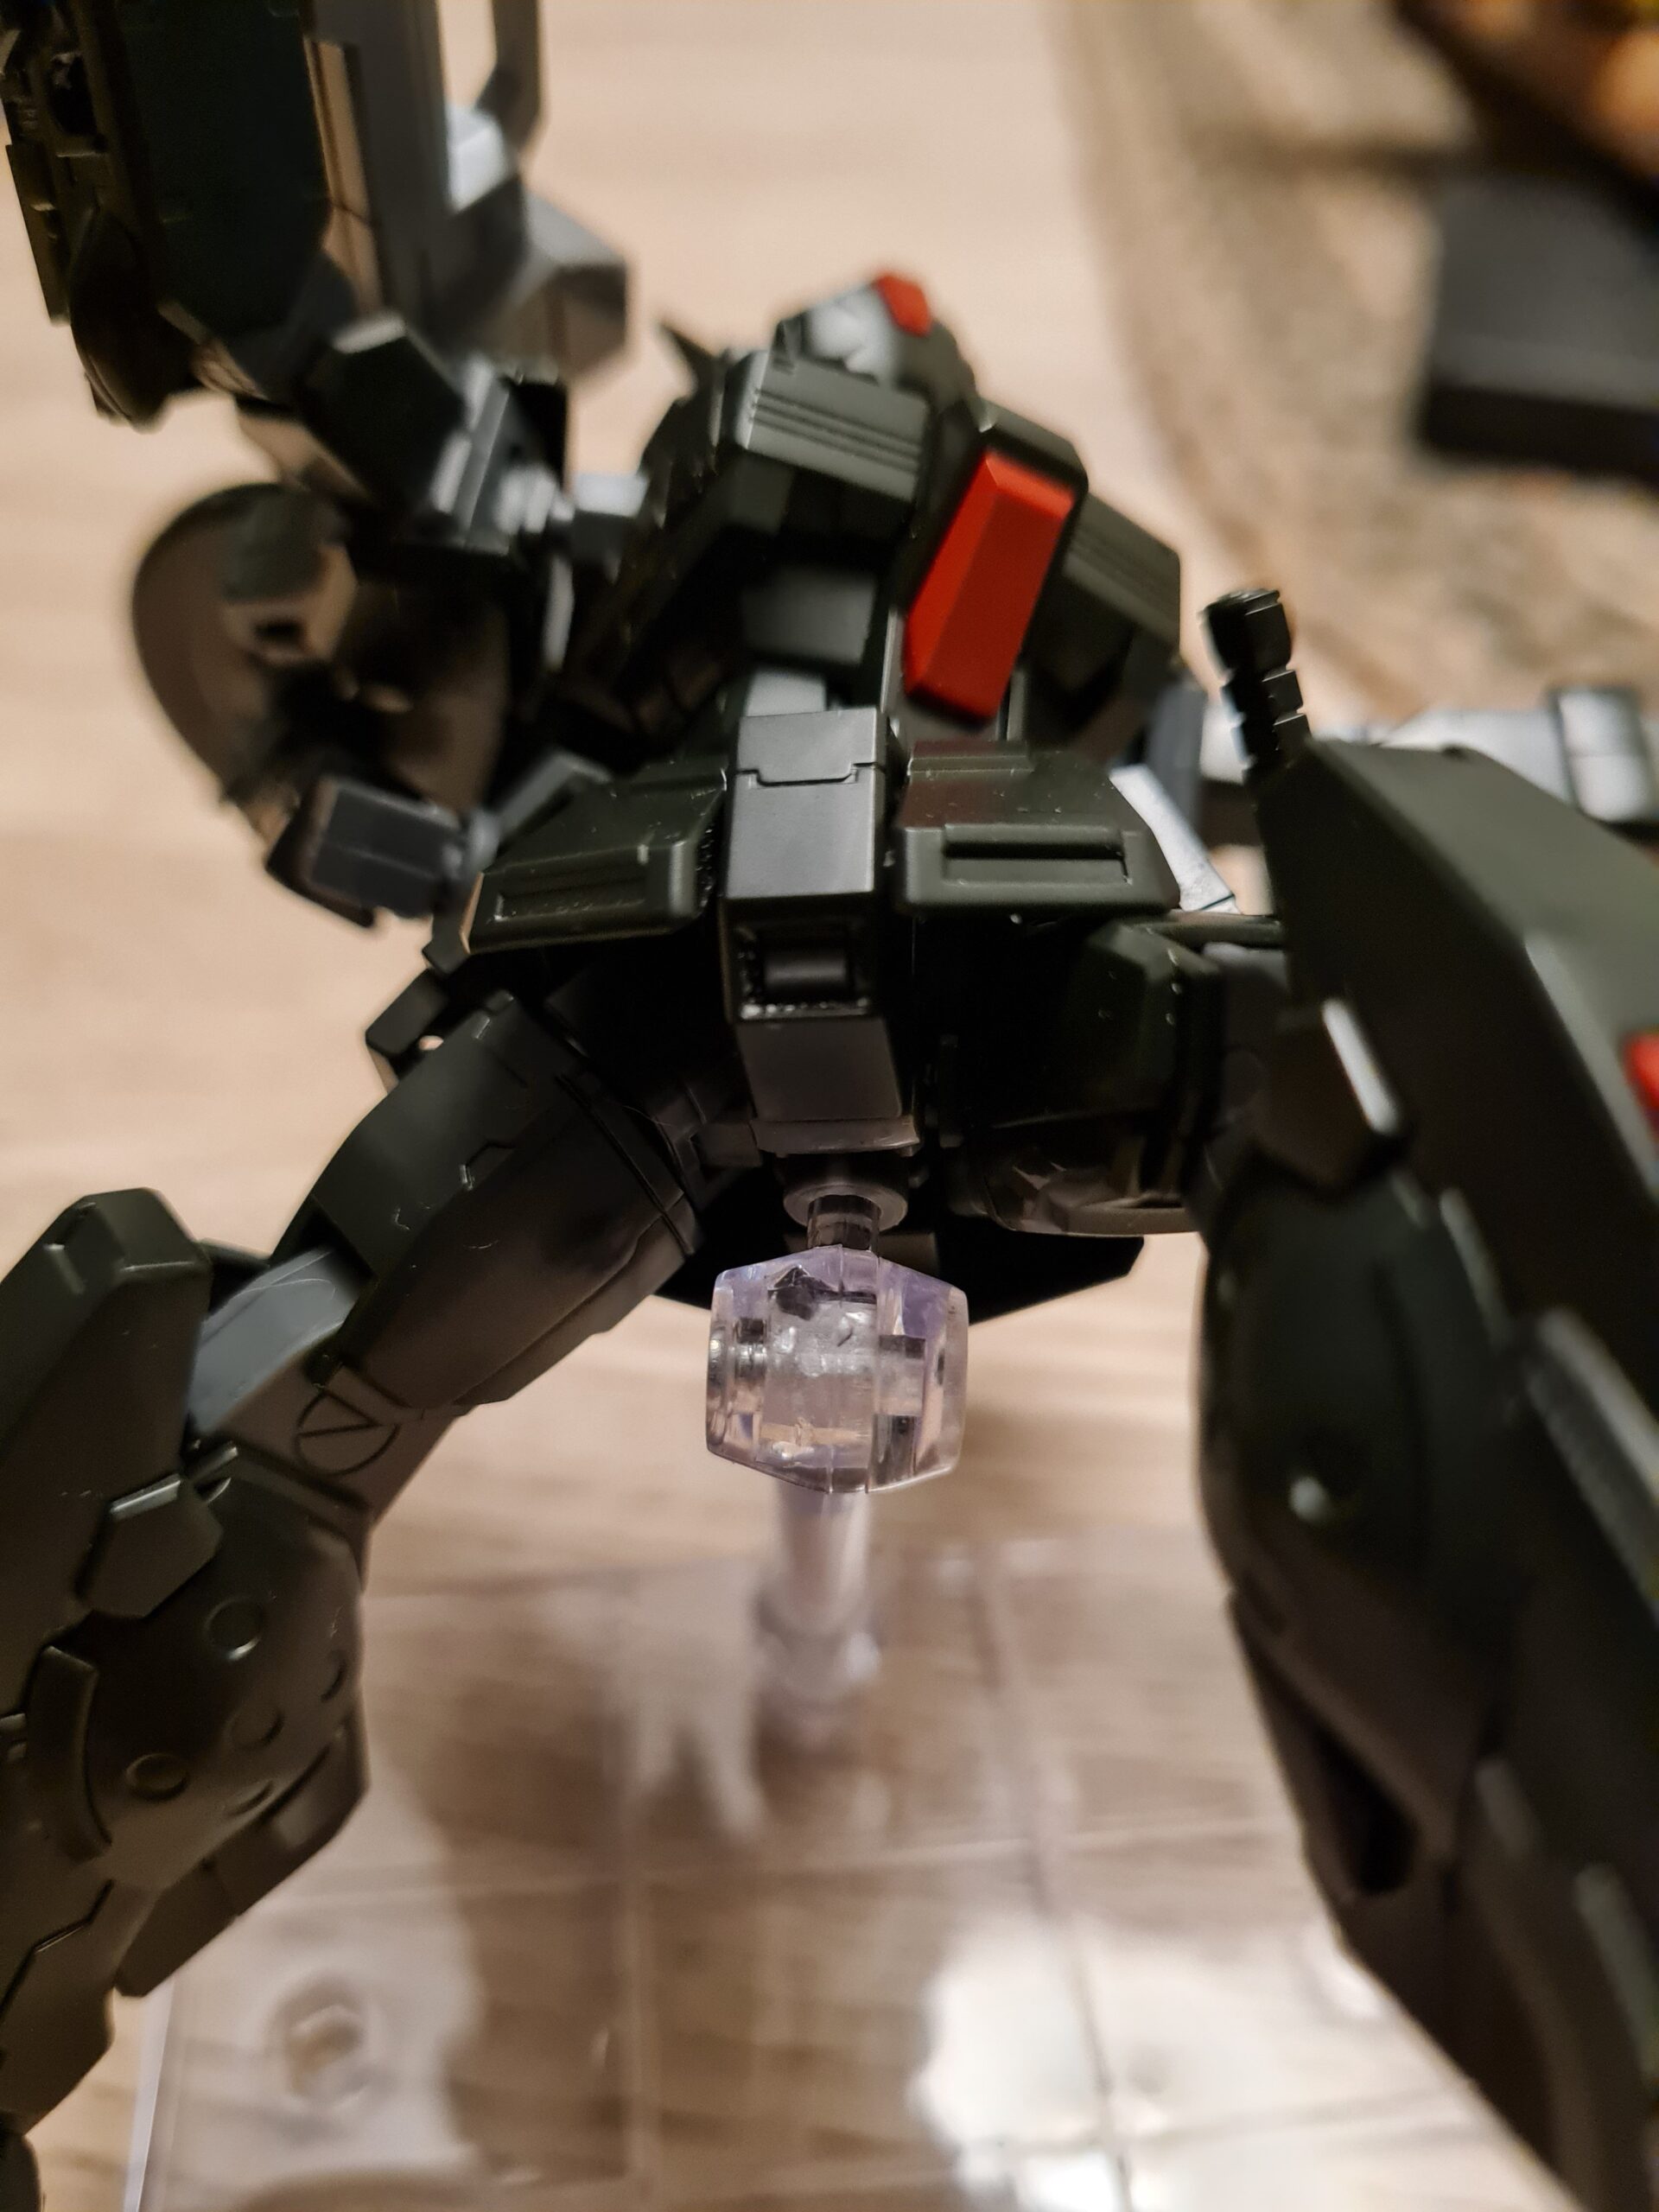
Front Blown AwayConnector CloseupSide View Blown AwayBlown Away
As you can see from the images above, I only used 1 of the two arms, and then rather than connecting the graspers, I used the adapter that goes into the grasper to go into the hold in the under side of the model. It was, I admit, a tight squeeze, but it did go in without any filing. This again offers a whole range of dynamic poses.
Conclusion
If you like the standard bases, or one of the more scenic bases then go for it, they are lovely. If however, you want to make the most of the cheaper bases then as you can see above, there are a lot of poses you can get with them where they will look awesome. I’m going to have a look and see if I can do more around the options to use them with other models. I may put up a post on that after I have had chance to look.
Thank you for taking the time to read this. If you haven’t already done so please like and follow us on our social media platforms and checkout our website!
We use cookies on our website to give you the most relevant experience by remembering your preferences and repeat visits. By clicking “Accept All”, you consent to the use of ALL the cookies. However, you may visit "Cookie Settings" to provide a controlled consent.
This website uses cookies to improve your experience while you navigate through the website. Out of these, the cookies that are categorized as necessary are stored on your browser as they are essential for the working of basic functionalities of the website. We also use third-party cookies that help us analyze and understand how you use this website. These cookies will be stored in your browser only with your consent. You also have the option to opt-out of these cookies. But opting out of some of these cookies may affect your browsing experience.
Necessary cookies are absolutely essential for the website to function properly. These cookies ensure basic functionalities and security features of the website, anonymously.
Cookie
Duration
Description
cookielawinfo-checkbox-analytics
11 months
This cookie is set by GDPR Cookie Consent plugin. The cookie is used to store the user consent for the cookies in the category "Analytics".
cookielawinfo-checkbox-functional
11 months
The cookie is set by GDPR cookie consent to record the user consent for the cookies in the category "Functional".
cookielawinfo-checkbox-necessary
11 months
This cookie is set by GDPR Cookie Consent plugin. The cookies is used to store the user consent for the cookies in the category "Necessary".
cookielawinfo-checkbox-others
11 months
This cookie is set by GDPR Cookie Consent plugin. The cookie is used to store the user consent for the cookies in the category "Other.
cookielawinfo-checkbox-performance
11 months
This cookie is set by GDPR Cookie Consent plugin. The cookie is used to store the user consent for the cookies in the category "Performance".
viewed_cookie_policy
11 months
The cookie is set by the GDPR Cookie Consent plugin and is used to store whether or not user has consented to the use of cookies. It does not store any personal data.
Functional cookies help to perform certain functionalities like sharing the content of the website on social media platforms, collect feedbacks, and other third-party features.
Performance cookies are used to understand and analyze the key performance indexes of the website which helps in delivering a better user experience for the visitors.
Analytical cookies are used to understand how visitors interact with the website. These cookies help provide information on metrics the number of visitors, bounce rate, traffic source, etc.
Advertisement cookies are used to provide visitors with relevant ads and marketing campaigns. These cookies track visitors across websites and collect information to provide customized ads.